EQUATORIAL MOUNT
Polar Alignment Quick Reference Guide
(Northern Hemisphere)
Bart Falzarano
DISCLAIMER
• The steps documented in this reference guide are the steps that I’ve been following for a few years now. I have had good
guiding results (between 0.50 - 0.70 arc seconds per pixel) with PHD2 telescope guiding software after performing these steps.
However, your guide results may vary.
• The mount shown in this guide is a Sky-Watcher EQ6-R Pro telescope mount.The mount has a built-in polar scope.The steps
should be similar for other equatorial mounts that have a built-in polar scope.
• Telescope balance (Right ascension balance and declination balance) is critical to good guiding.The telescope should be
balanced after all cameras and cables are connected.The front cover cap on the telescope should also be removed before
balancing the telescope.This quick reference guide does not cover how to balance the telescope on an equatorial mount.
• Appreciate your comments! If you have feedback or improvement suggestions, please leave a comment.
Bart Falzarano
HELPFUL SMARTPHONE APPS AND
TOOLS
• Google Sky map
• SyncScan Pro
• SmallTorpedo
Level
Bart Falzarano
LEVEL, POSITION, & ELEVATION
• Ensure your EQ mount is level and pointing north.Tip:
use Google Sky Map smartphone app or a compass to
help position your EQ mount so that it is pointing north.
• Set and adjust elevation to your latitude using the
Altitude (elevation) adjustment bolts
Bart Falzarano
ALIGNING POLARIS
1. Align Polaris in center of the polar scope using the alt and
az bolts
2. Use the alt bolts to lift Polaris until it is on the inner rings
3. Rotate the RA of mount (if needed) so the 12 o’clock or
0 position point coincides with where Polaris is
4. Using the app make adjustments to the alt and az bolts to
move Polaris to the correct position as shown in the
SyncScan Pro app polar clock utility (Utility/Advanced/
Polar Scope)
Note: I’ve started to skip steps 1 - 3 above, meaning when I see Polaris, I
simply perform step 4 and use the alt and az bolts to move Polaris to the
the correct position as shown in the polar clock utility. I haven’t noticed any
alignment or guiding issues when skipping steps 1- 3 above.Appreciate
your comments and thoughts on this.
Step 1
Step 2
Alt bolts
(elevation)
Az bolts
one bolt on
each side.
(Azimuth)
Step 3
rotate RA of mount
Step 4
Optional. Skip steps 1 - 3.
Perform step 4. See note
Bart Falzarano
In this example, this is where
Polaris should be positioned.
SET RA HOME POSITION
1. Unlock the RA clutch and use the torpedo level
to level the scope with counterweight to your left
and telescope to your right.
2. After level lock the RA clutch.
3. Unlock the RA dial with the two small thumb
screws and rotate the dial to line up the 6 with
the arrow on the mount..Tighten the two small
thumb screws to lock the RA dial.
4. Unlock the RA clutch and rotate the right
ascension until you are at the 0 position on the
dial. Lock the RA clutch.
Bart Falzarano
RA Clutch
Dec Clutch
Dec Dial
RA Dial
SET DEC HOME POSITION
1. Unlock declination clutch and use the torpedo level
to level the scope.
2. Lock the declination clutch when level.
3. Unlock the declination dial with the two small
thumb screws and rotate the dial to 0 to align with
the arrow on the mount. Tighten the the two small
thumb screws to lock the declination dial.
4. Open declination clutch
5. Rotate declination to 90 degrees.Your telescope
should now be pointing up and approximately
towards Polaris.
Bart Falzarano
RA Clutch
Dec Clutch
Dec Dial
RA Dial
Dec Dial
POLAR ALIGNMENT AND HOME
POSITION COMPLETE
1. Congrats!You mount is now polar aligned and
in the home position.Your telescope should
now be pointing up and approximately
towards Polaris.
2. If using the hand controller: turn on the mount
and follow the hand controller setup.
3. If using EQMOD or SynScan App: turn on the
mount and connect the mount to your
astronomy software such as, NINA or
Sequence Generator Pro. Start guiding
calibration with PHD2 or other telescope
guiding software.
Bart Falzarano
Robotic focuser for your
Celestron 130SLT. Includes
ASCOM and INDI drivers
HELPFUL REFERENCES
• Martin’s Astrophotography Polar AlignmentTutorial
• Martin’s Astrophotography Sky-Watcher EQ6-R Pro
SetupTutorial
• Sky-Watcher EQ6-R Pro User Manual
Bart Falzarano
If you want to learn more, I
highly recommend watching
Martin’s detailed tutorials and
other videos

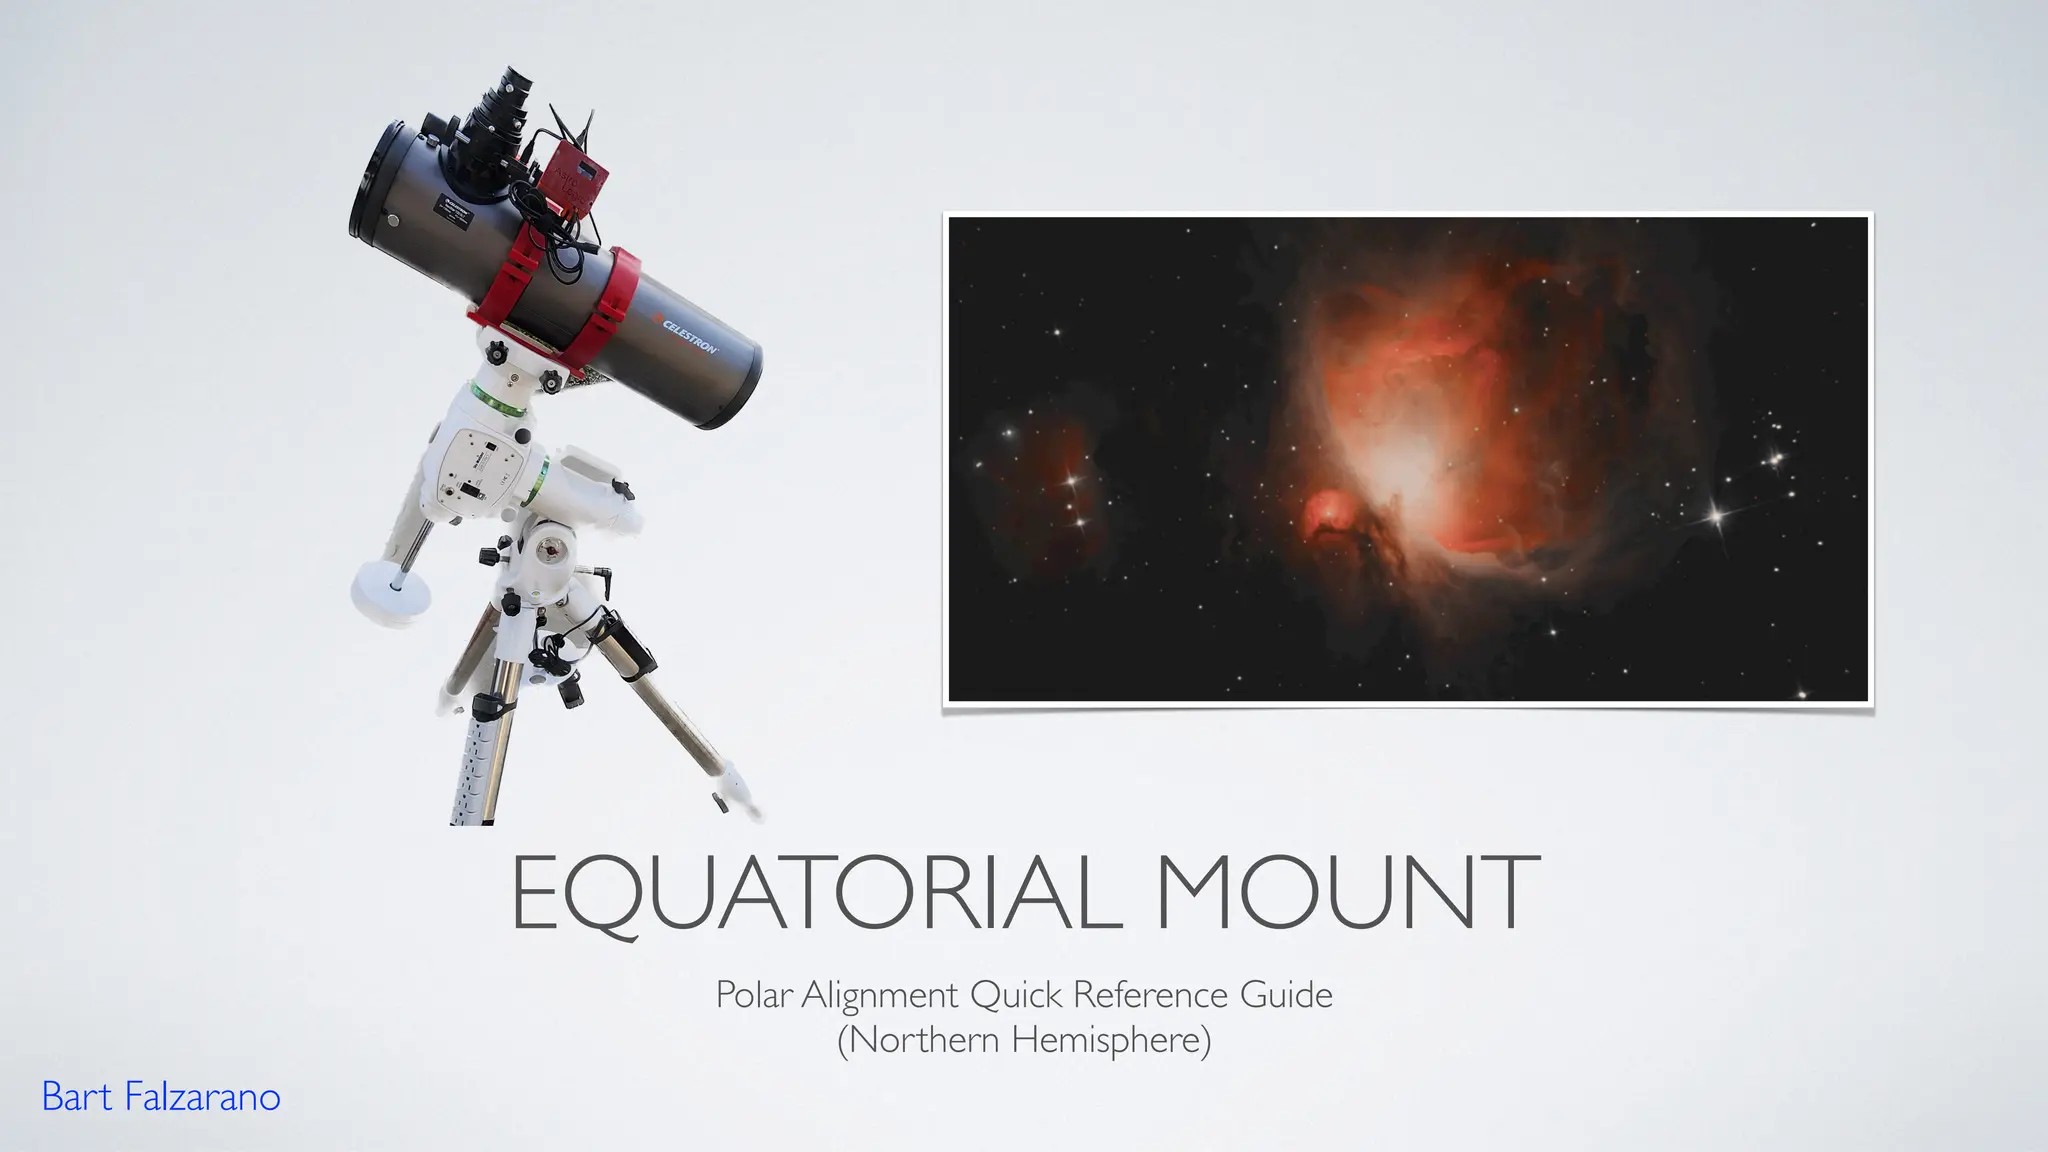
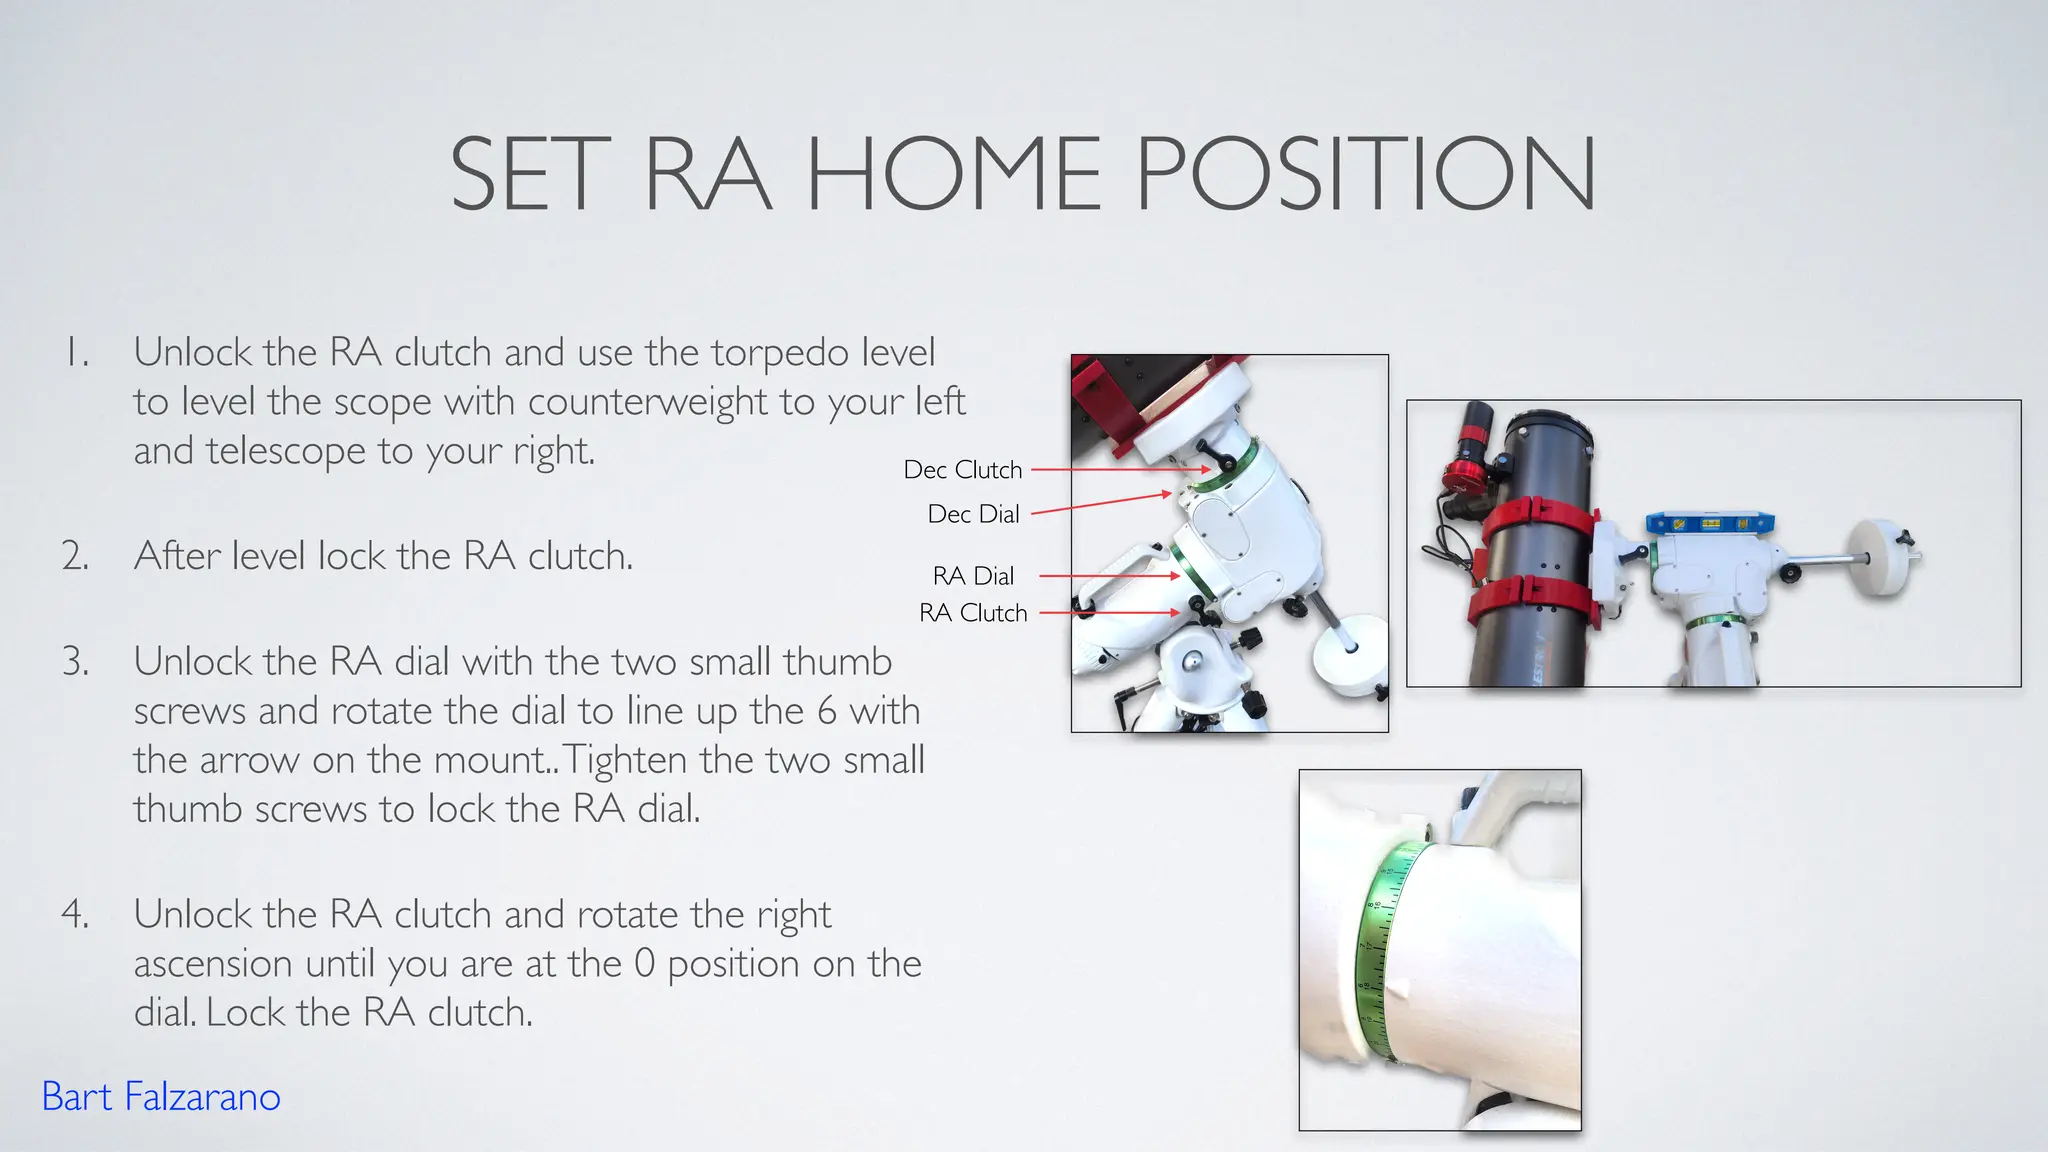
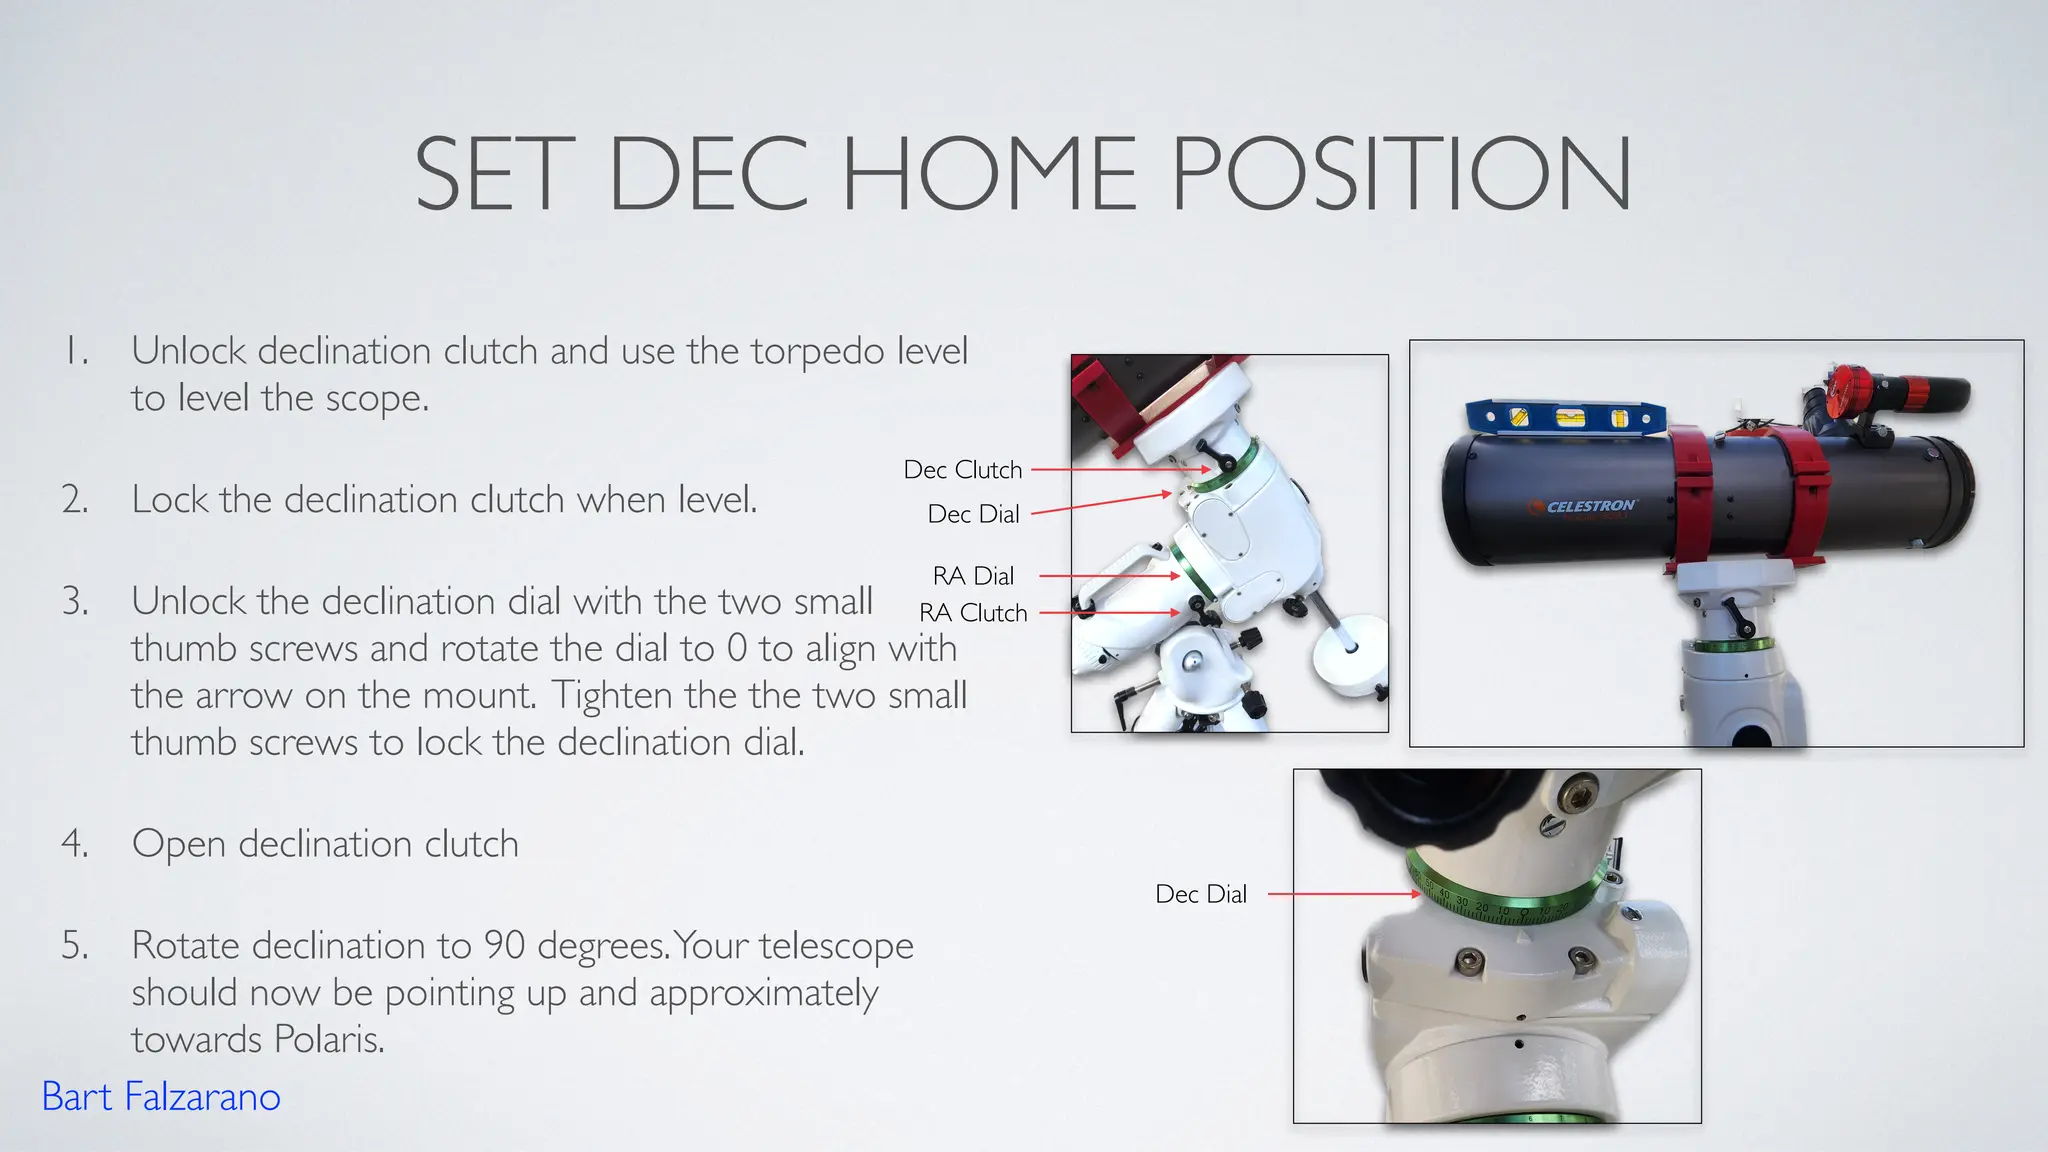
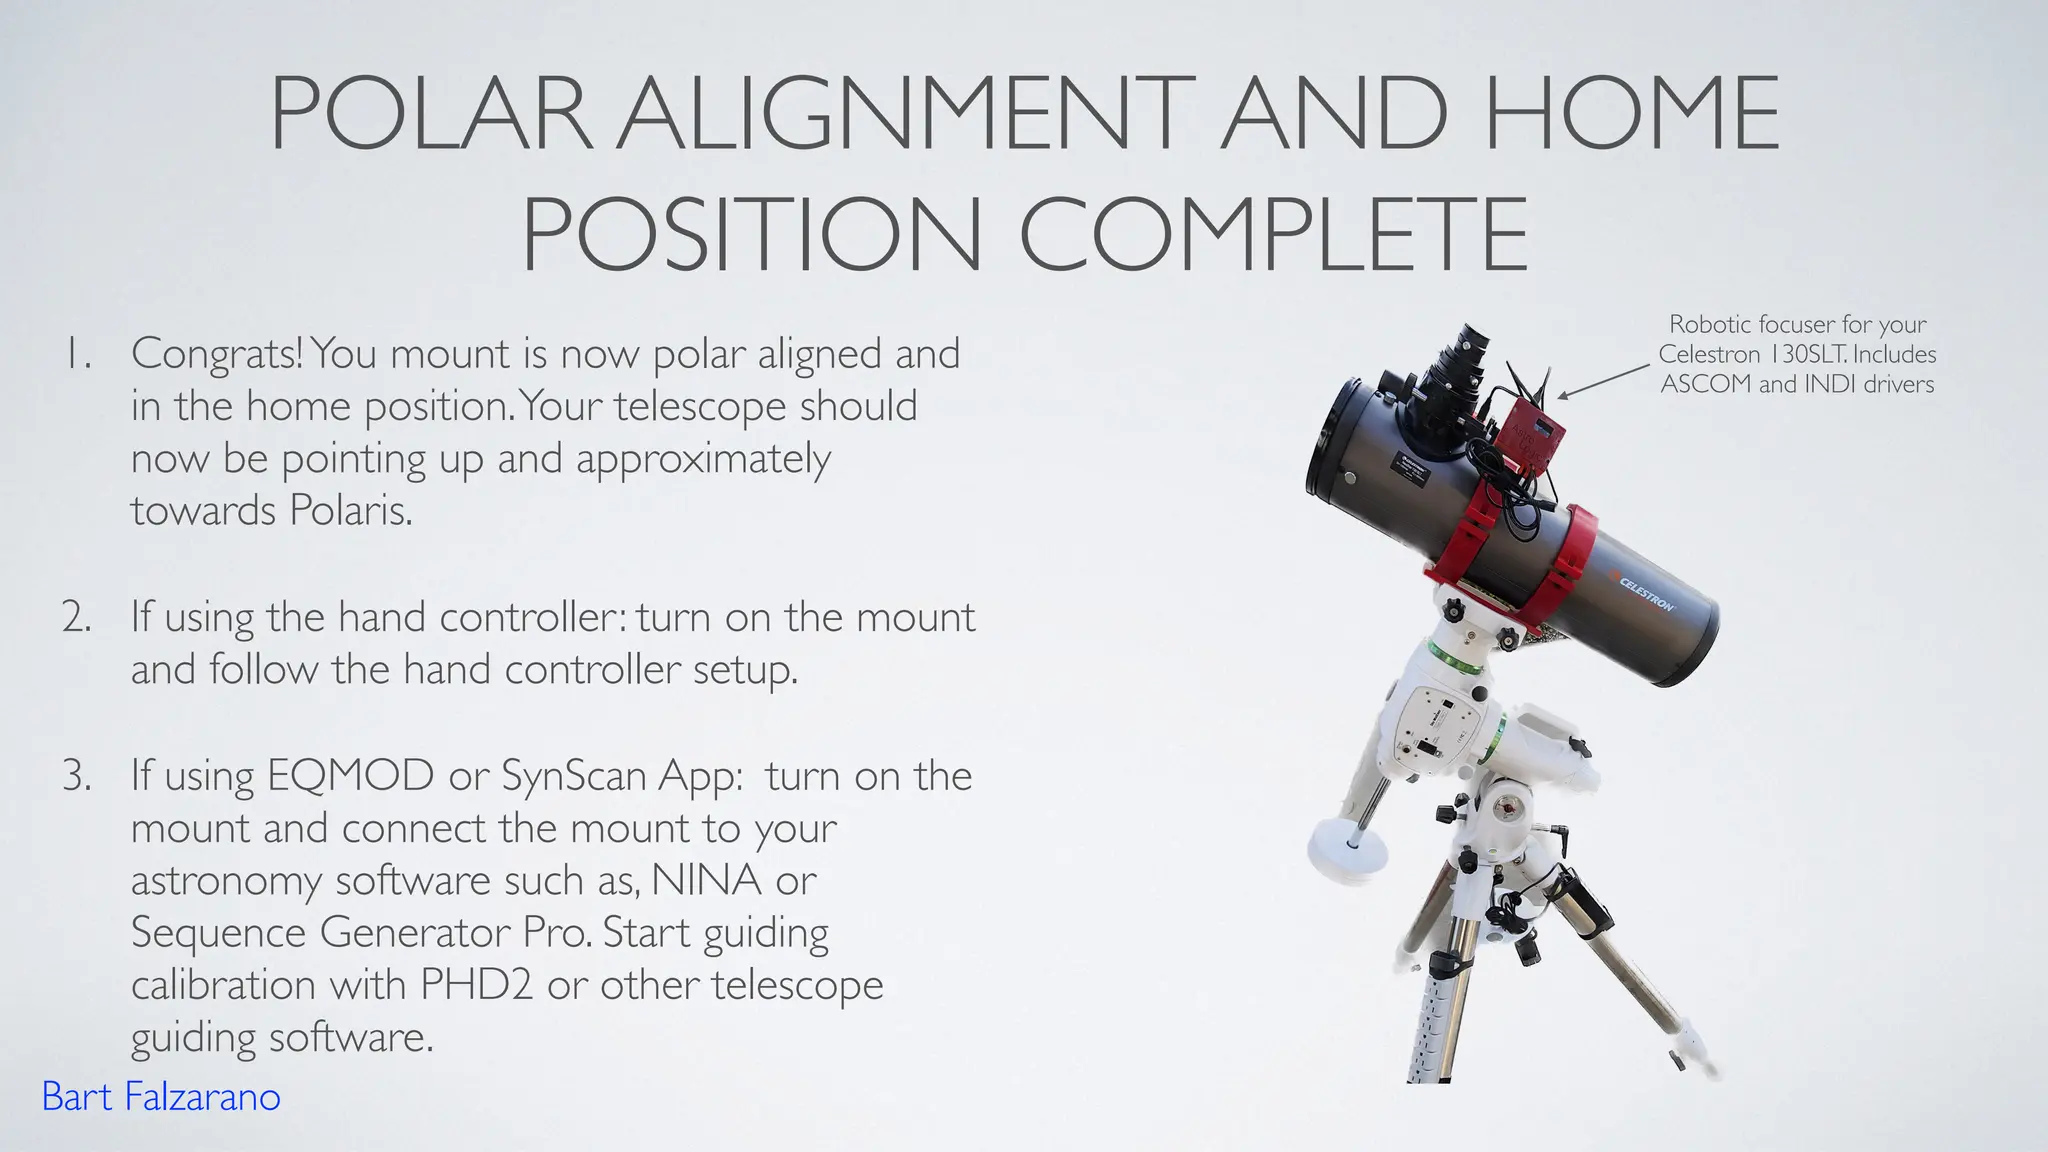
Telescope equatorial mount polar alignment quick reference guide

  • 1.
    EQUATORIAL MOUNT Polar AlignmentQuick Reference Guide (Northern Hemisphere) Bart Falzarano
  • 2.
    DISCLAIMER • The stepsdocumented in this reference guide are the steps that I’ve been following for a few years now. I have had good guiding results (between 0.50 - 0.70 arc seconds per pixel) with PHD2 telescope guiding software after performing these steps. However, your guide results may vary. • The mount shown in this guide is a Sky-Watcher EQ6-R Pro telescope mount.The mount has a built-in polar scope.The steps should be similar for other equatorial mounts that have a built-in polar scope. • Telescope balance (Right ascension balance and declination balance) is critical to good guiding.The telescope should be balanced after all cameras and cables are connected.The front cover cap on the telescope should also be removed before balancing the telescope.This quick reference guide does not cover how to balance the telescope on an equatorial mount. • Appreciate your comments! If you have feedback or improvement suggestions, please leave a comment. Bart Falzarano
  • 3.
    HELPFUL SMARTPHONE APPSAND TOOLS • Google Sky map • SyncScan Pro • SmallTorpedo Level Bart Falzarano
  • 4.
    LEVEL, POSITION, &ELEVATION • Ensure your EQ mount is level and pointing north.Tip: use Google Sky Map smartphone app or a compass to help position your EQ mount so that it is pointing north. • Set and adjust elevation to your latitude using the Altitude (elevation) adjustment bolts Bart Falzarano
  • 5.
    ALIGNING POLARIS 1. AlignPolaris in center of the polar scope using the alt and az bolts 2. Use the alt bolts to lift Polaris until it is on the inner rings 3. Rotate the RA of mount (if needed) so the 12 o’clock or 0 position point coincides with where Polaris is 4. Using the app make adjustments to the alt and az bolts to move Polaris to the correct position as shown in the SyncScan Pro app polar clock utility (Utility/Advanced/ Polar Scope) Note: I’ve started to skip steps 1 - 3 above, meaning when I see Polaris, I simply perform step 4 and use the alt and az bolts to move Polaris to the the correct position as shown in the polar clock utility. I haven’t noticed any alignment or guiding issues when skipping steps 1- 3 above.Appreciate your comments and thoughts on this. Step 1 Step 2 Alt bolts (elevation) Az bolts one bolt on each side. (Azimuth) Step 3 rotate RA of mount Step 4 Optional. Skip steps 1 - 3. Perform step 4. See note Bart Falzarano In this example, this is where Polaris should be positioned.
  • 6.
    SET RA HOMEPOSITION 1. Unlock the RA clutch and use the torpedo level to level the scope with counterweight to your left and telescope to your right. 2. After level lock the RA clutch. 3. Unlock the RA dial with the two small thumb screws and rotate the dial to line up the 6 with the arrow on the mount..Tighten the two small thumb screws to lock the RA dial. 4. Unlock the RA clutch and rotate the right ascension until you are at the 0 position on the dial. Lock the RA clutch. Bart Falzarano RA Clutch Dec Clutch Dec Dial RA Dial
  • 7.
    SET DEC HOMEPOSITION 1. Unlock declination clutch and use the torpedo level to level the scope. 2. Lock the declination clutch when level. 3. Unlock the declination dial with the two small thumb screws and rotate the dial to 0 to align with the arrow on the mount. Tighten the the two small thumb screws to lock the declination dial. 4. Open declination clutch 5. Rotate declination to 90 degrees.Your telescope should now be pointing up and approximately towards Polaris. Bart Falzarano RA Clutch Dec Clutch Dec Dial RA Dial Dec Dial
  • 8.
    POLAR ALIGNMENT ANDHOME POSITION COMPLETE 1. Congrats!You mount is now polar aligned and in the home position.Your telescope should now be pointing up and approximately towards Polaris. 2. If using the hand controller: turn on the mount and follow the hand controller setup. 3. If using EQMOD or SynScan App: turn on the mount and connect the mount to your astronomy software such as, NINA or Sequence Generator Pro. Start guiding calibration with PHD2 or other telescope guiding software. Bart Falzarano Robotic focuser for your Celestron 130SLT. Includes ASCOM and INDI drivers
  • 9.
    HELPFUL REFERENCES • Martin’sAstrophotography Polar AlignmentTutorial • Martin’s Astrophotography Sky-Watcher EQ6-R Pro SetupTutorial • Sky-Watcher EQ6-R Pro User Manual Bart Falzarano If you want to learn more, I highly recommend watching Martin’s detailed tutorials and other videos