Downloaded 246 times
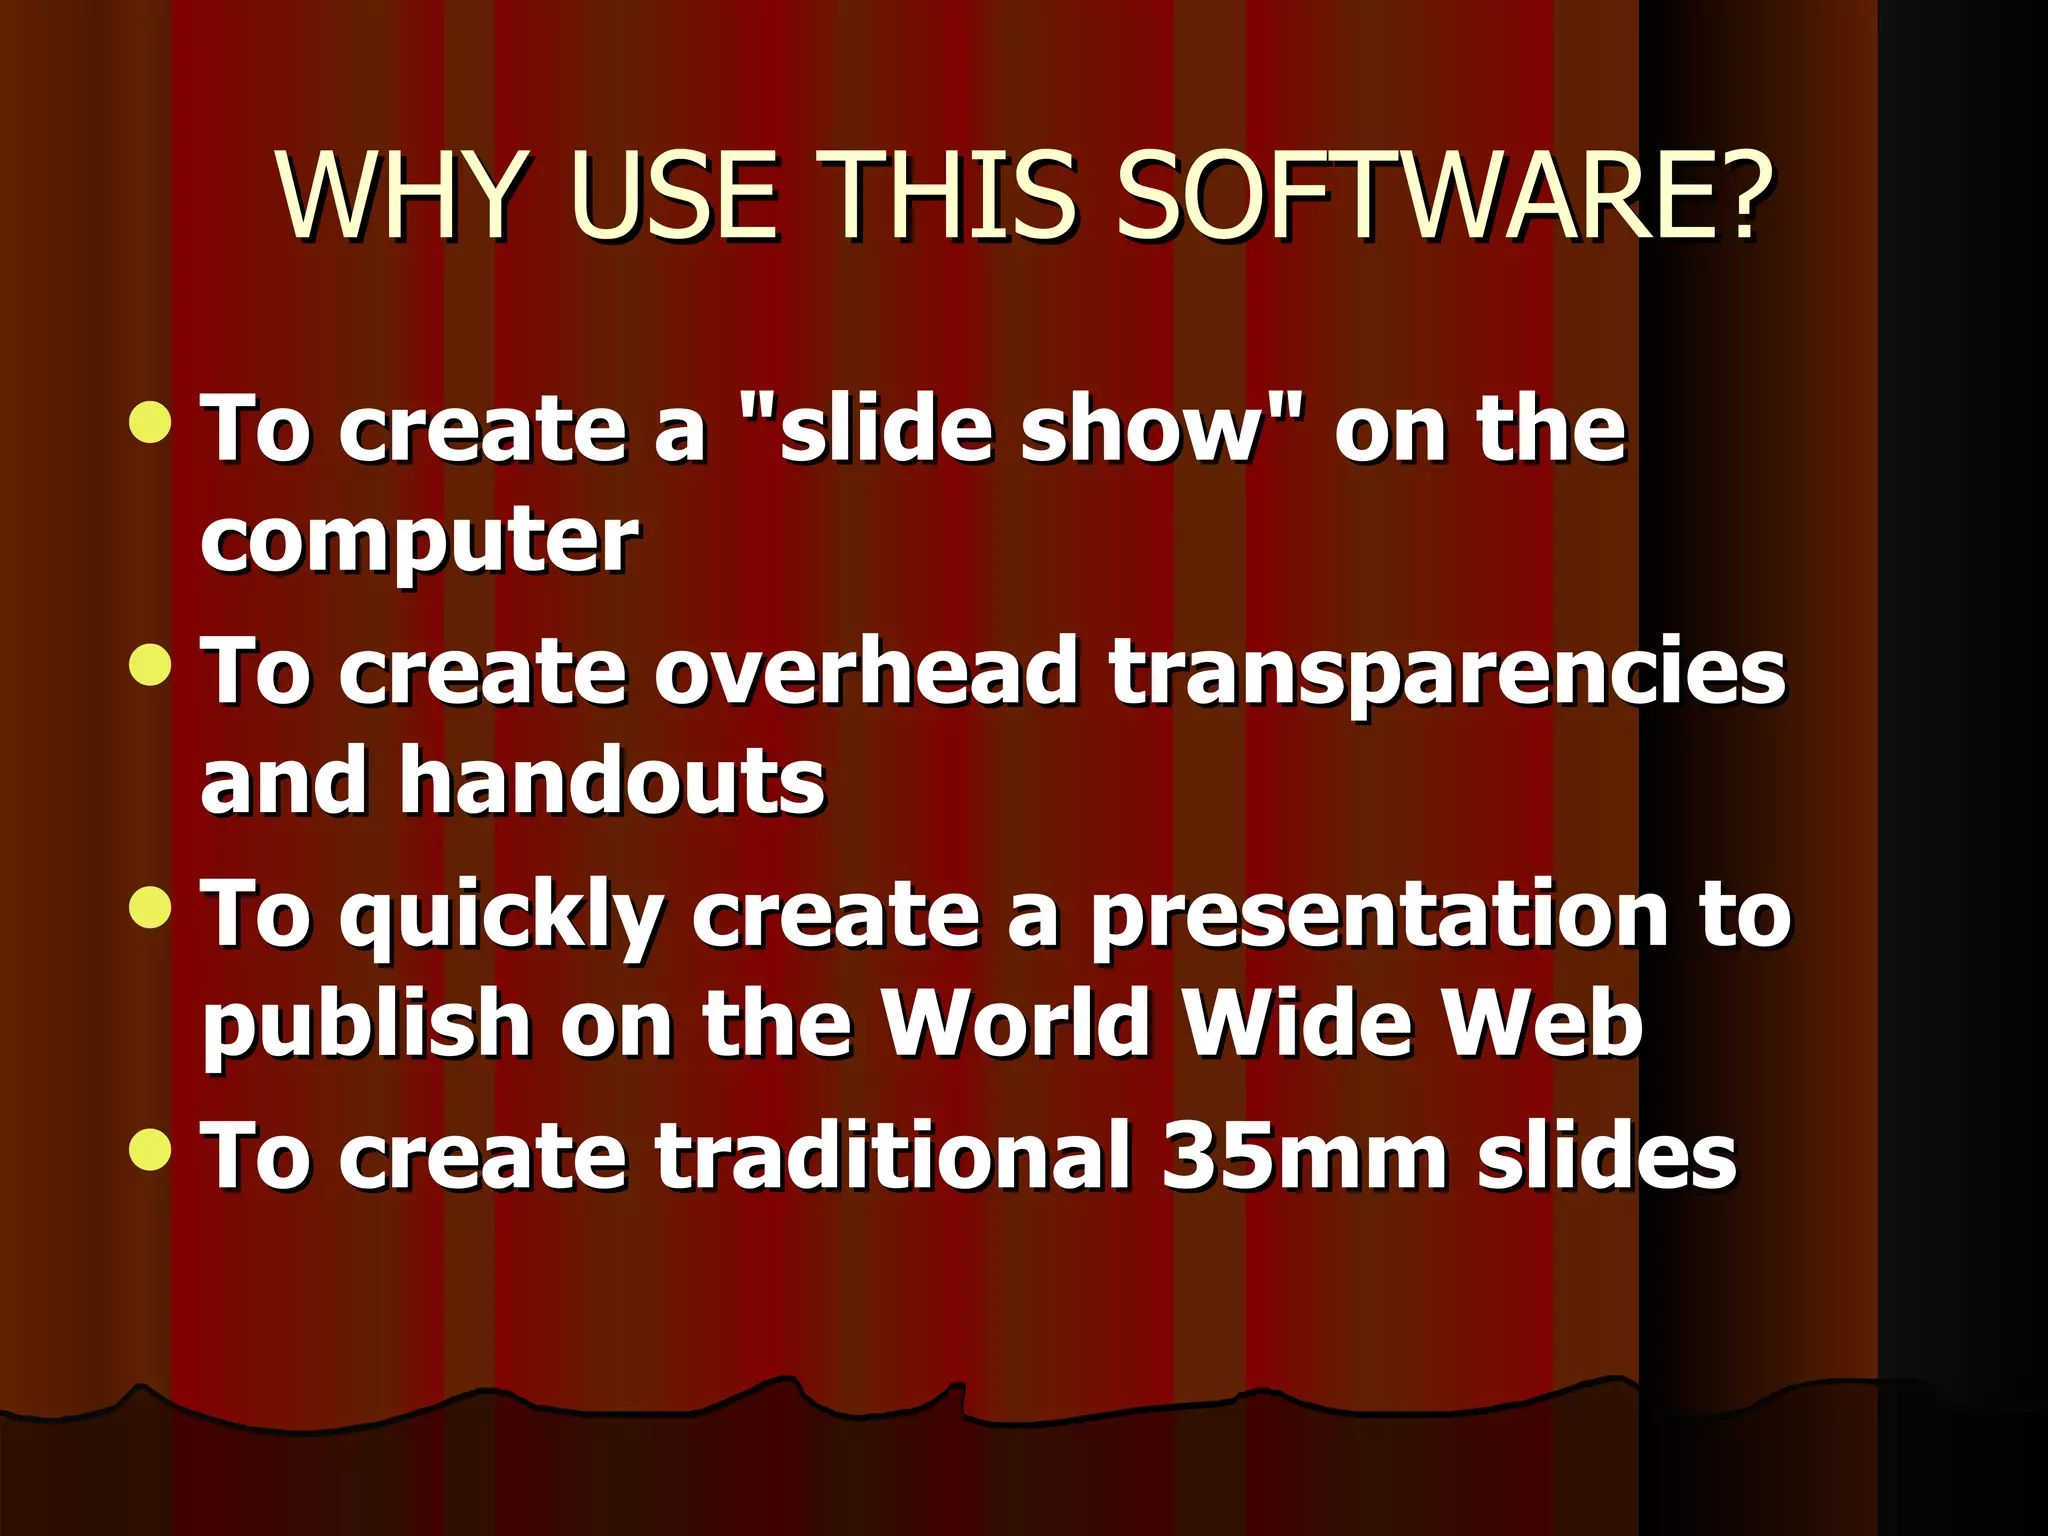
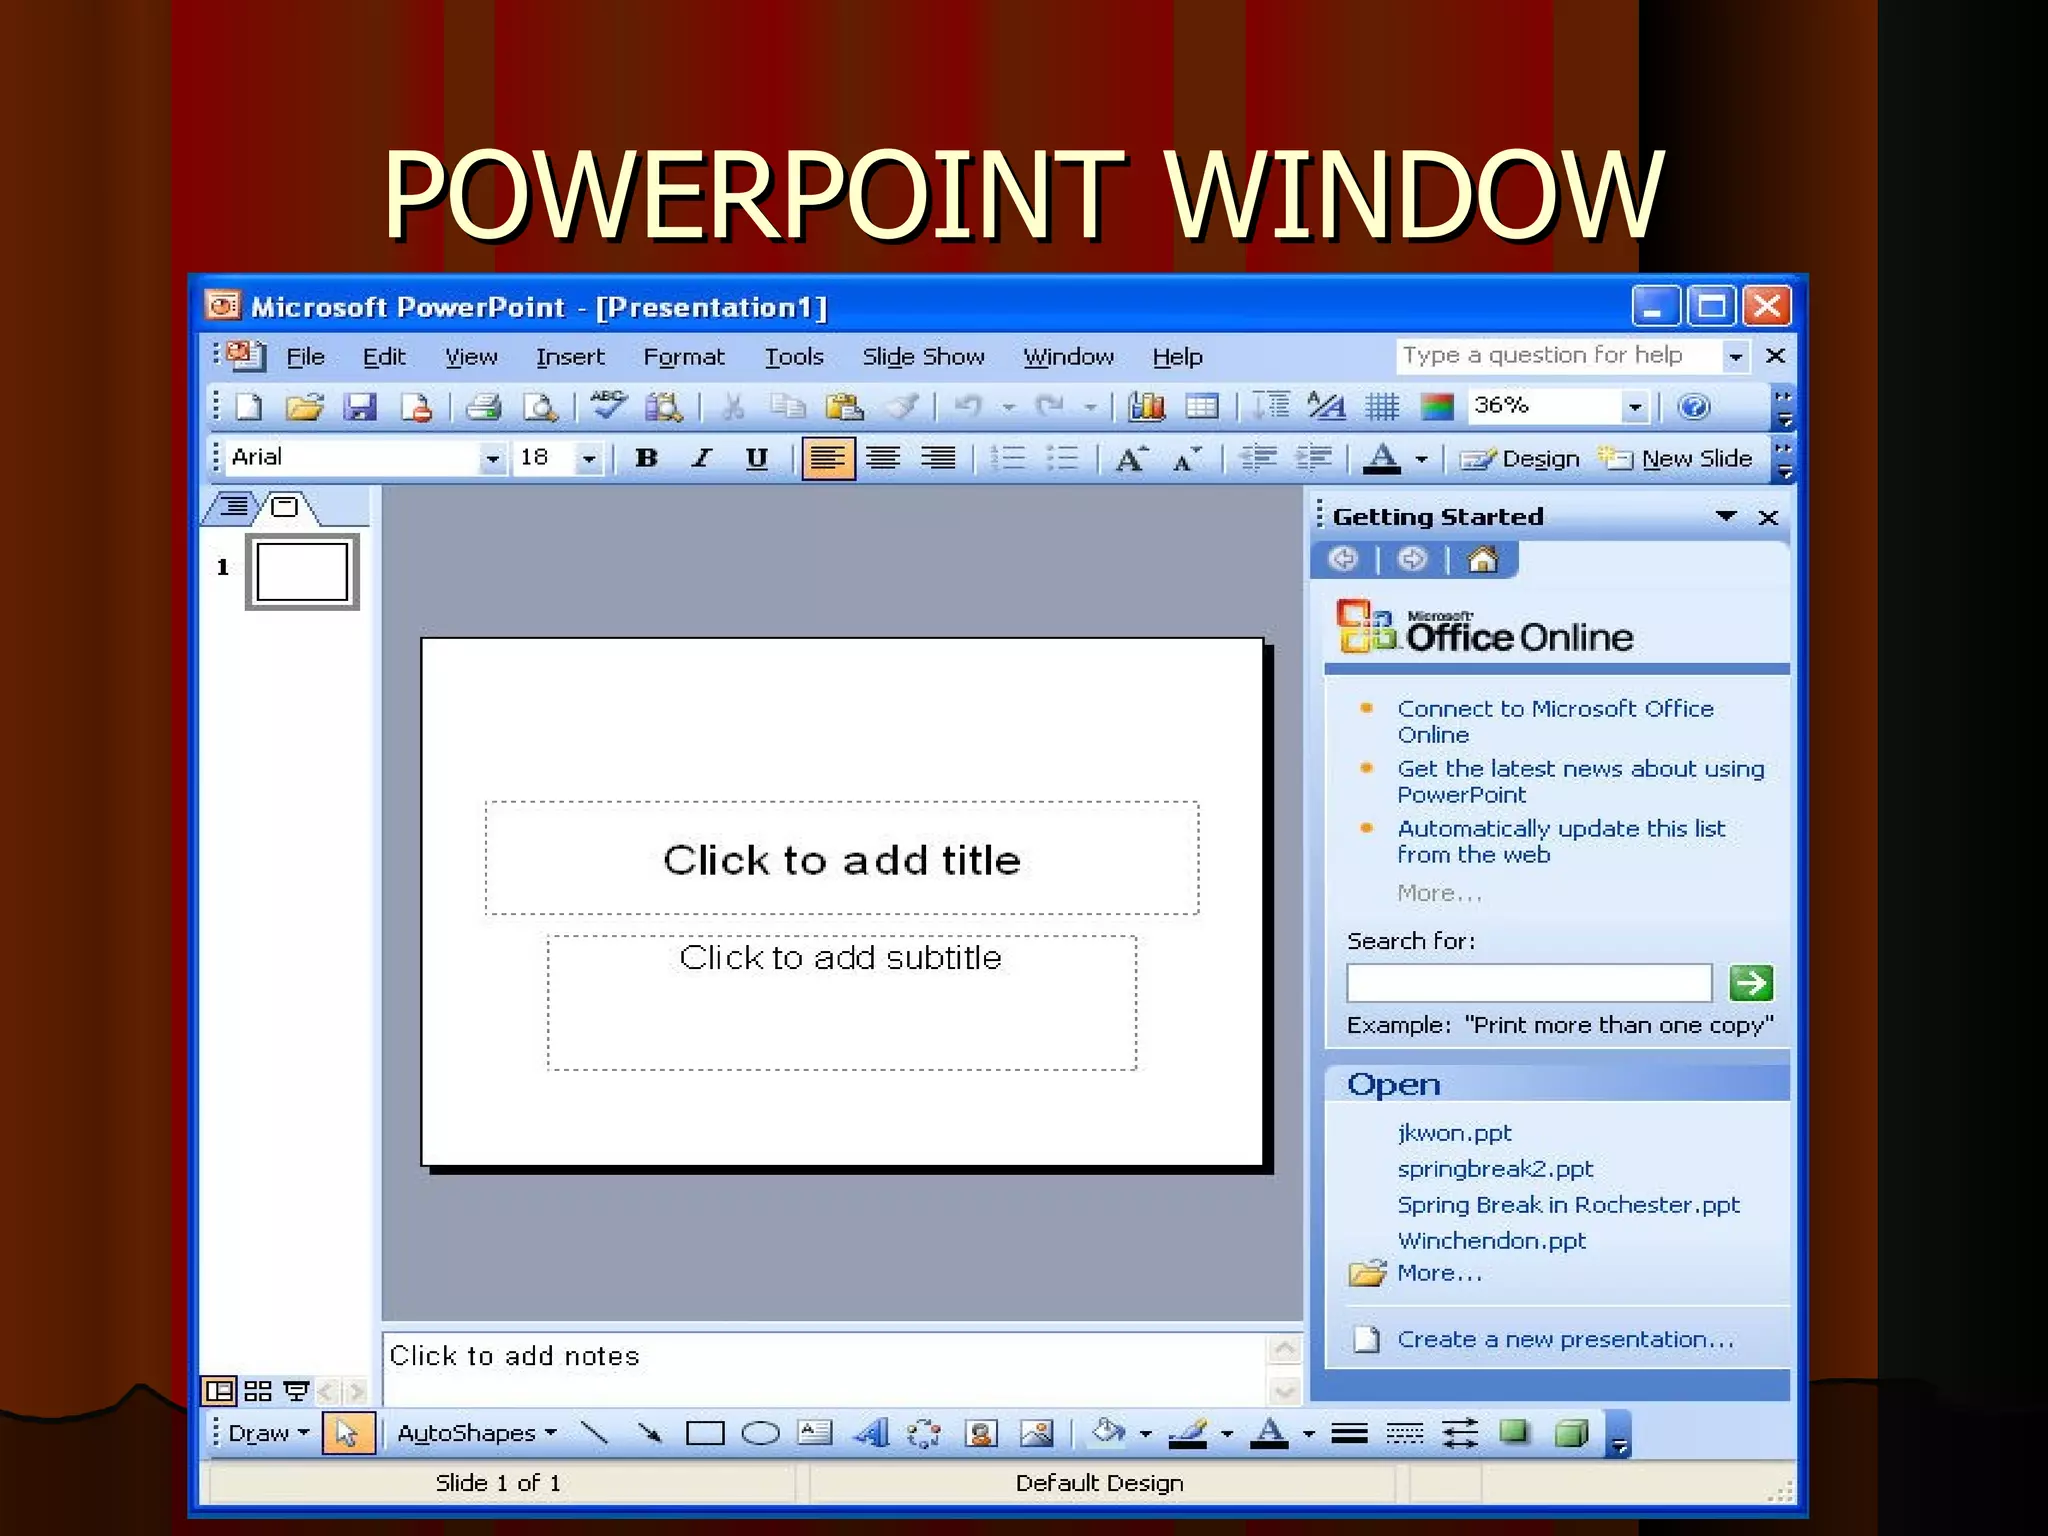
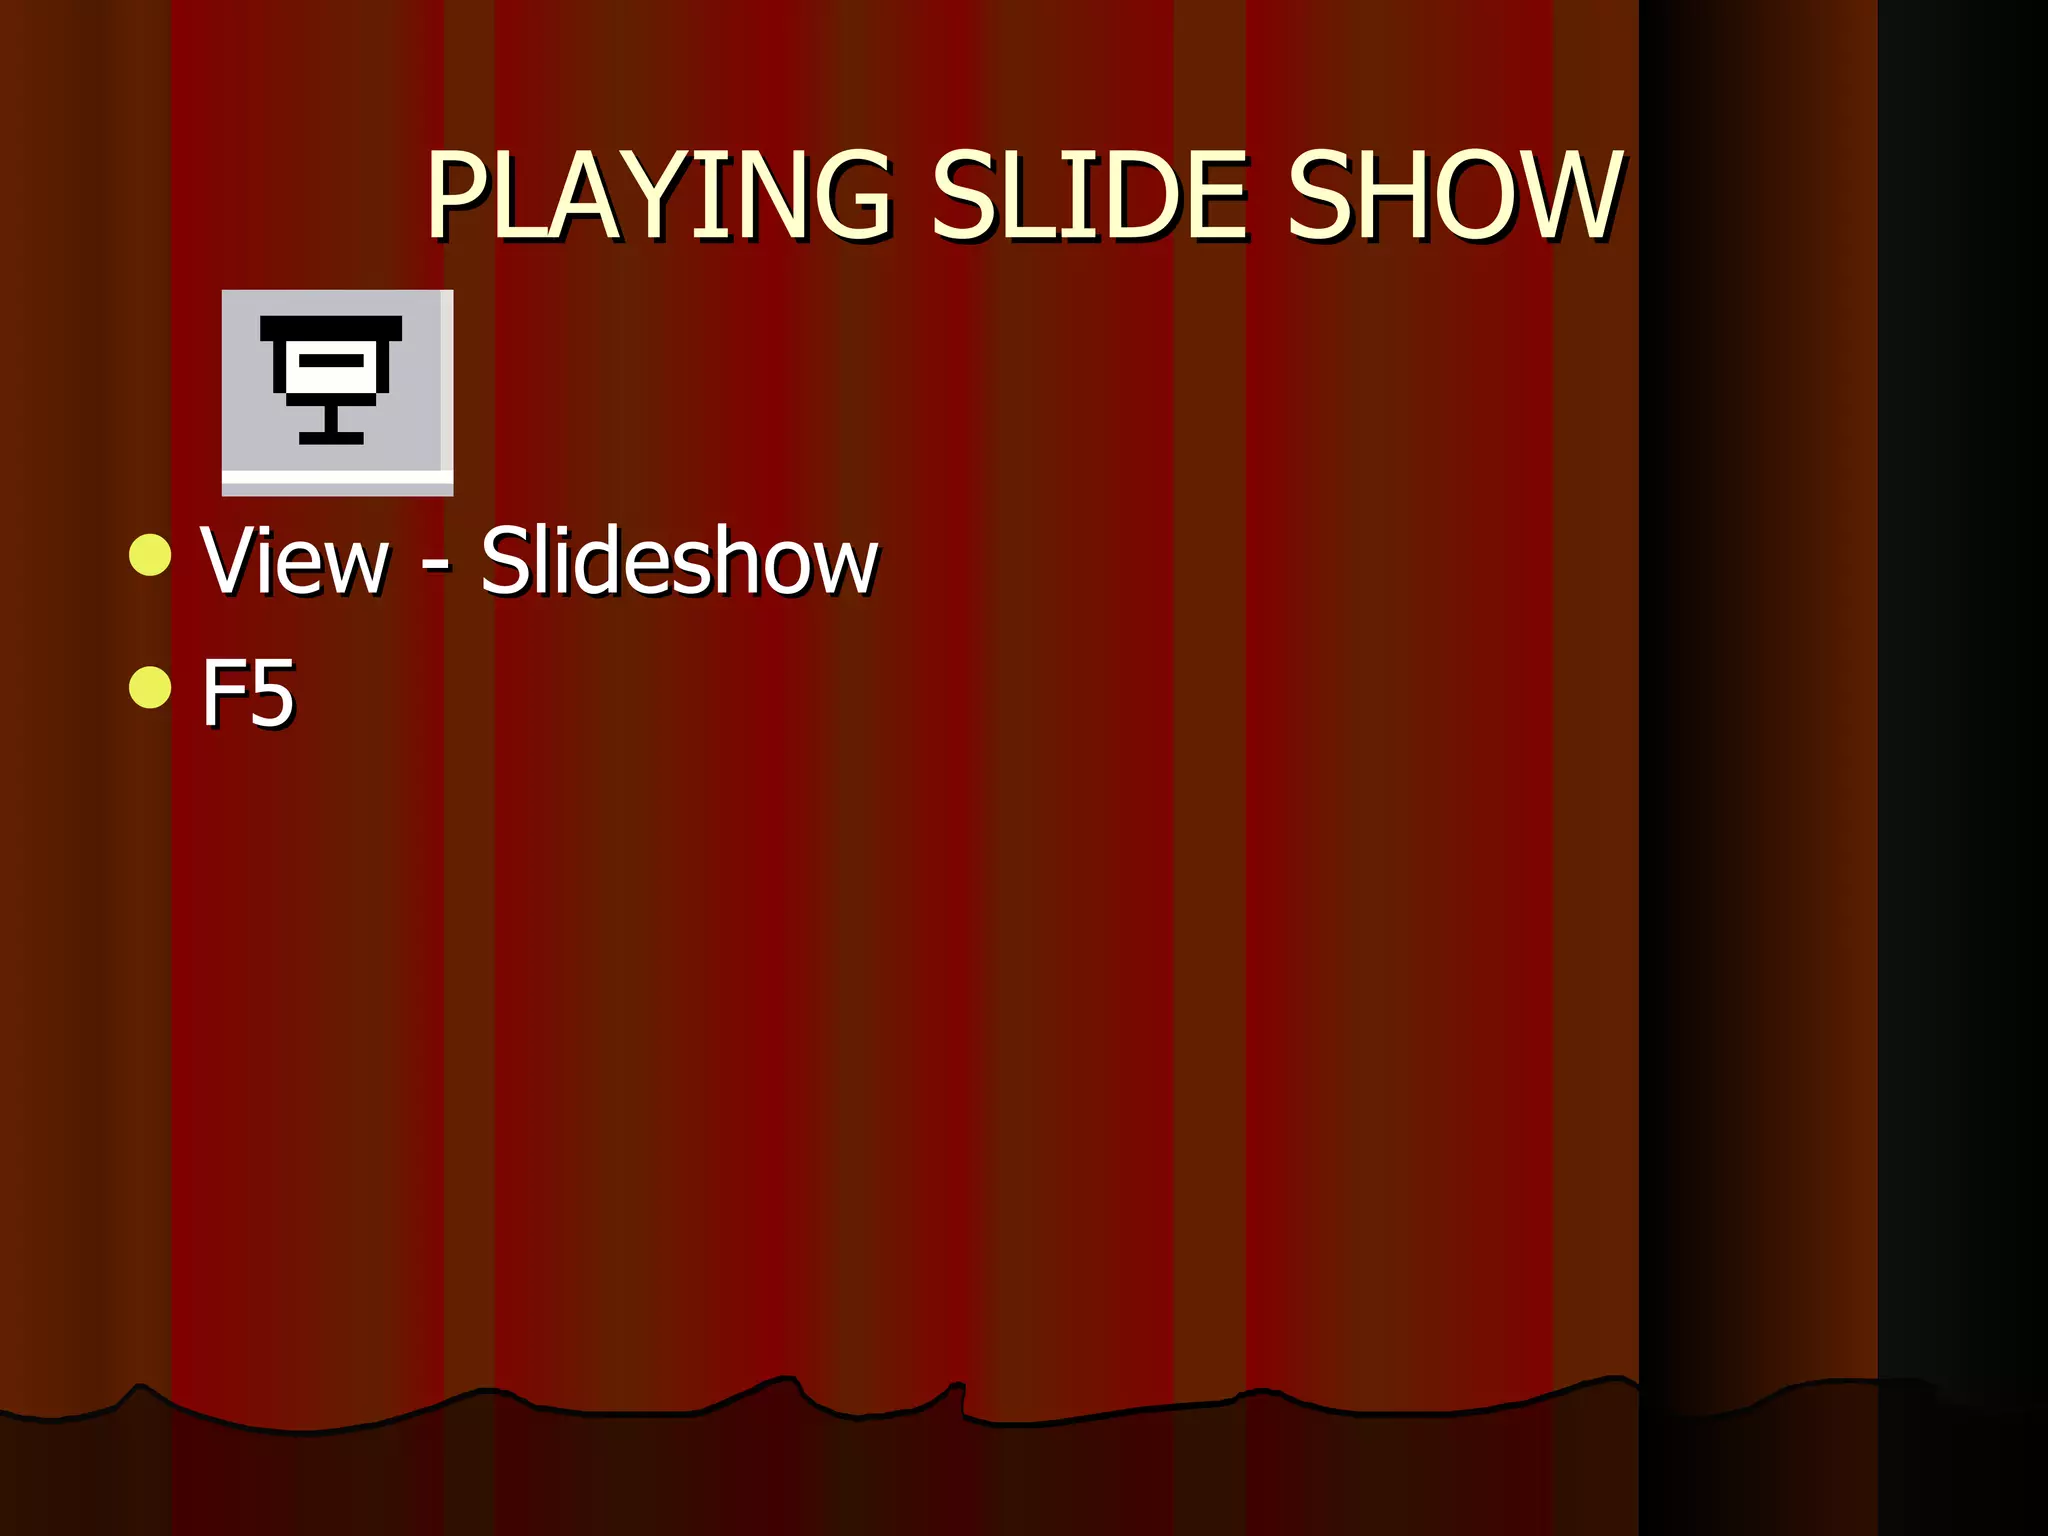
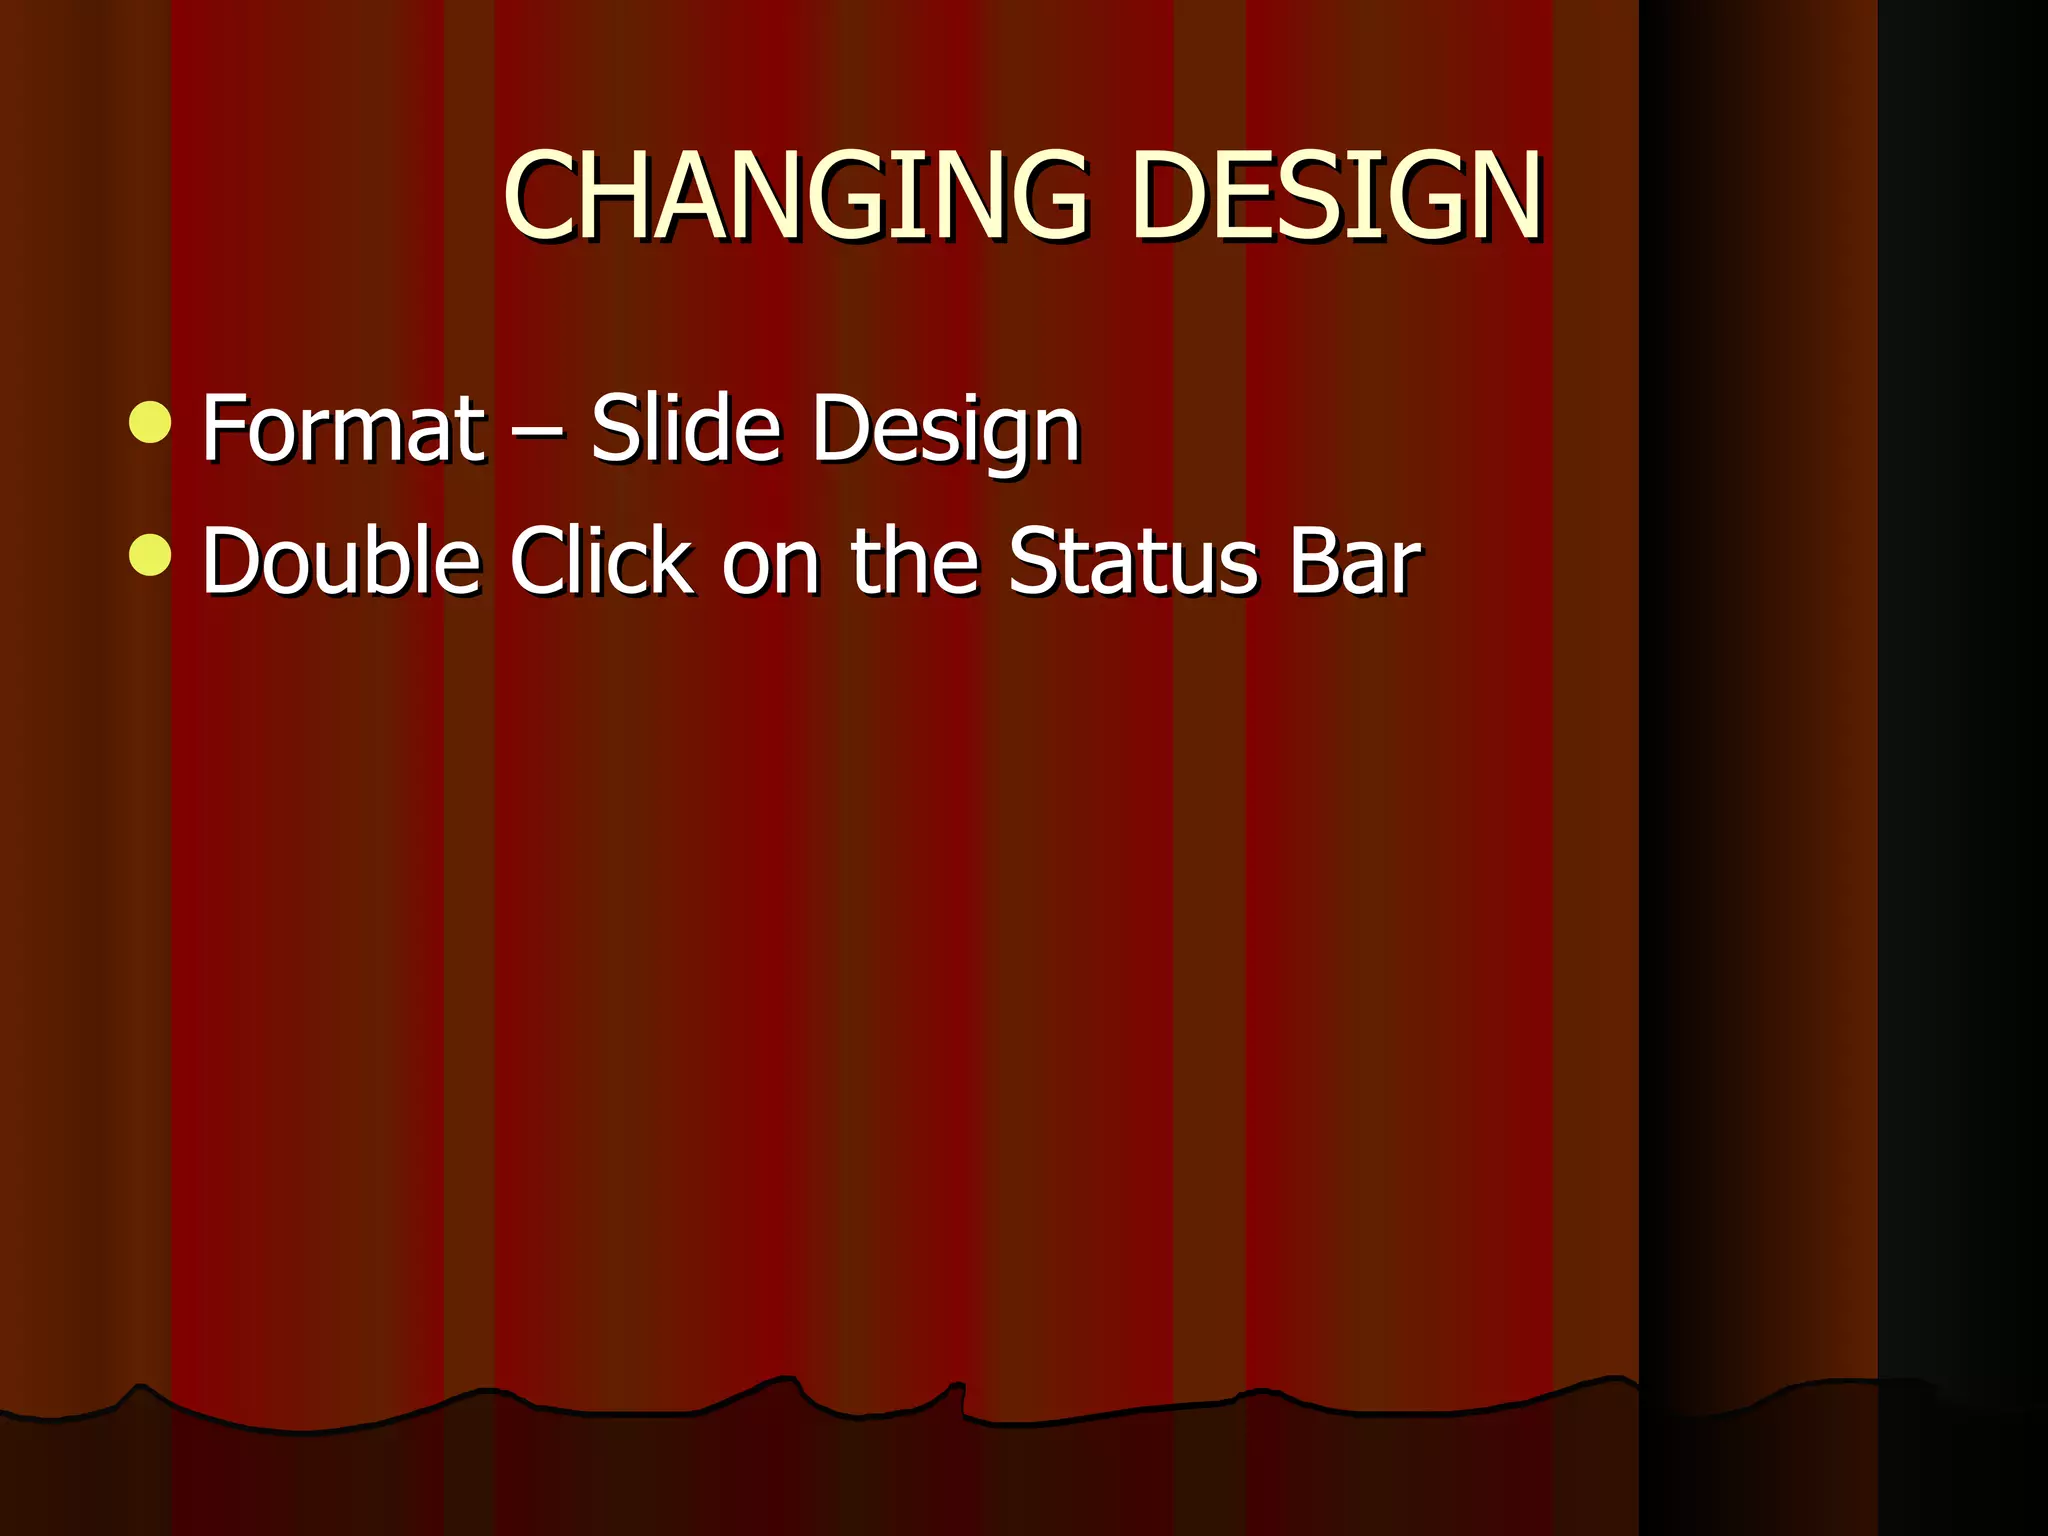
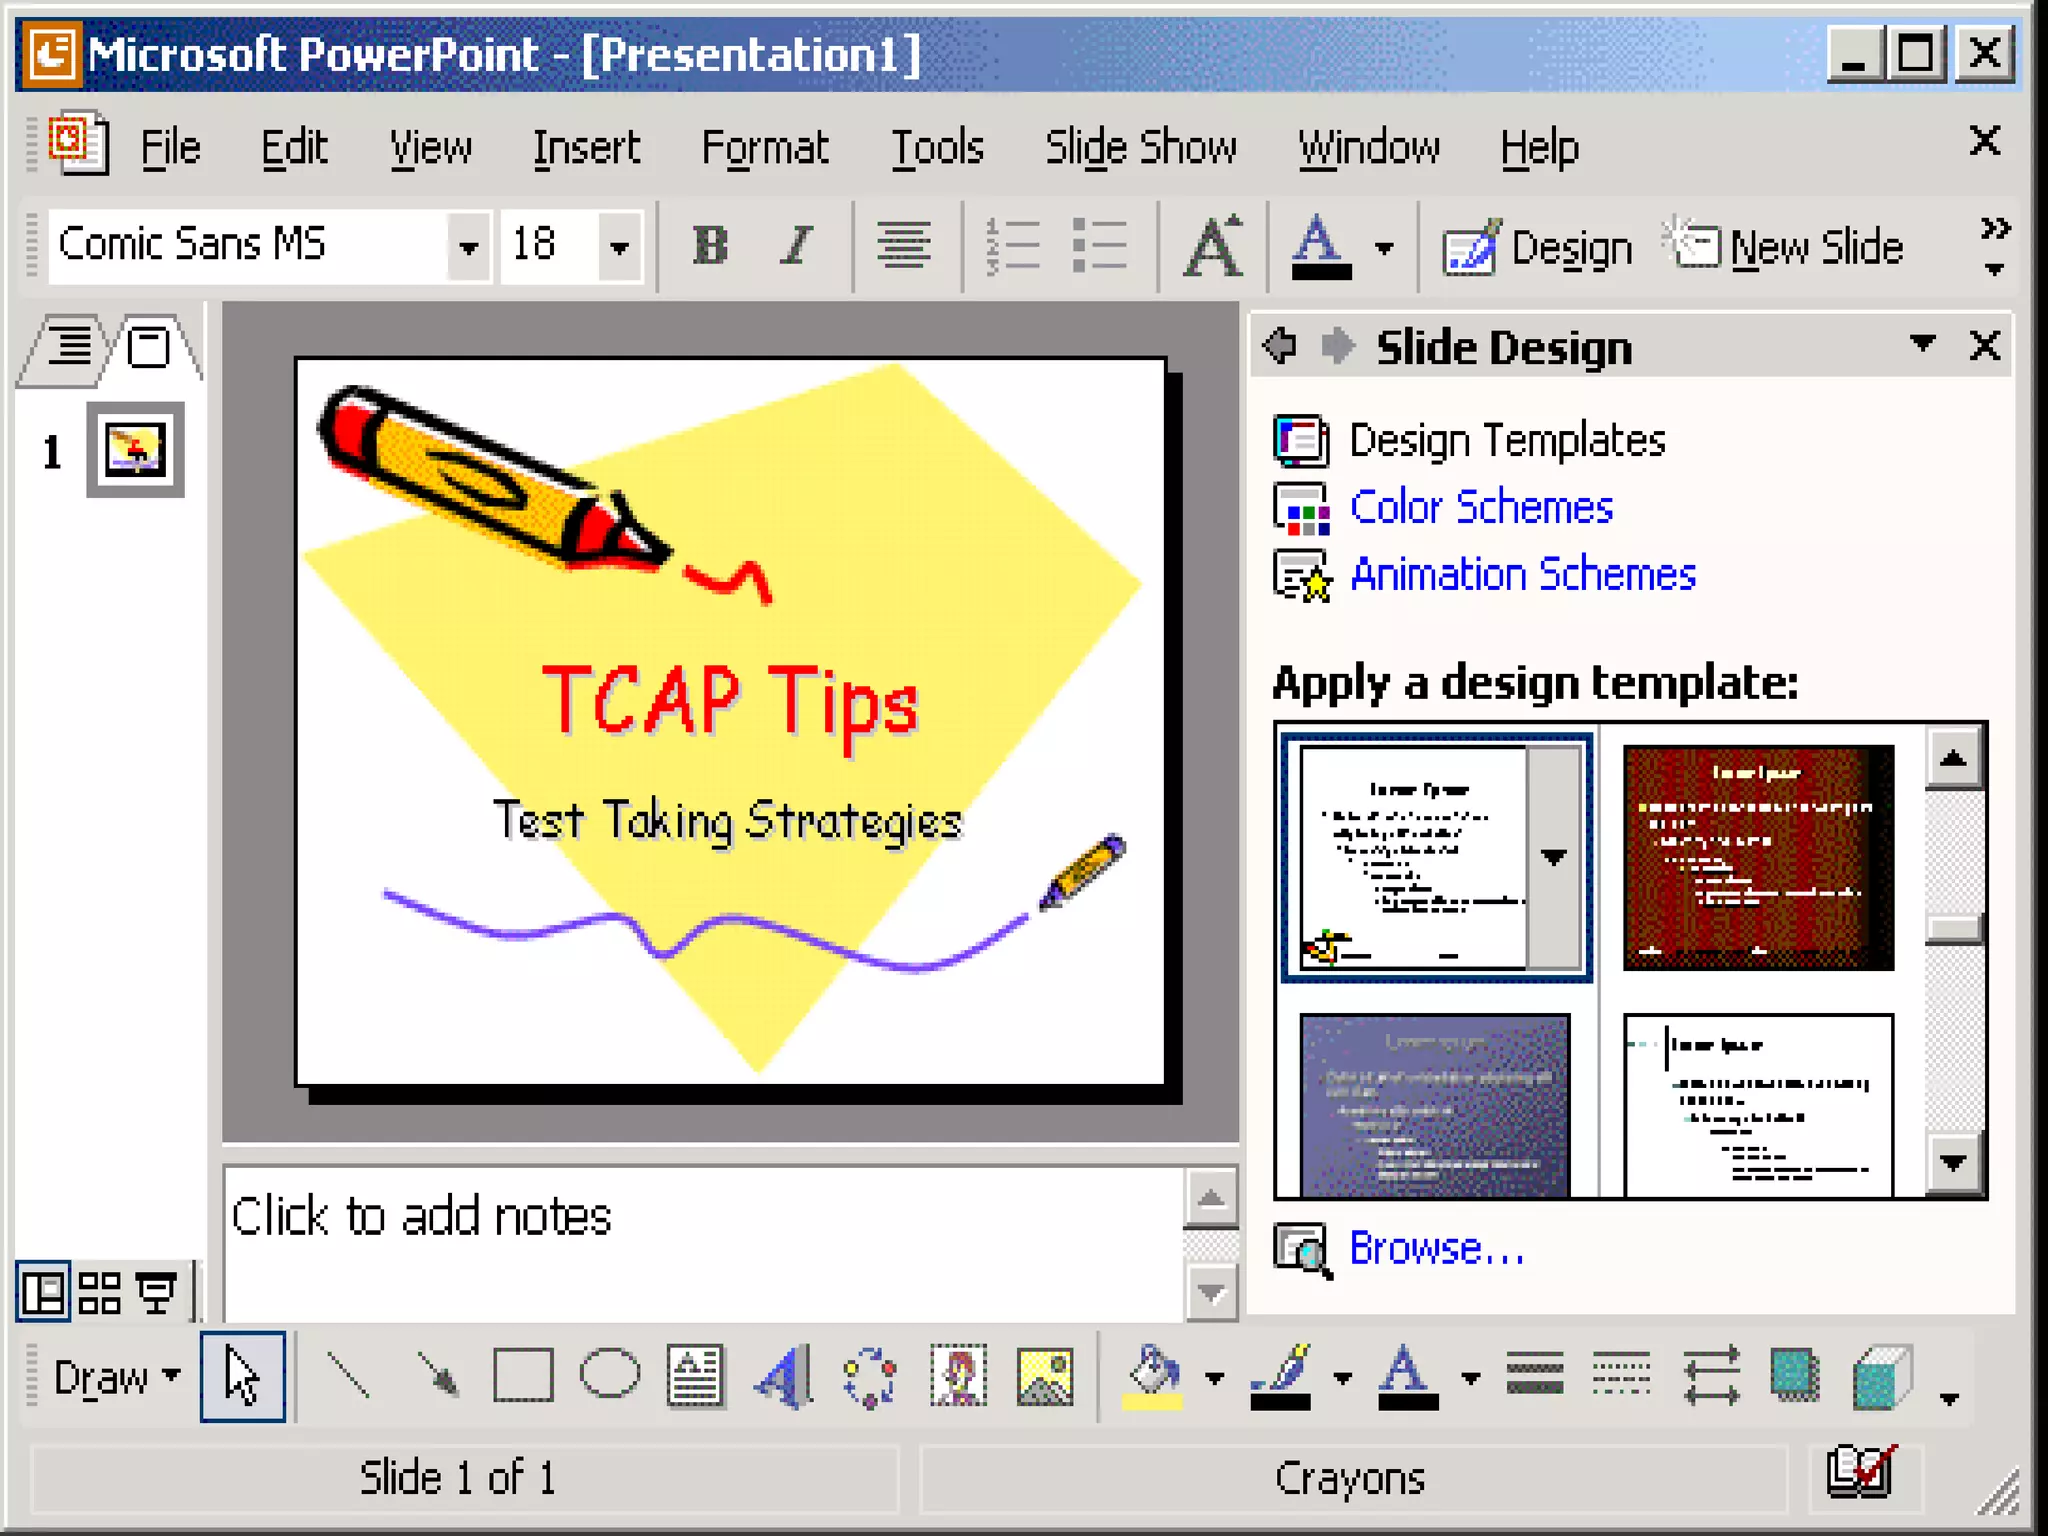
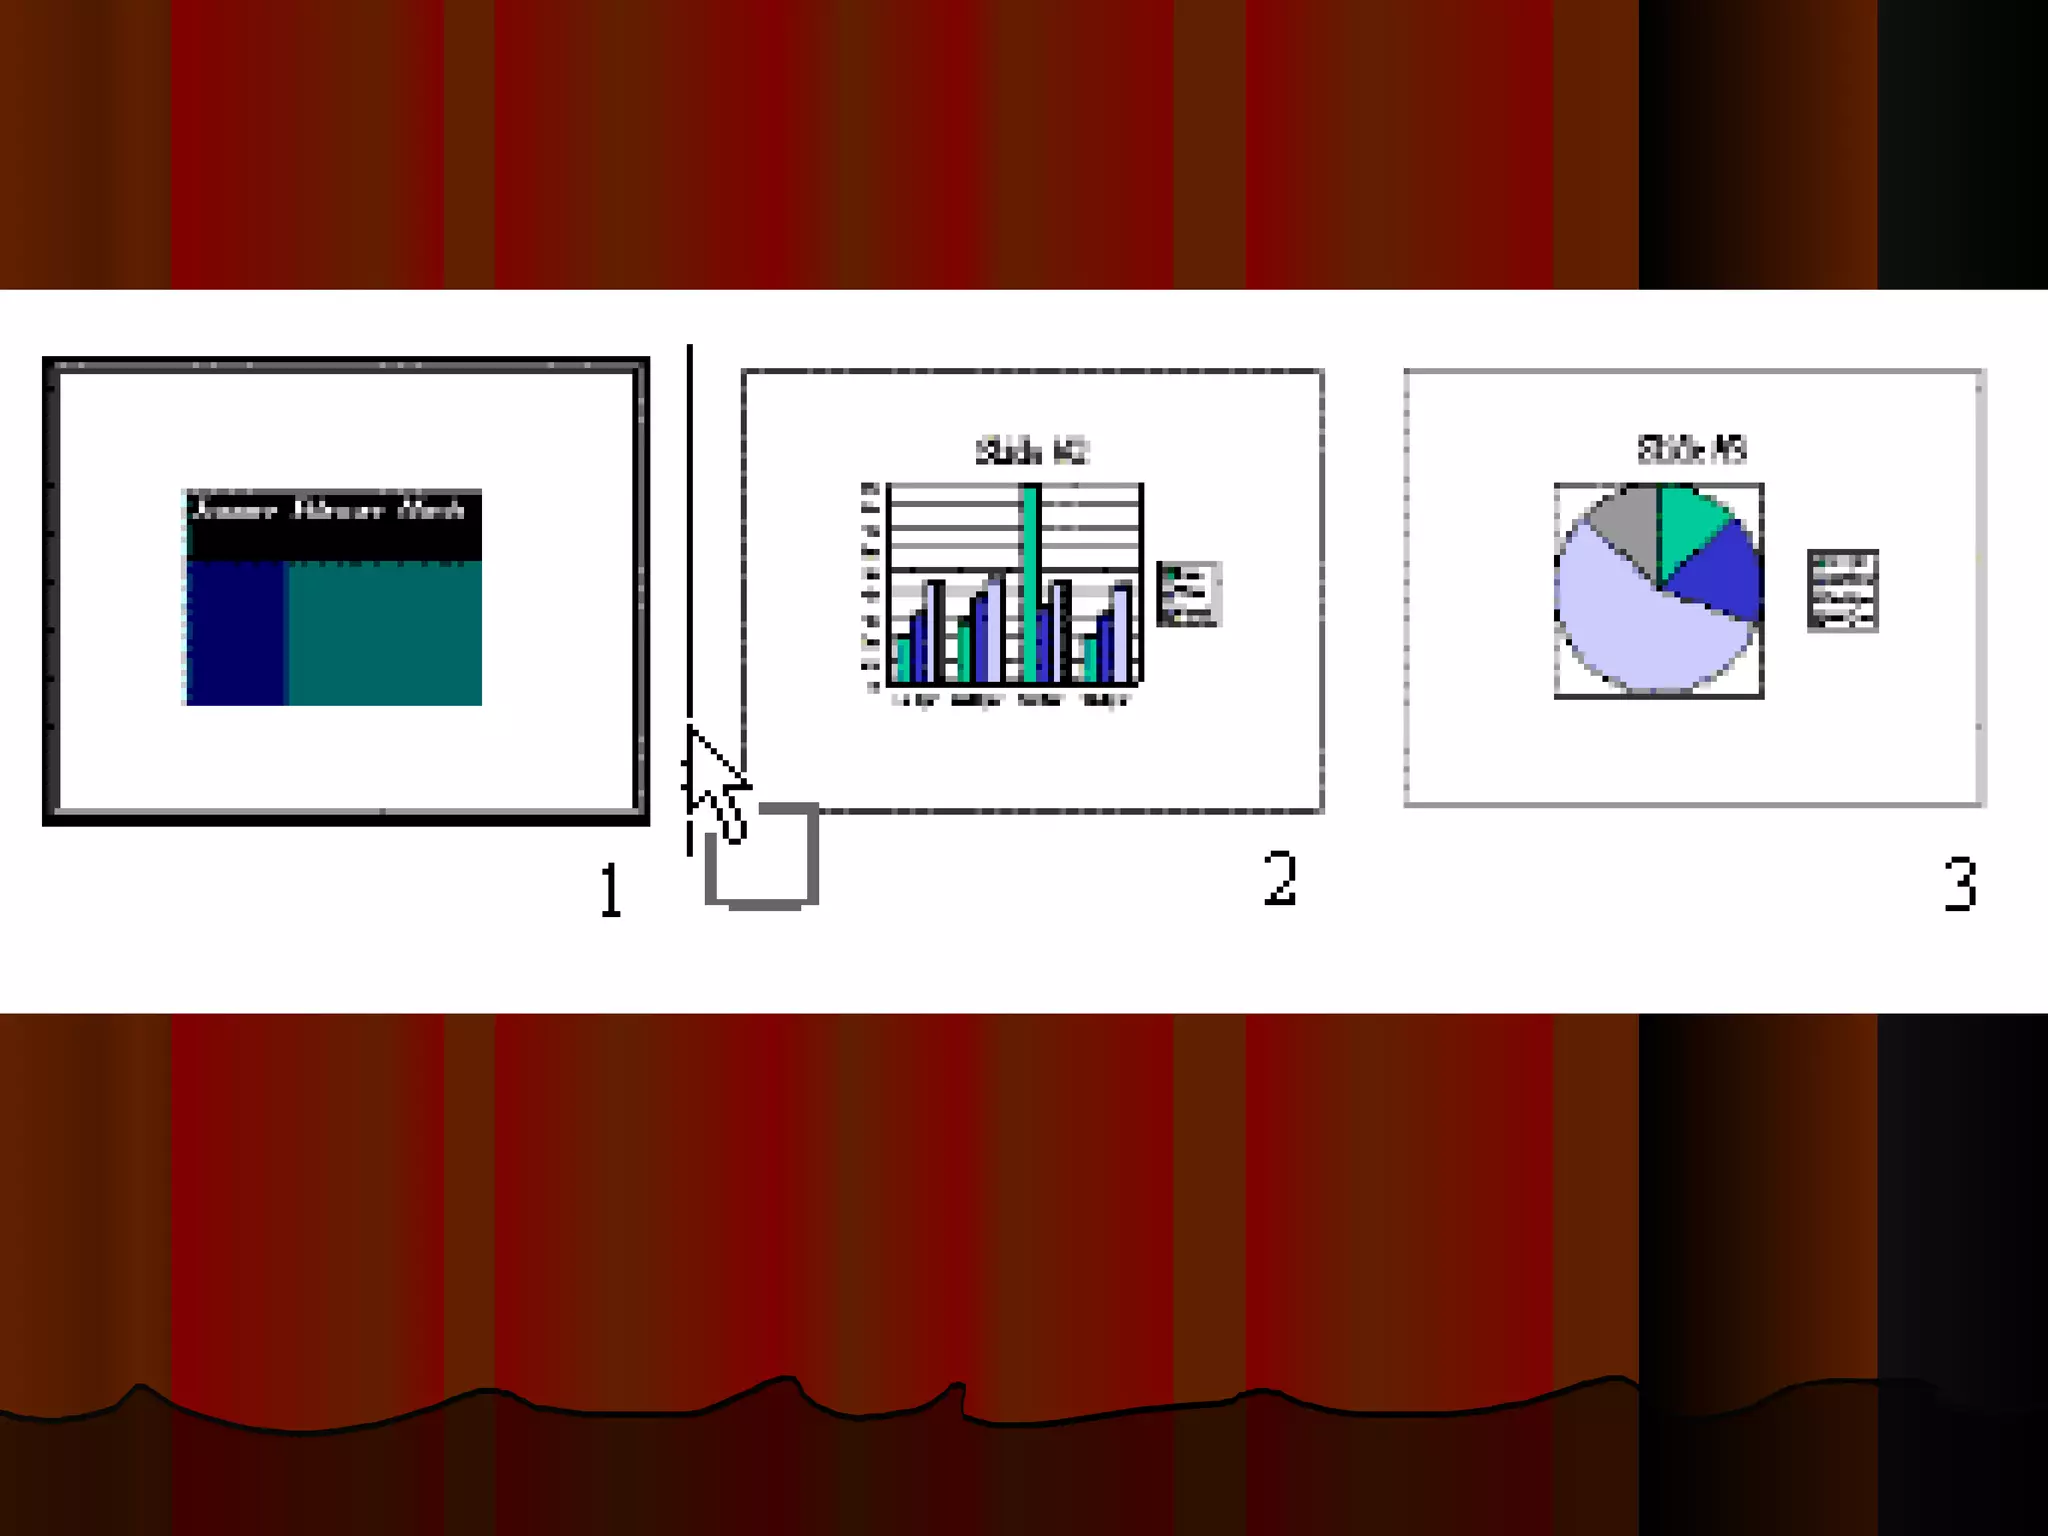
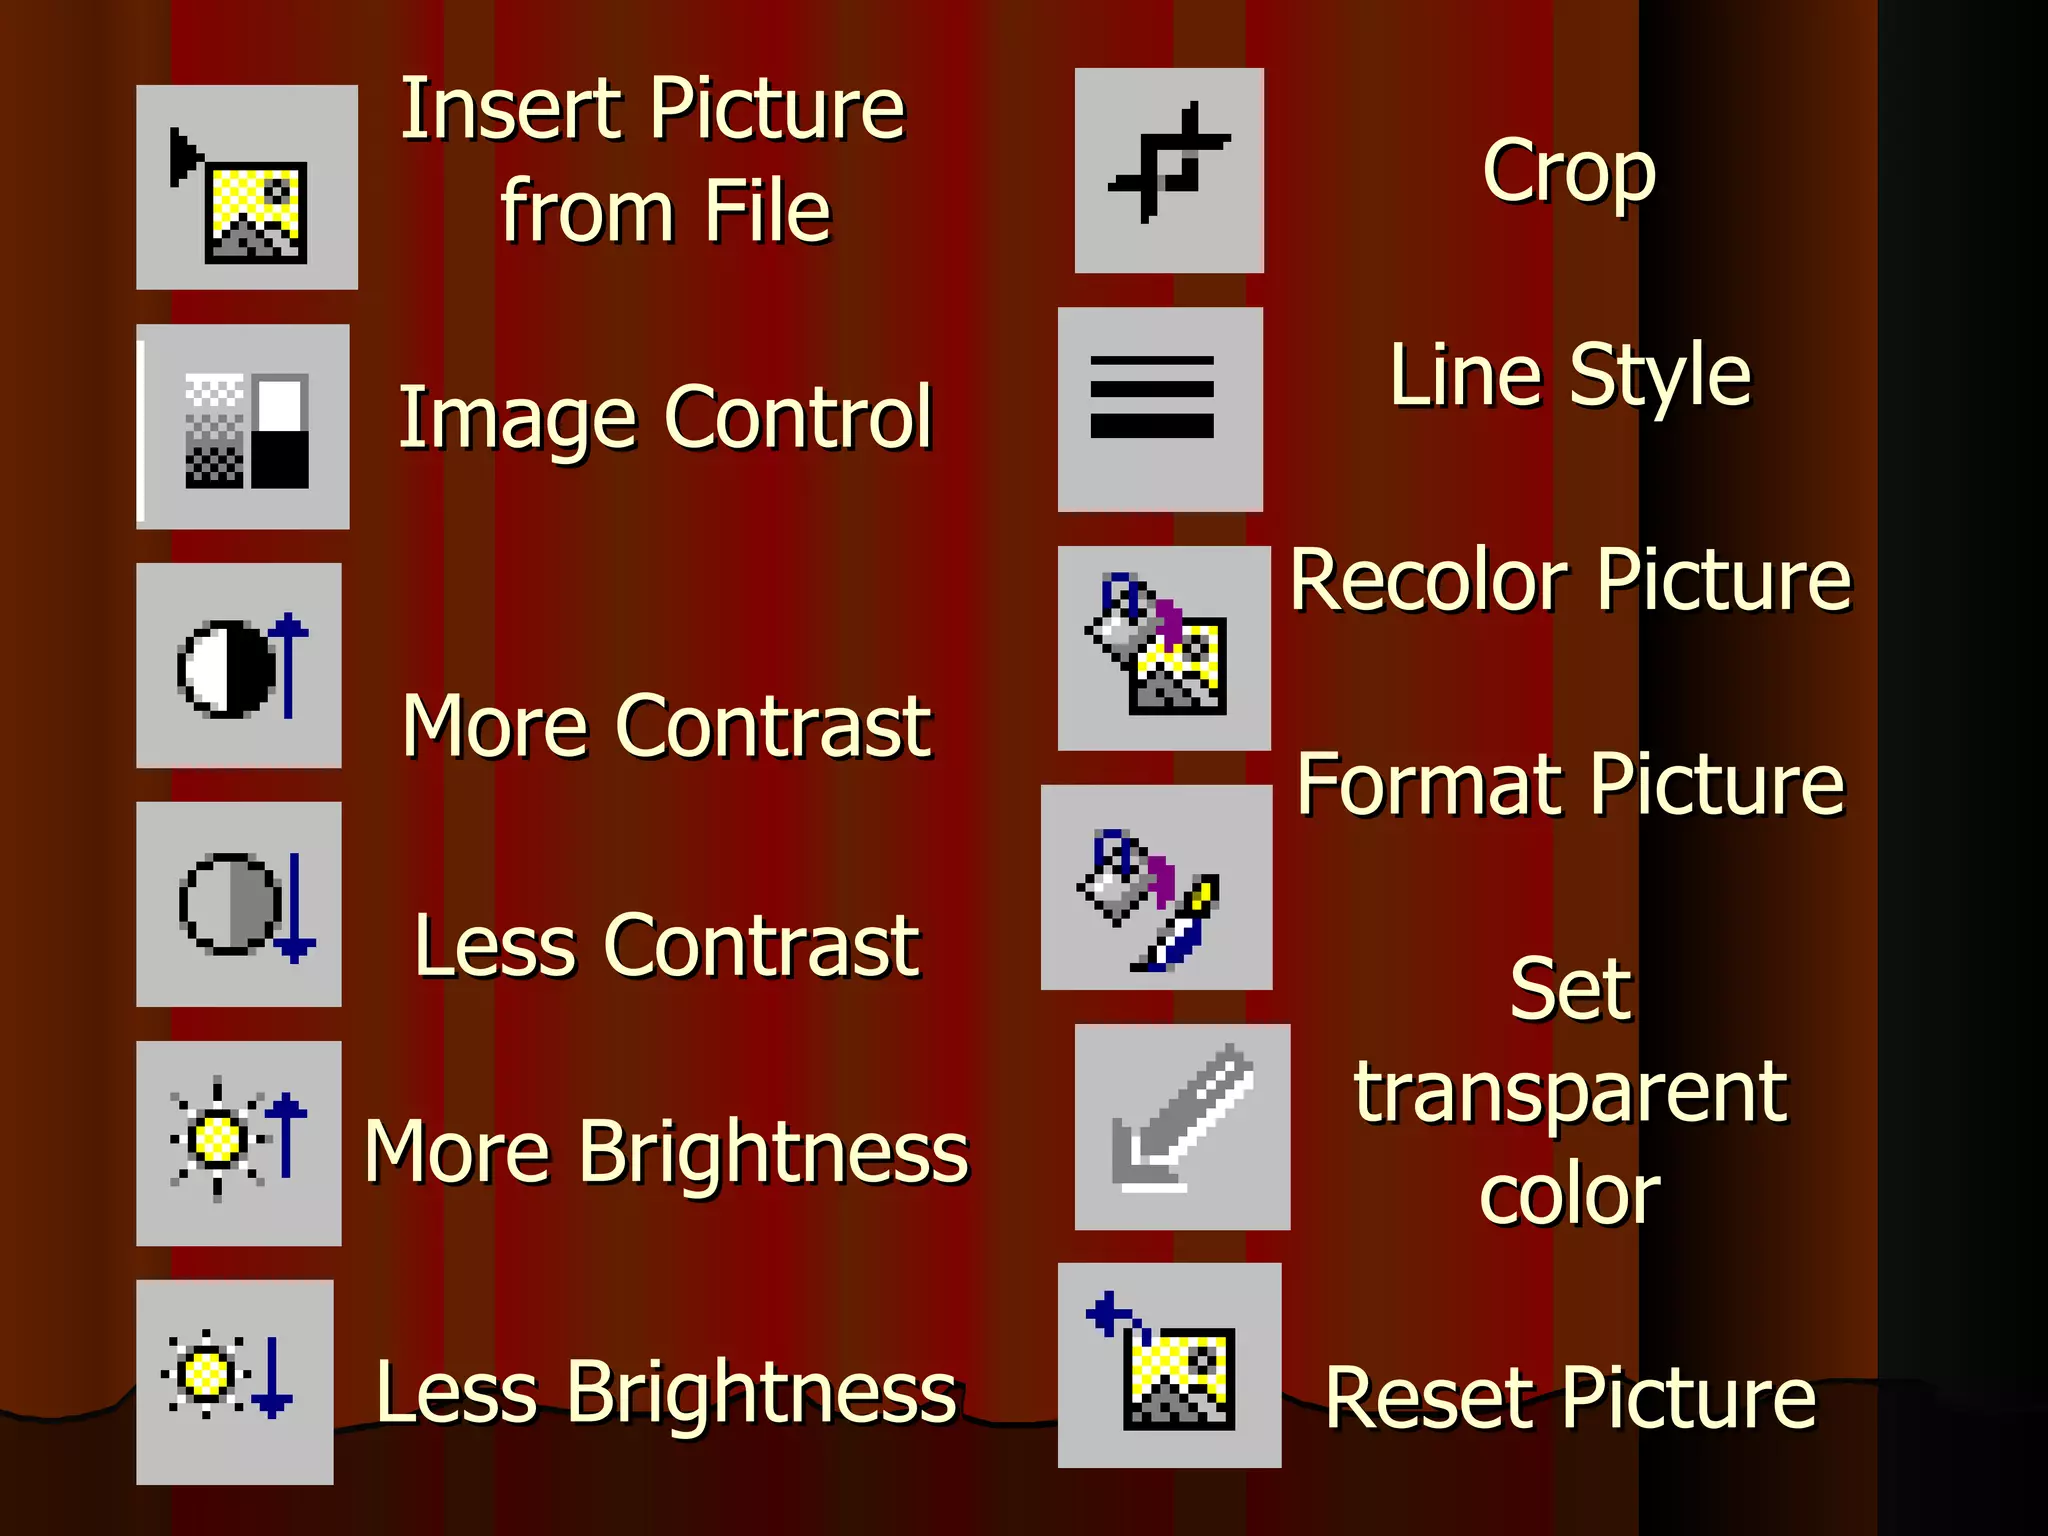
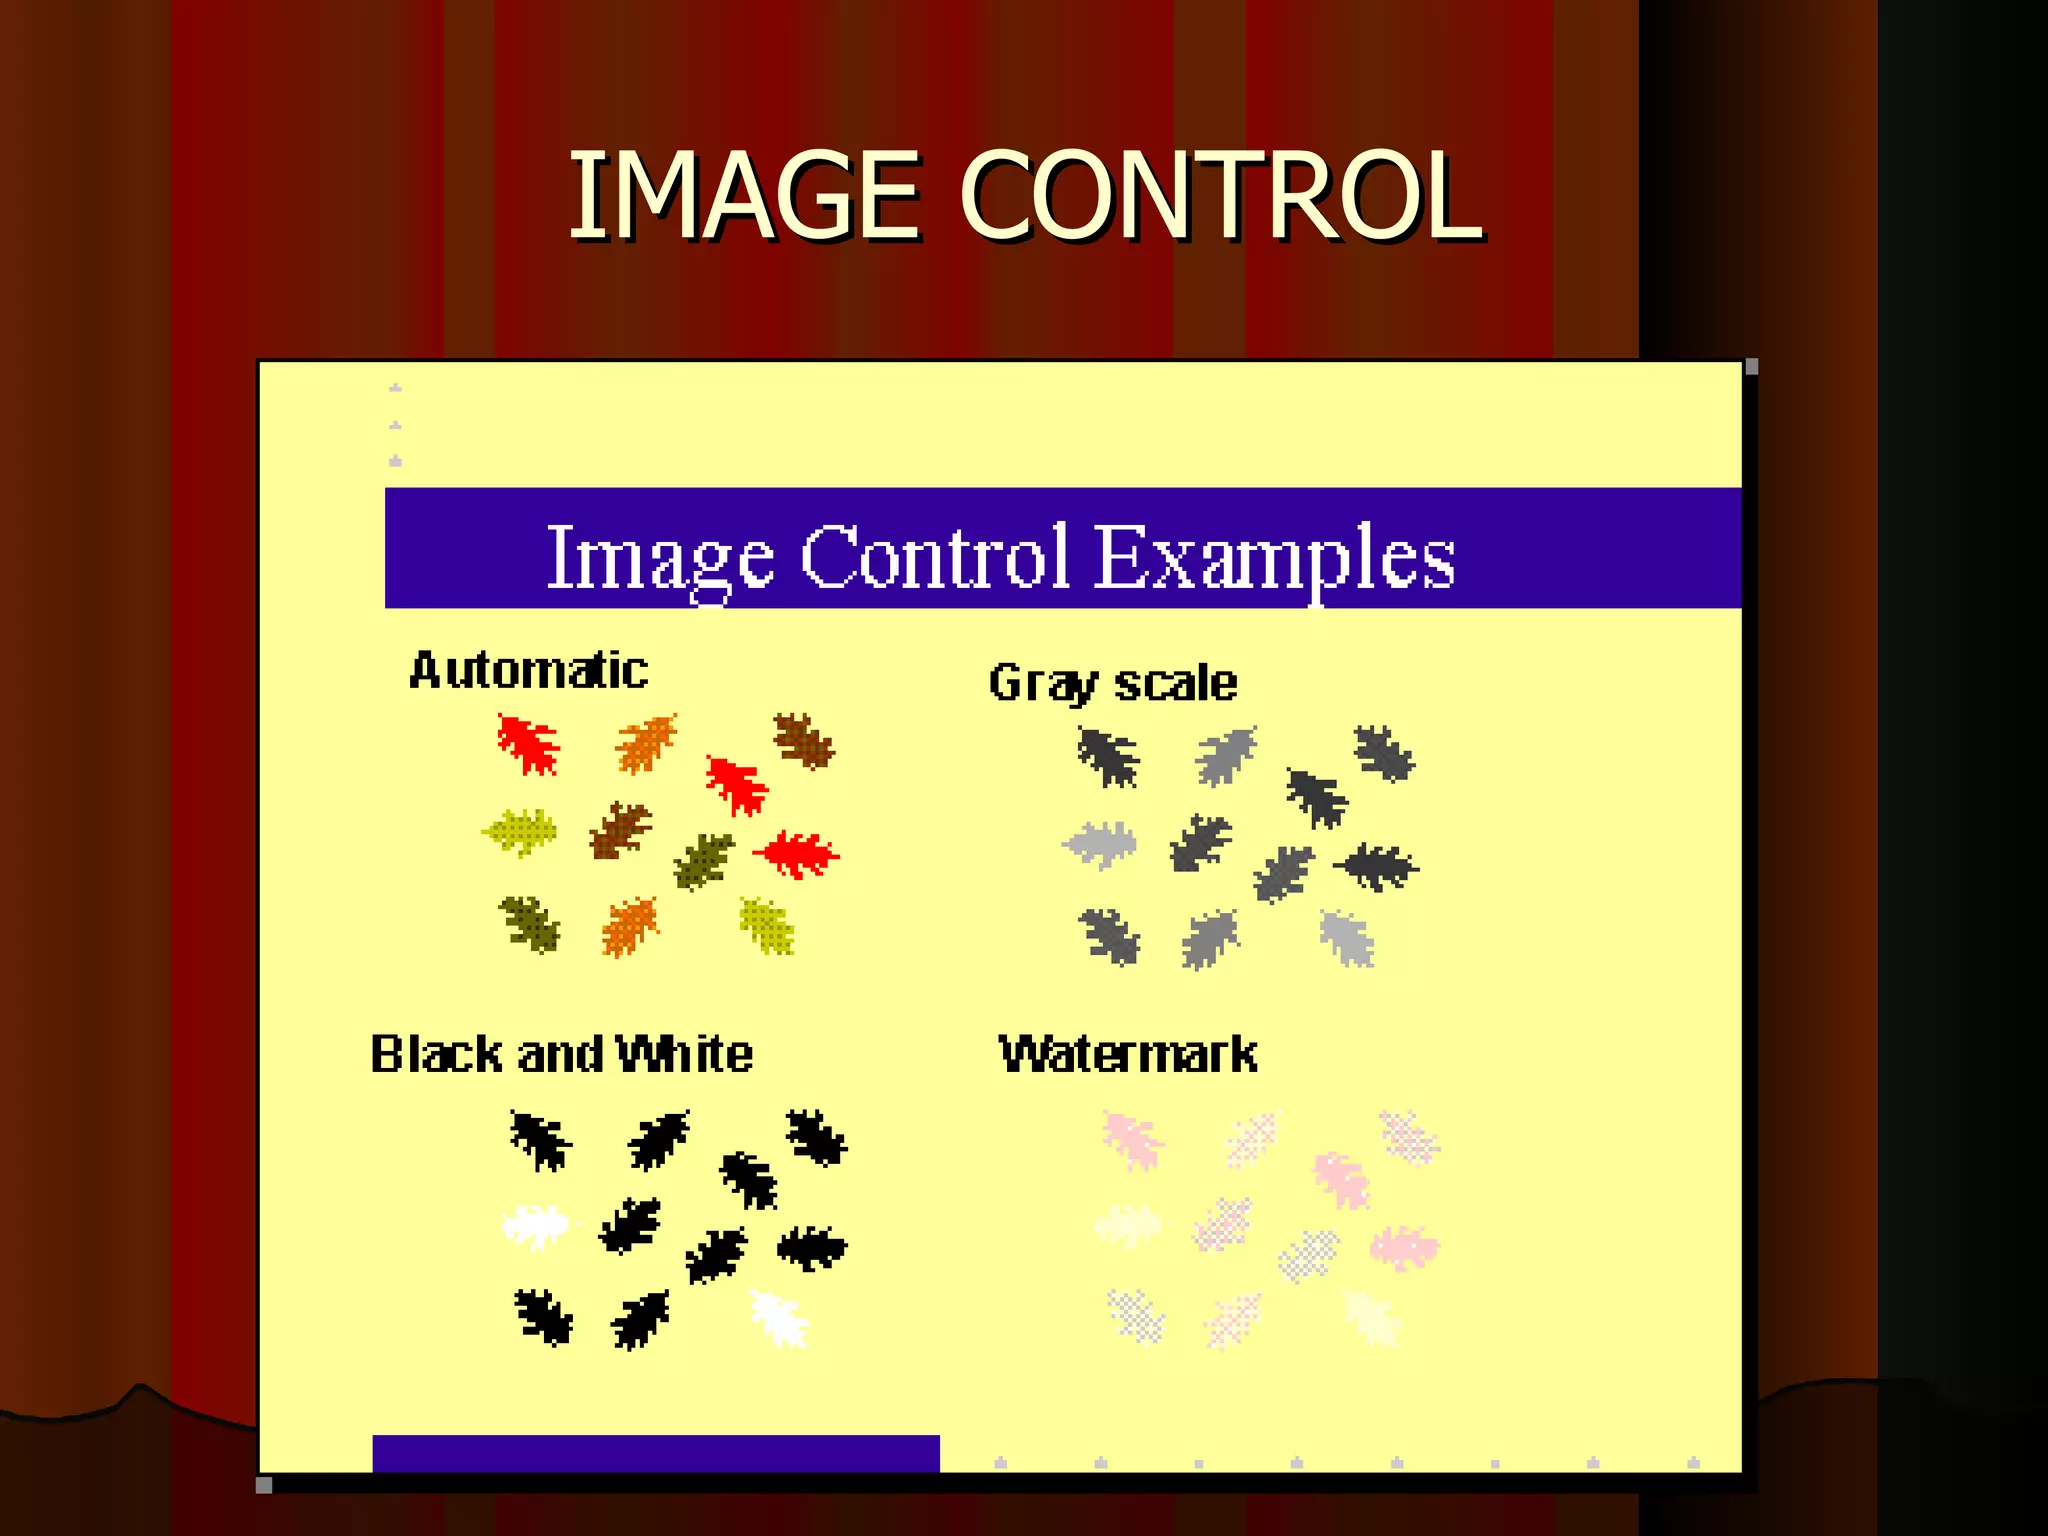
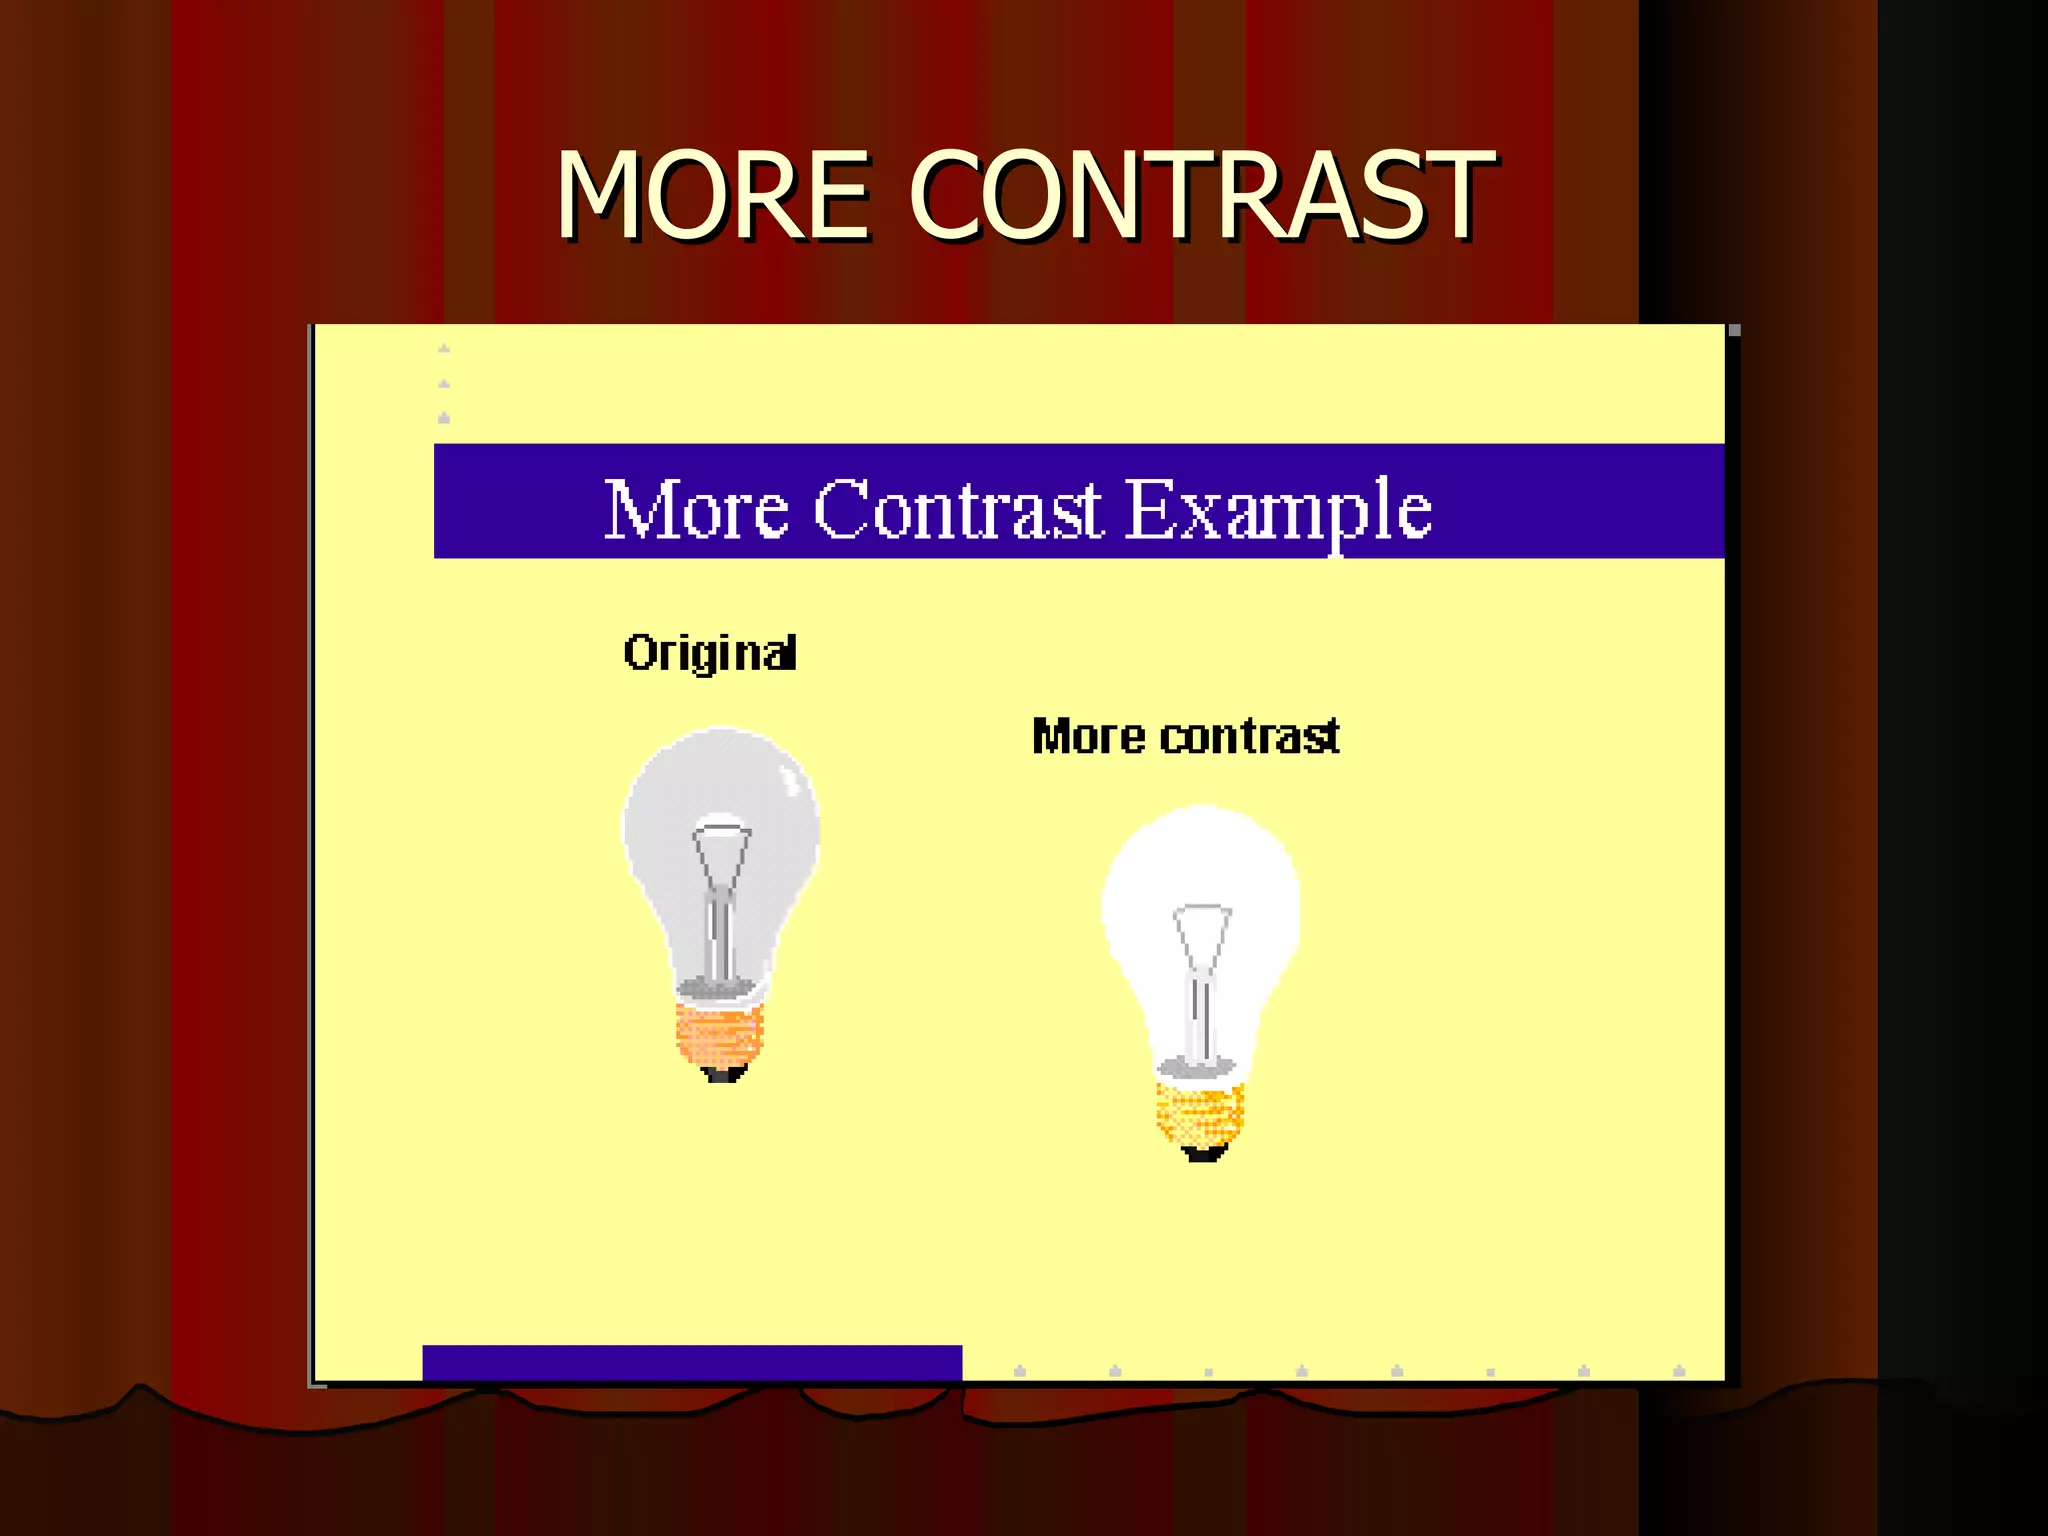
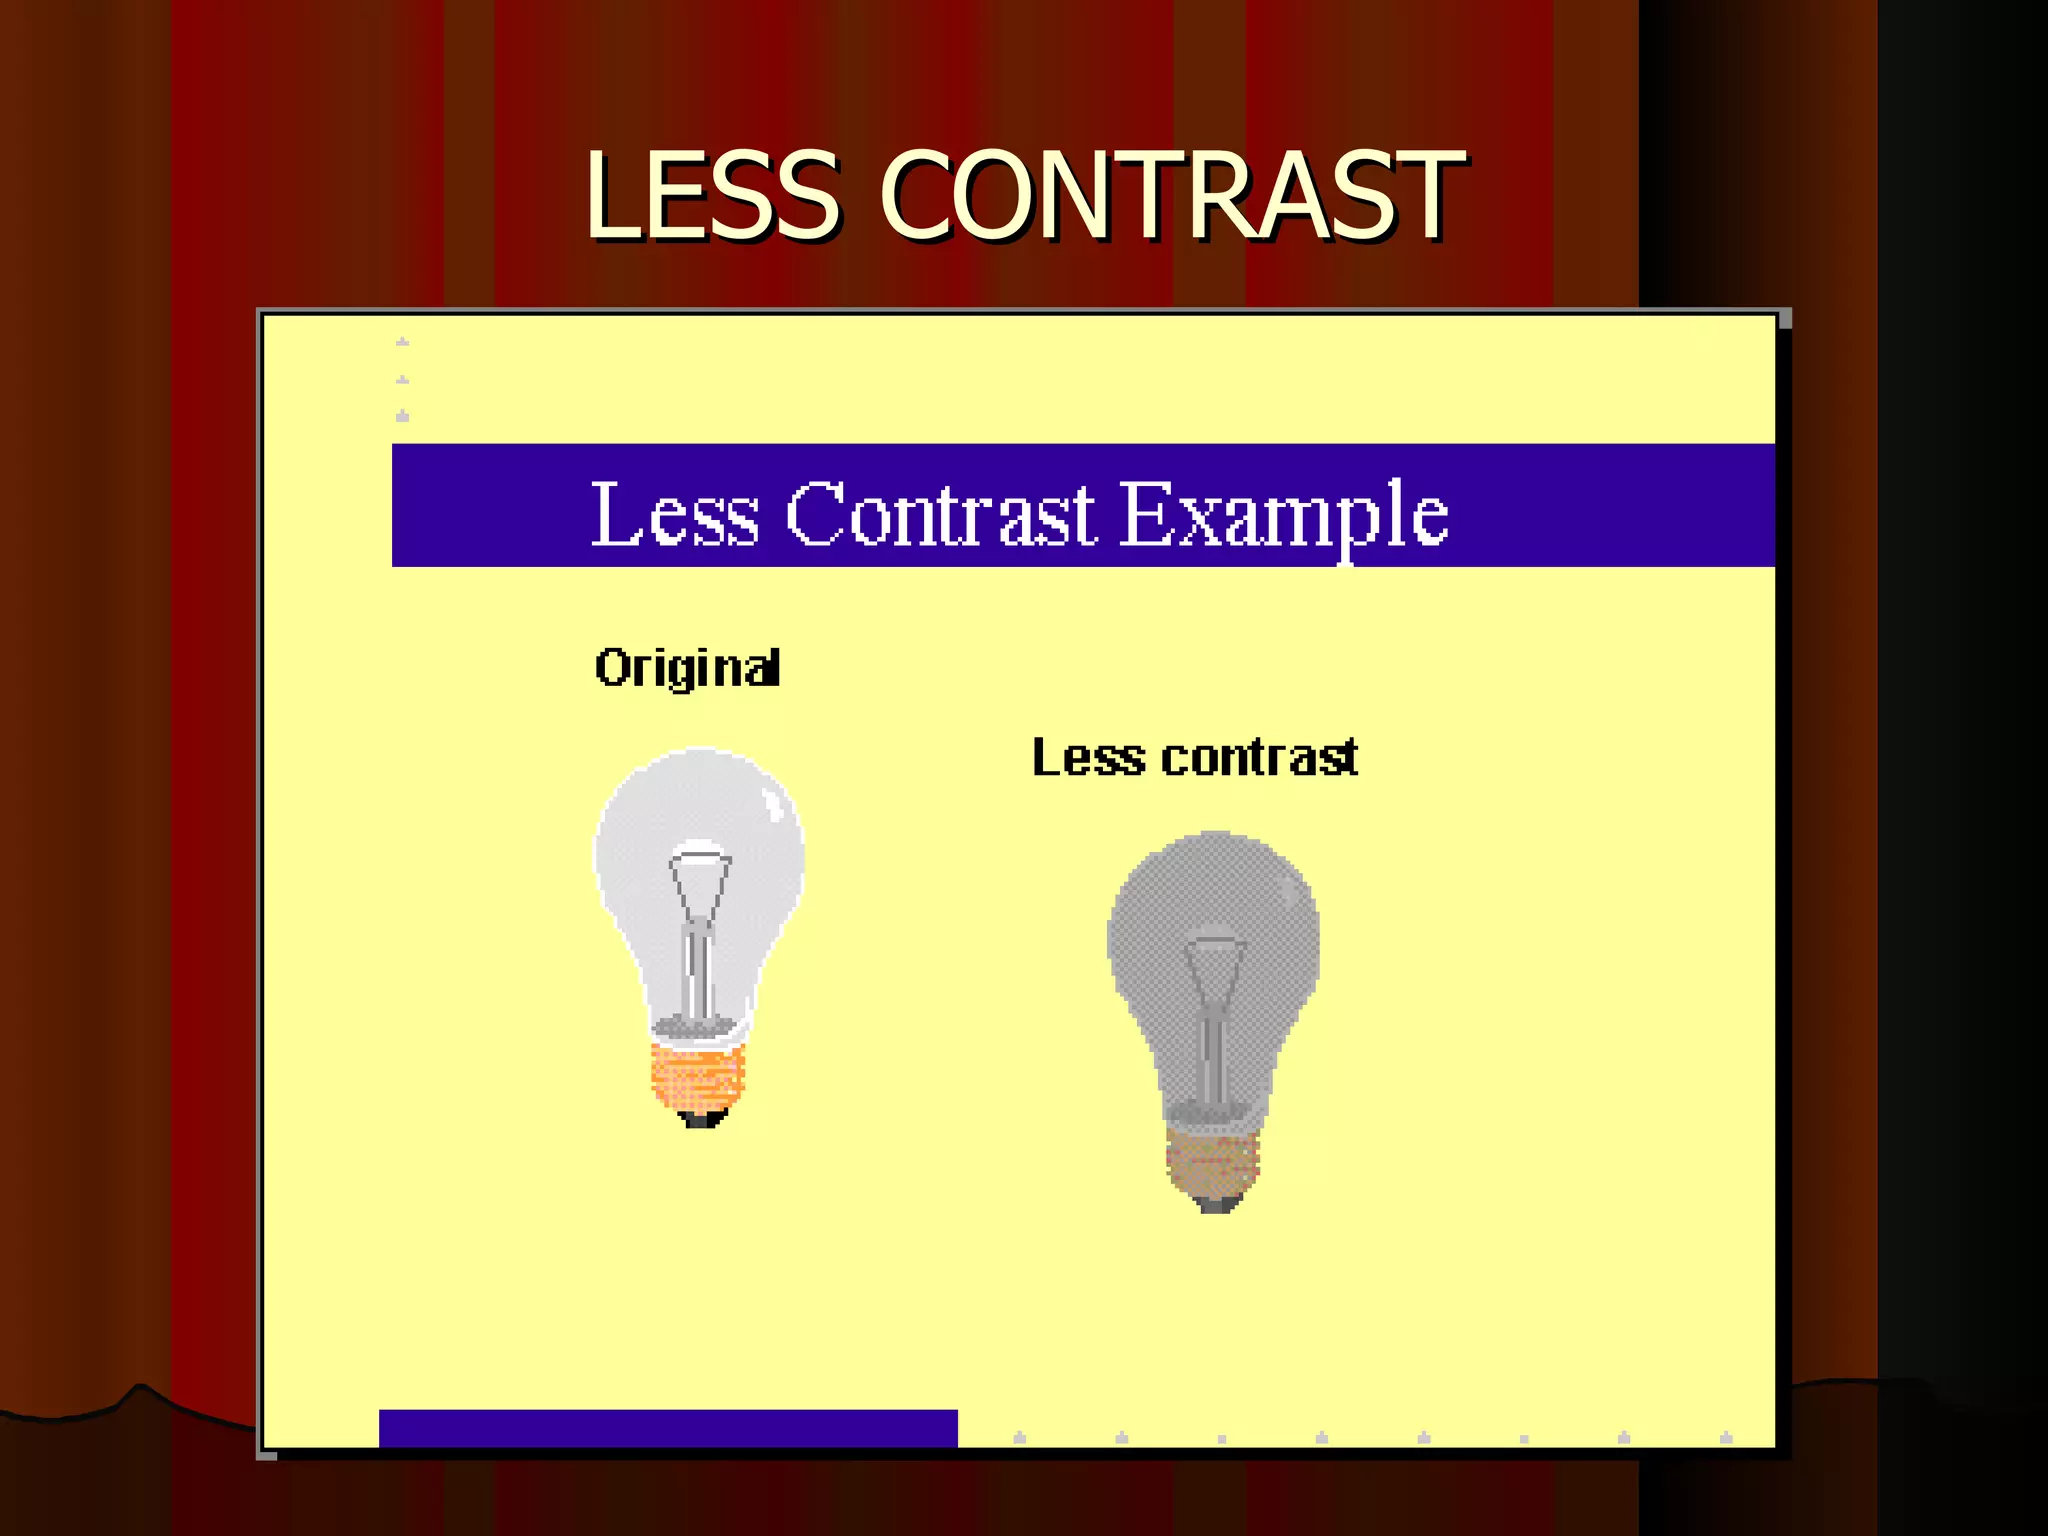
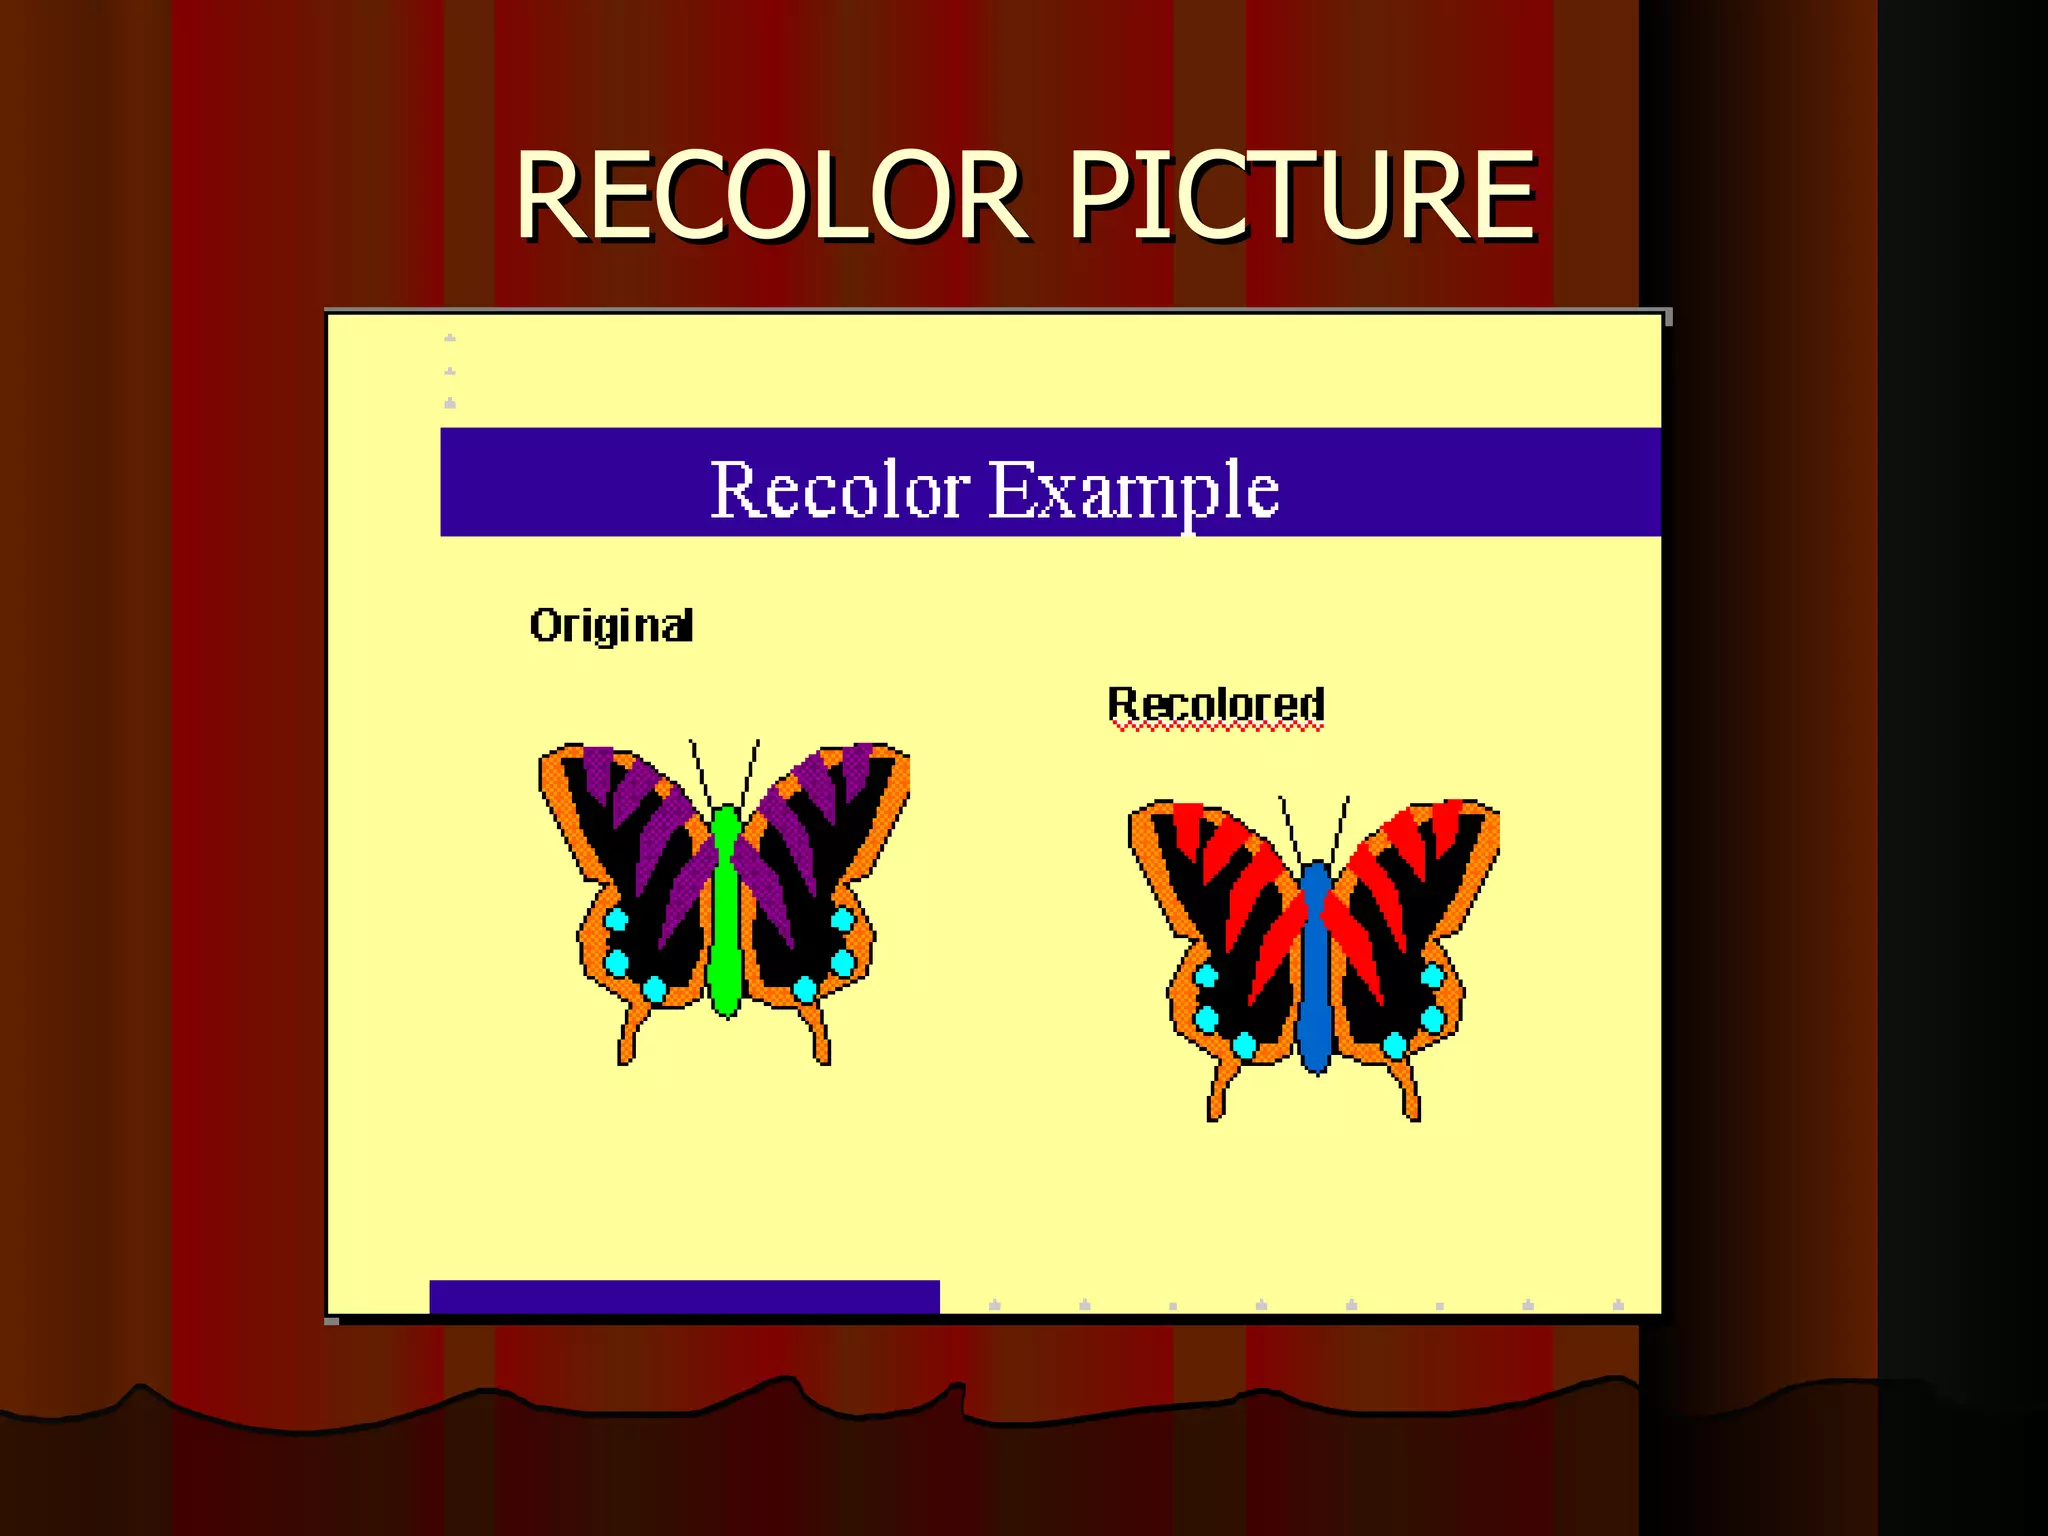
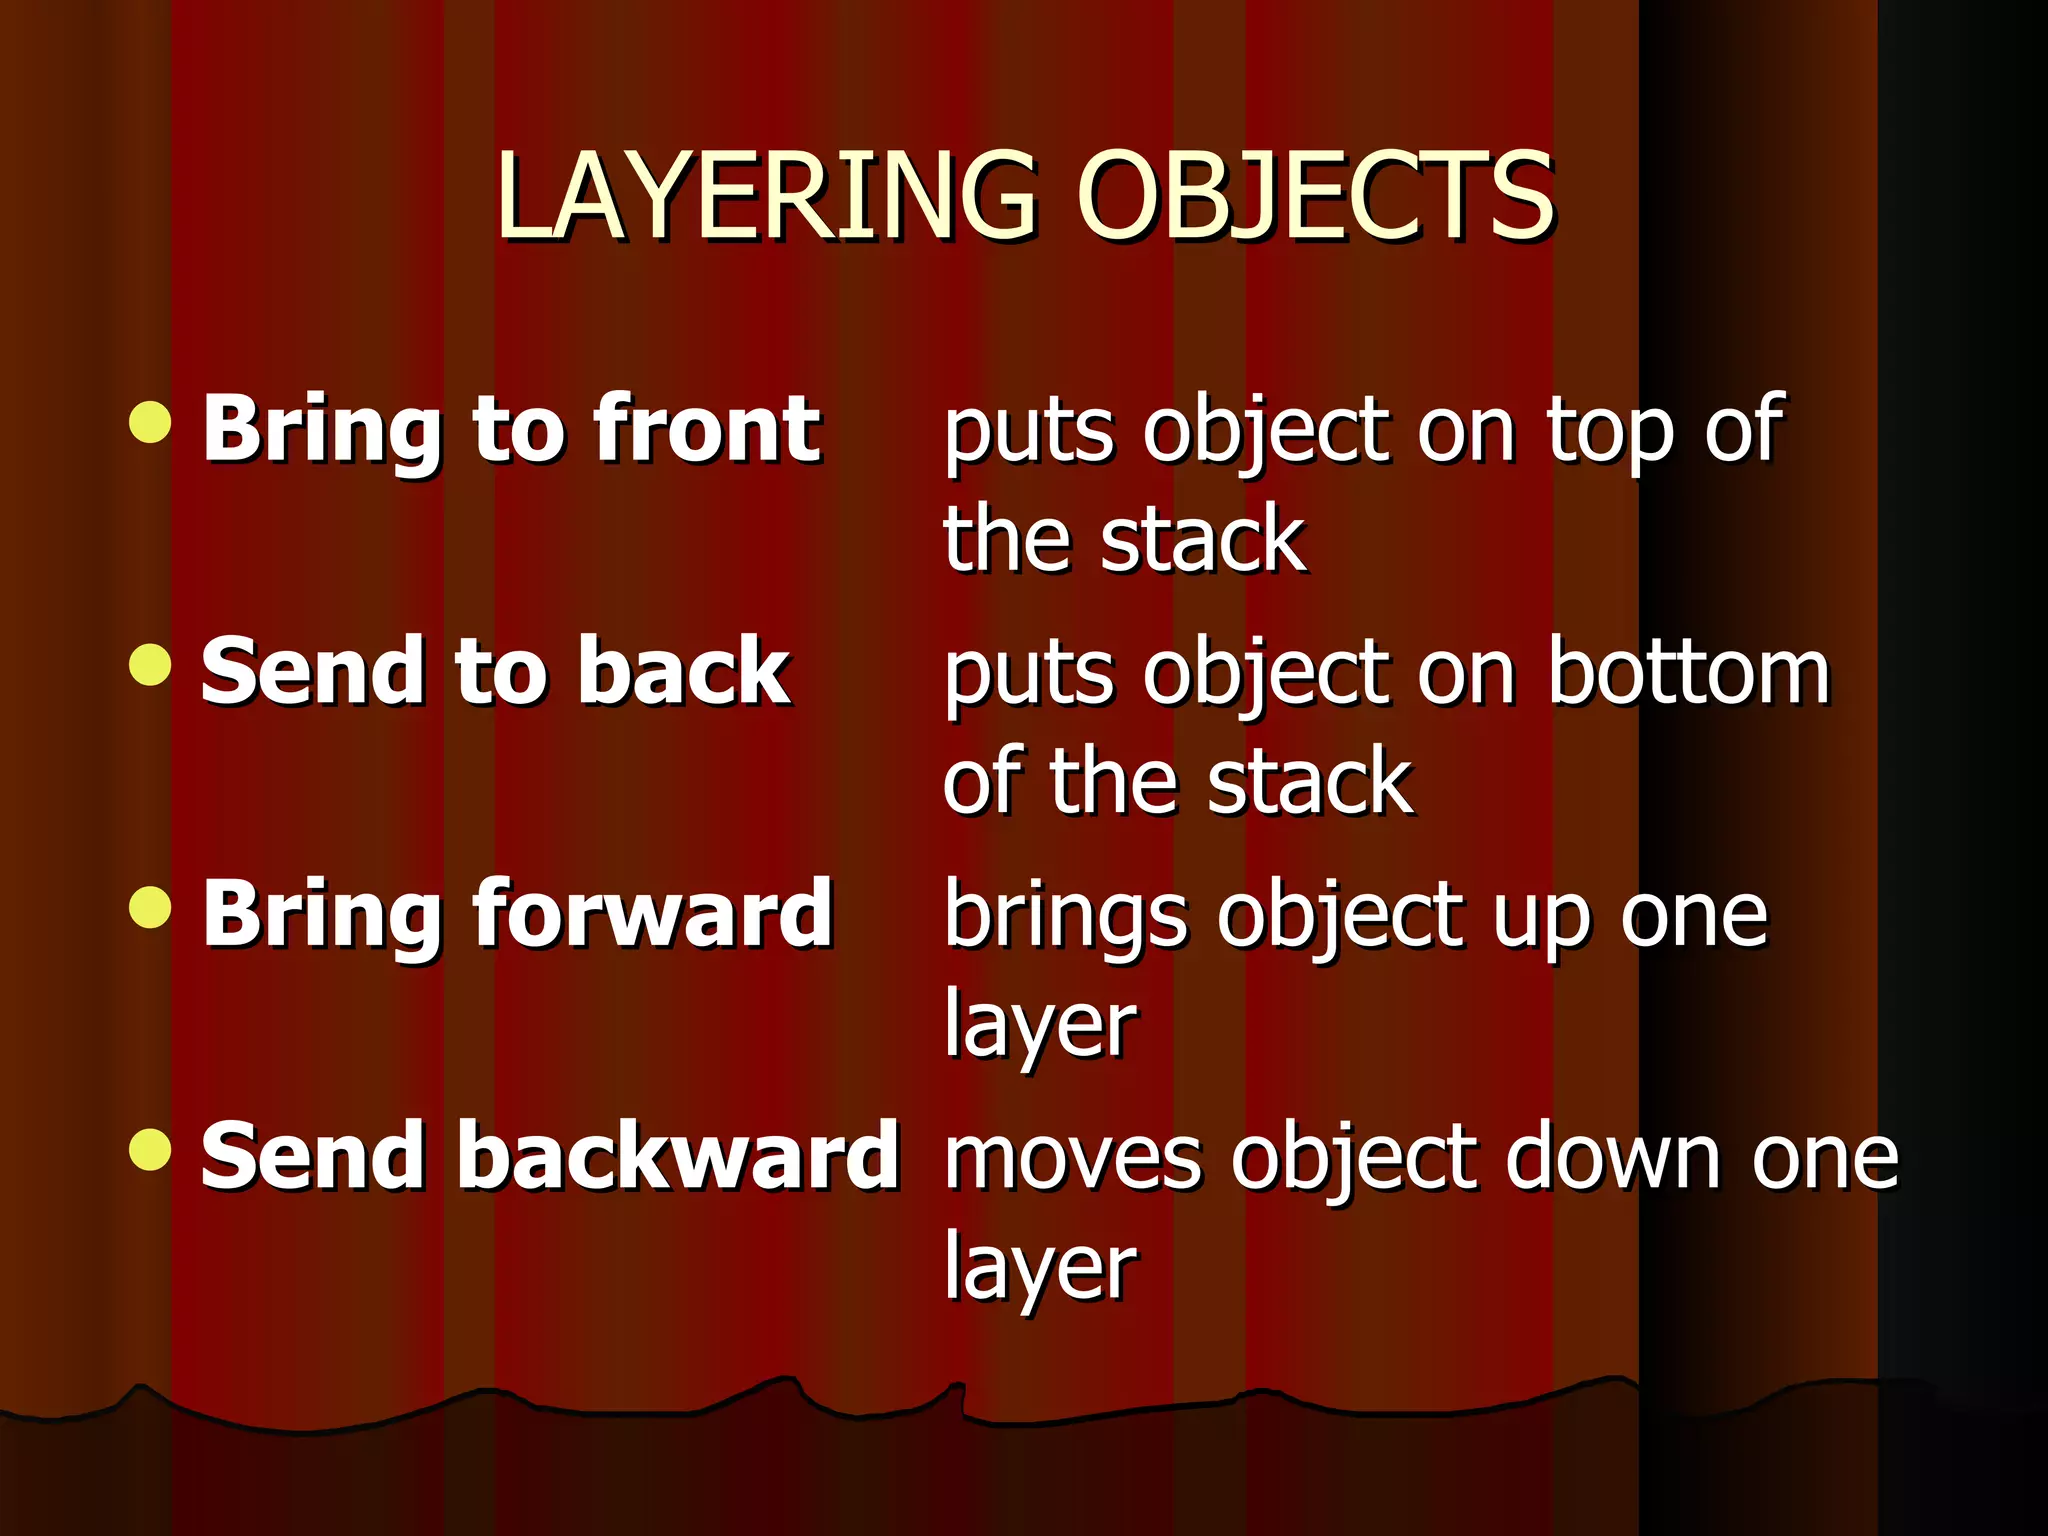
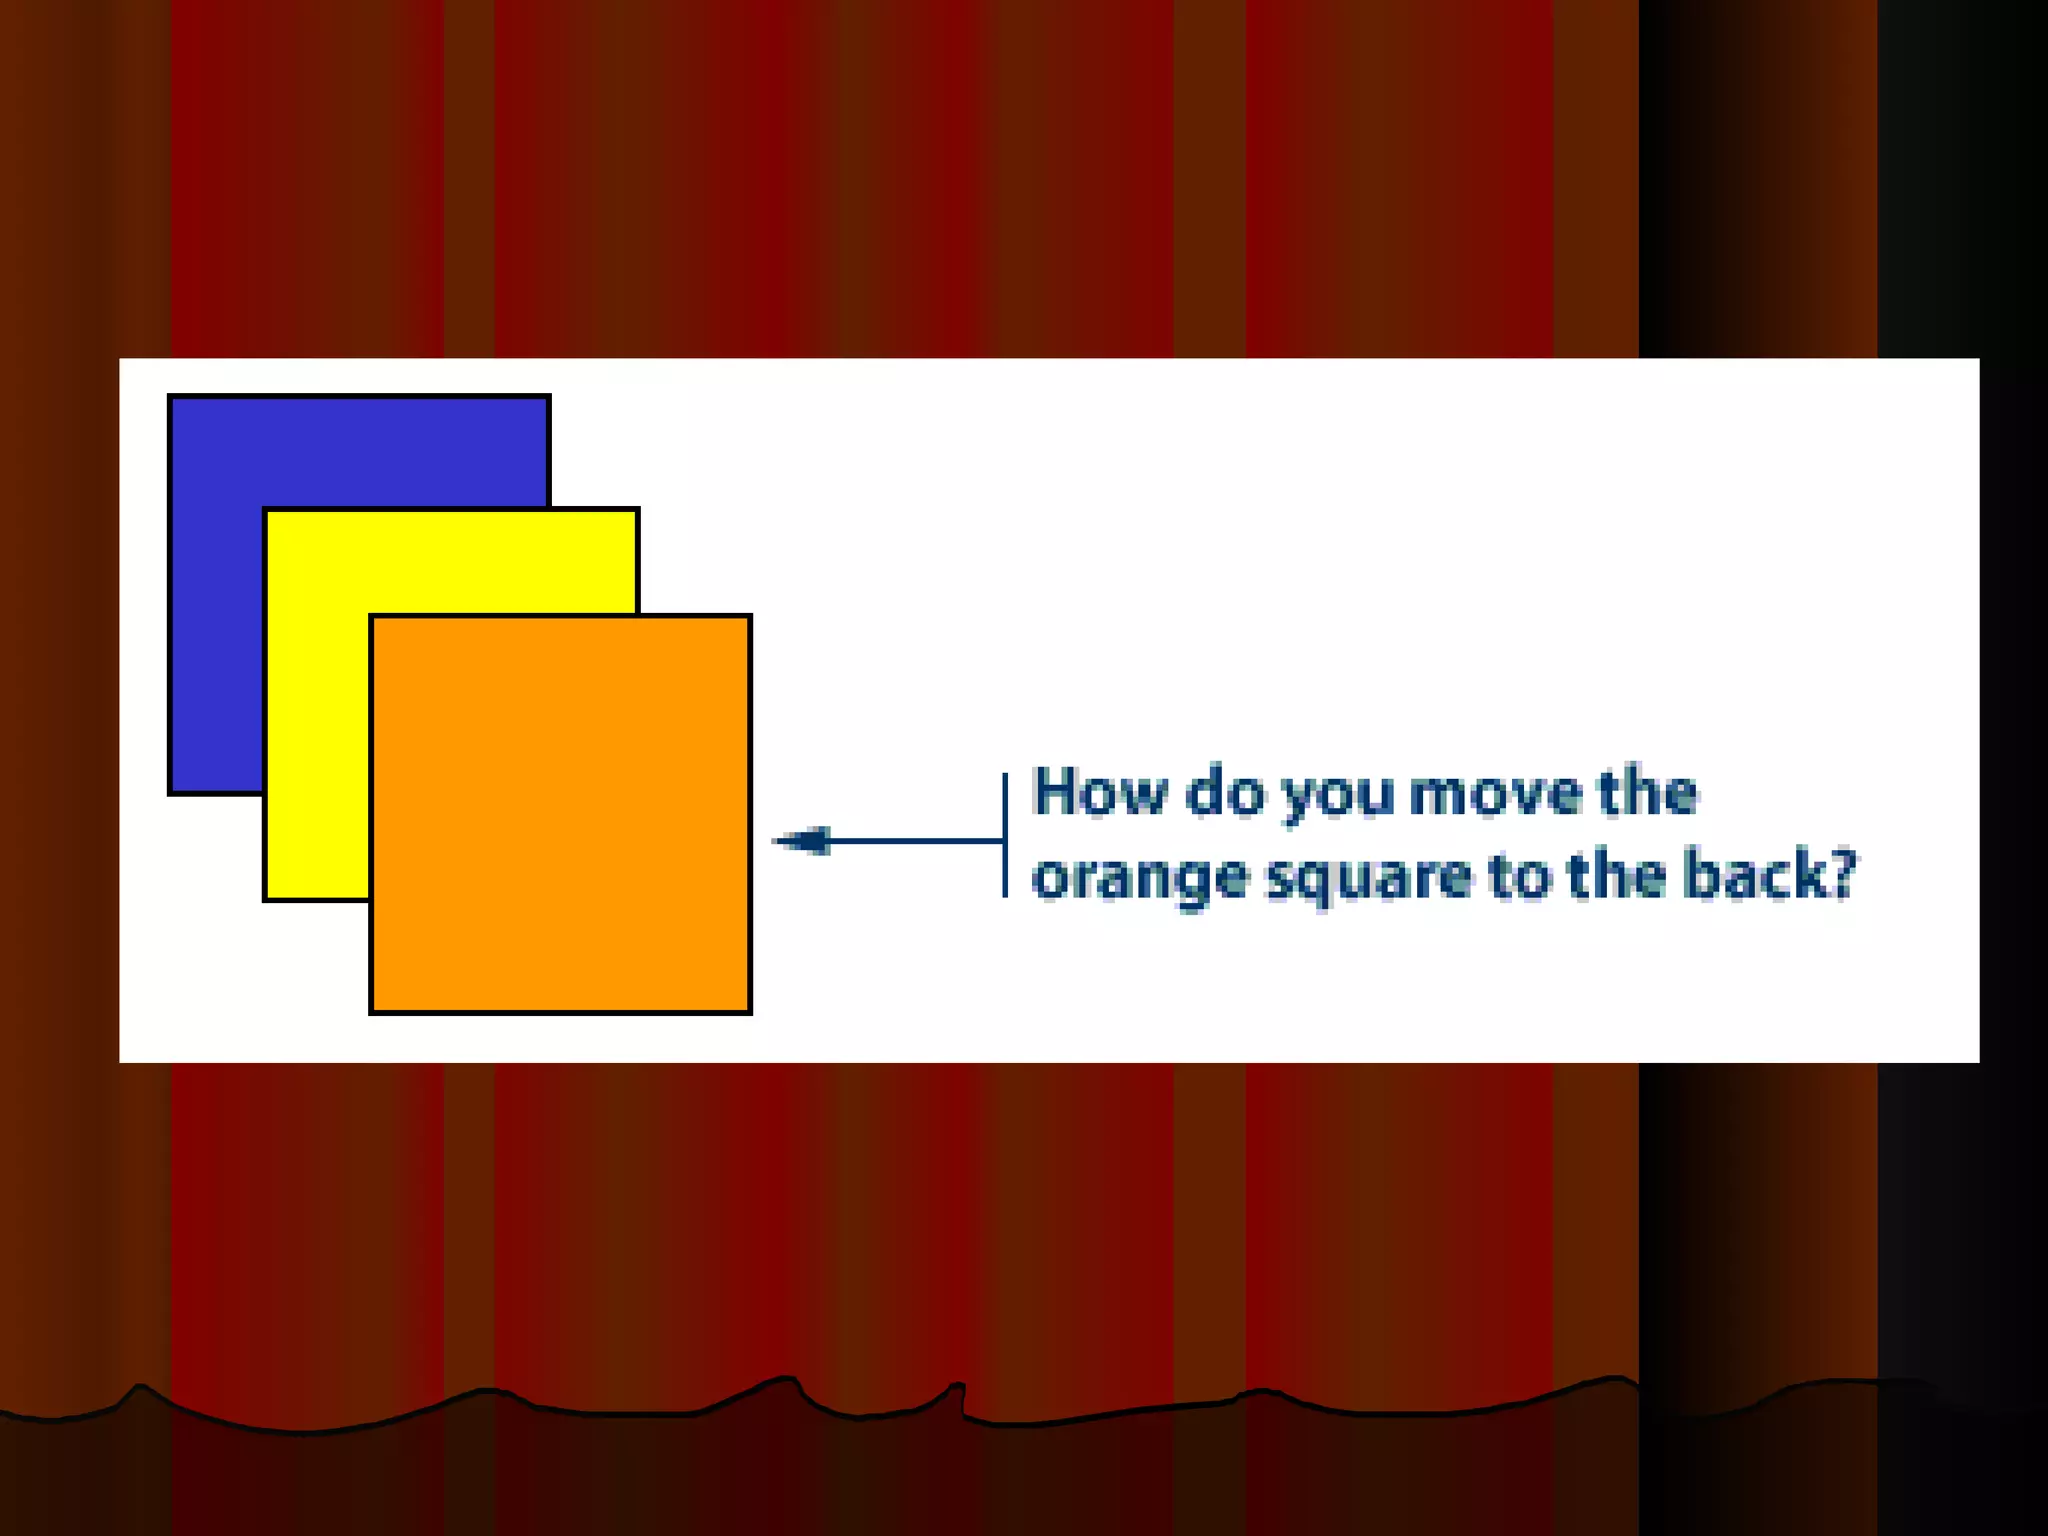
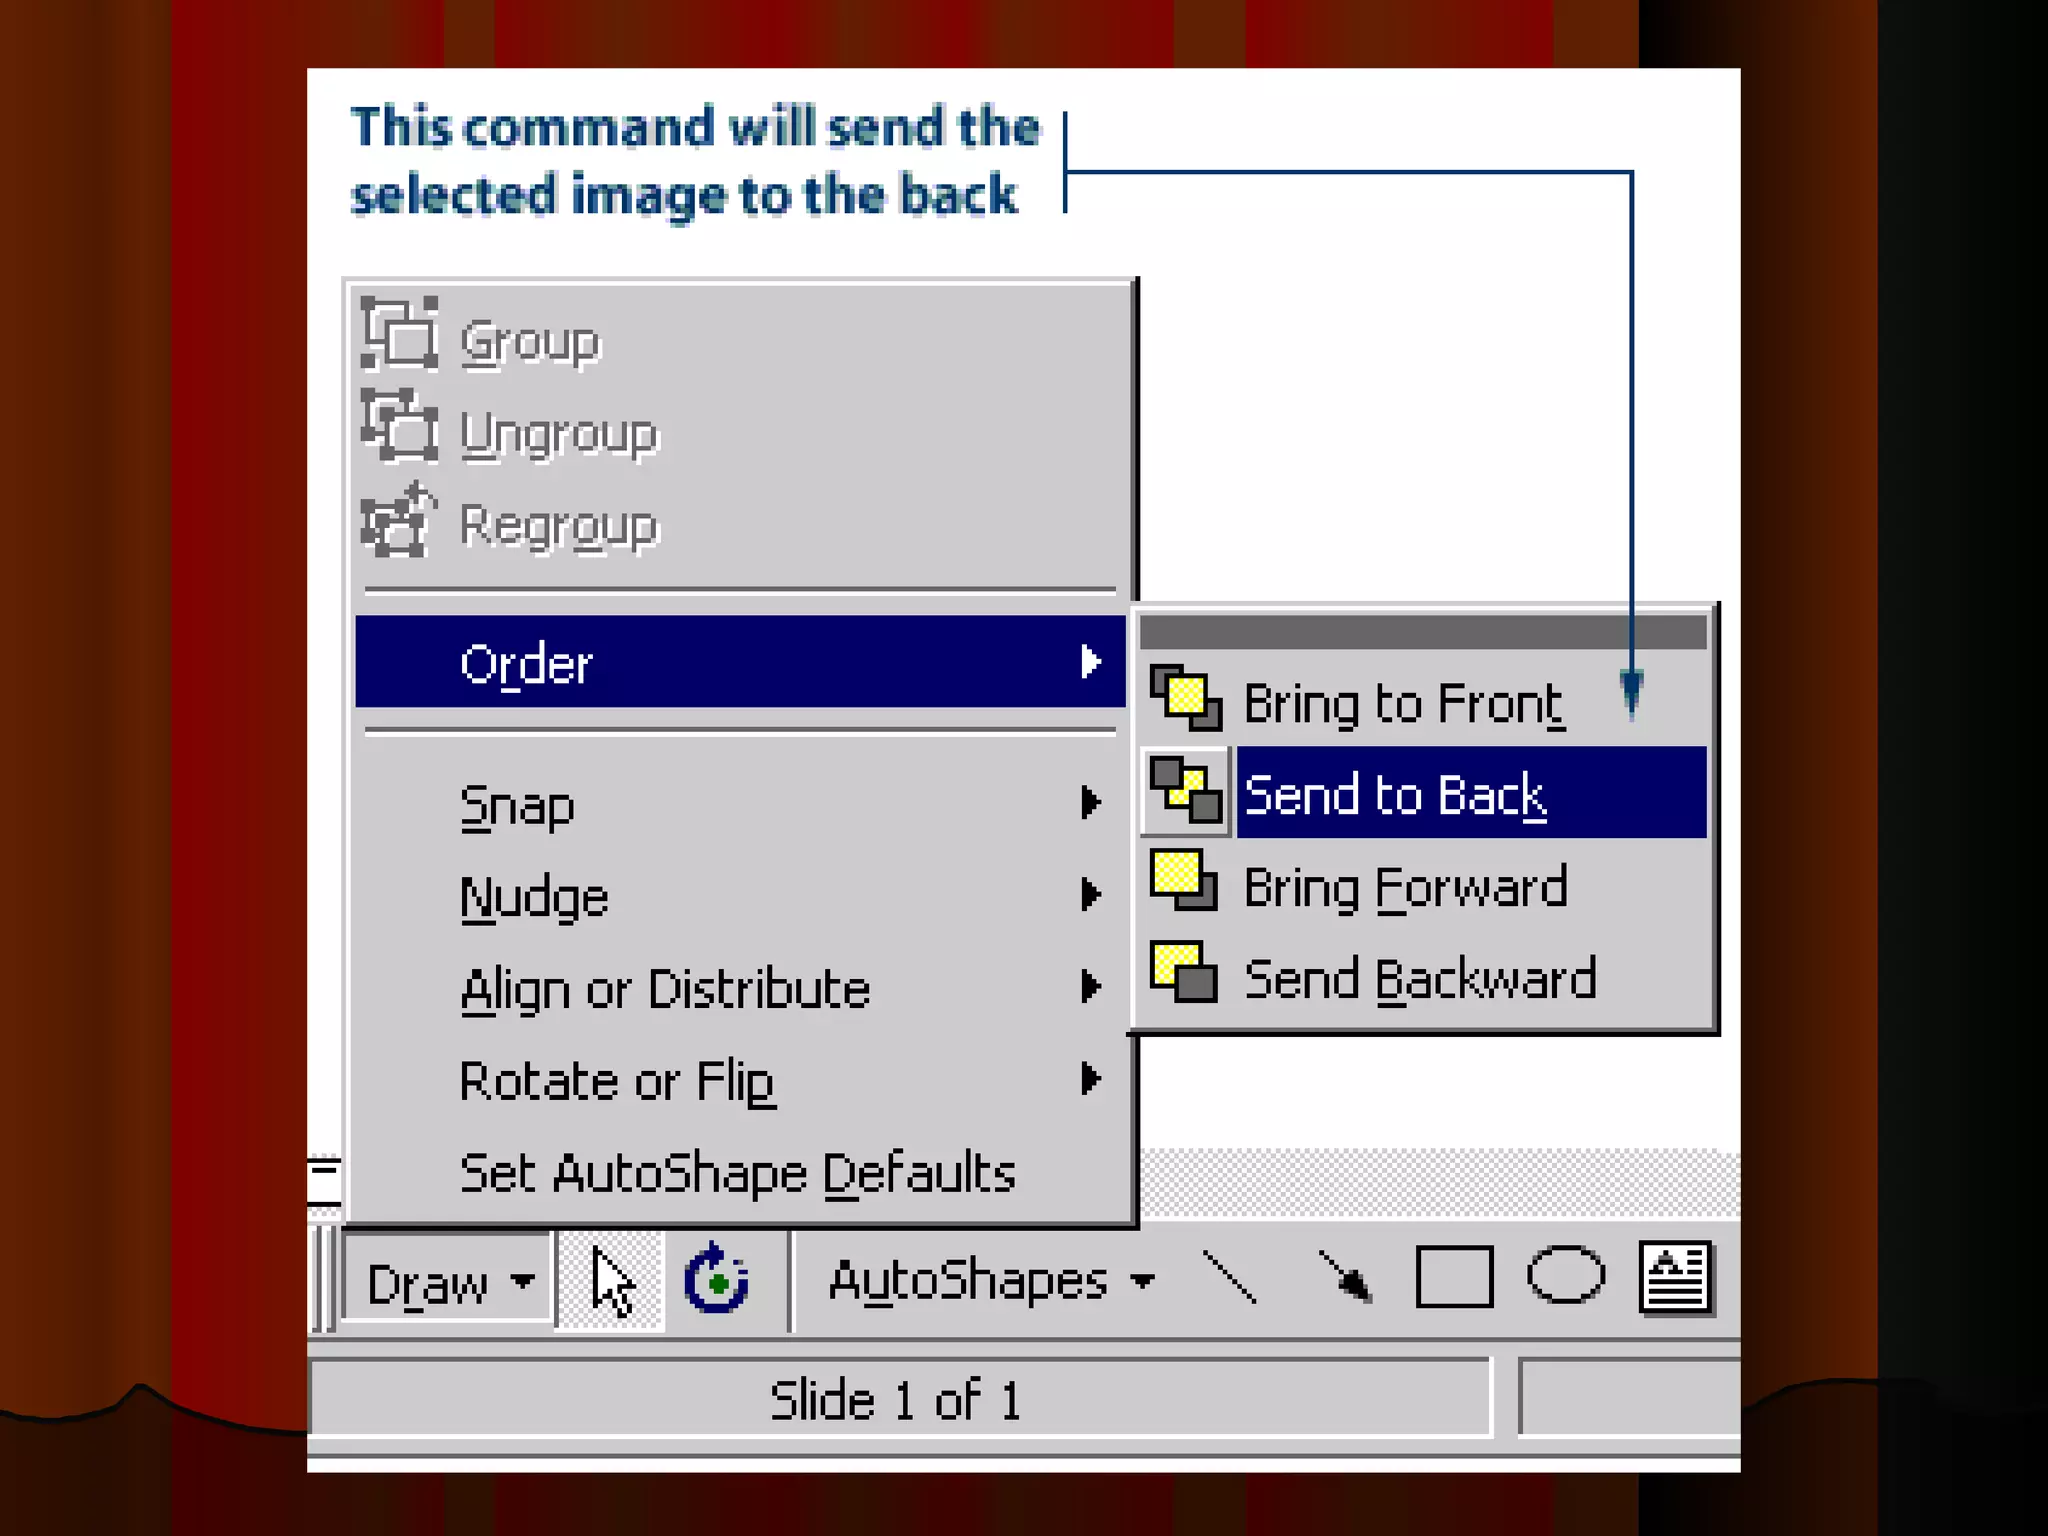
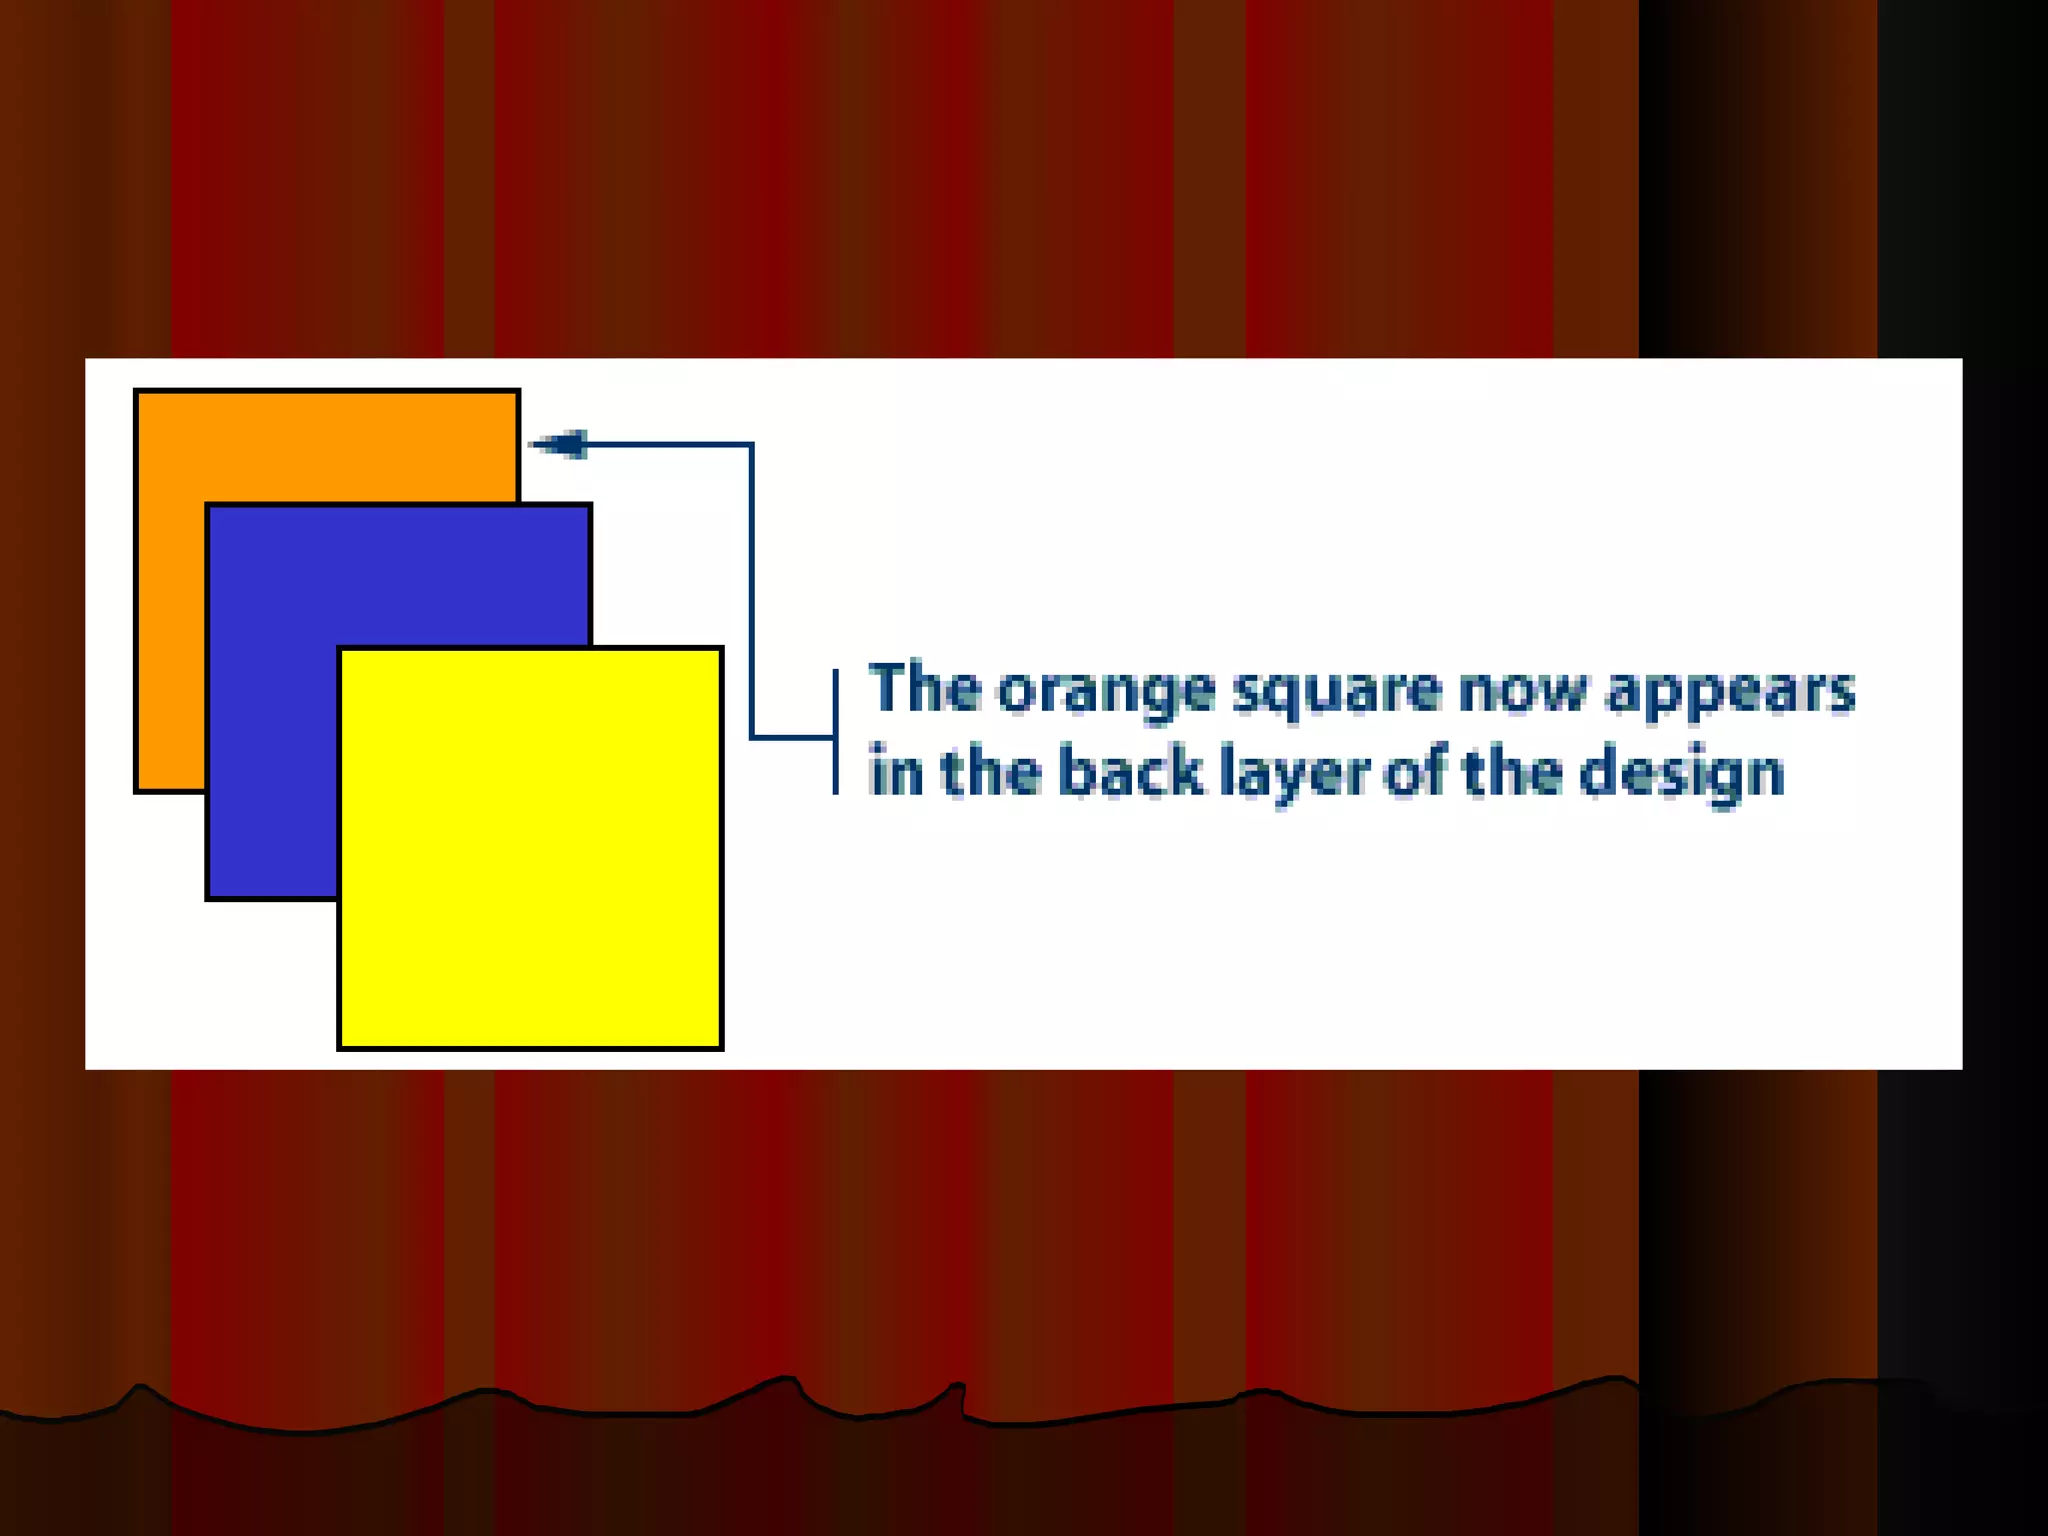
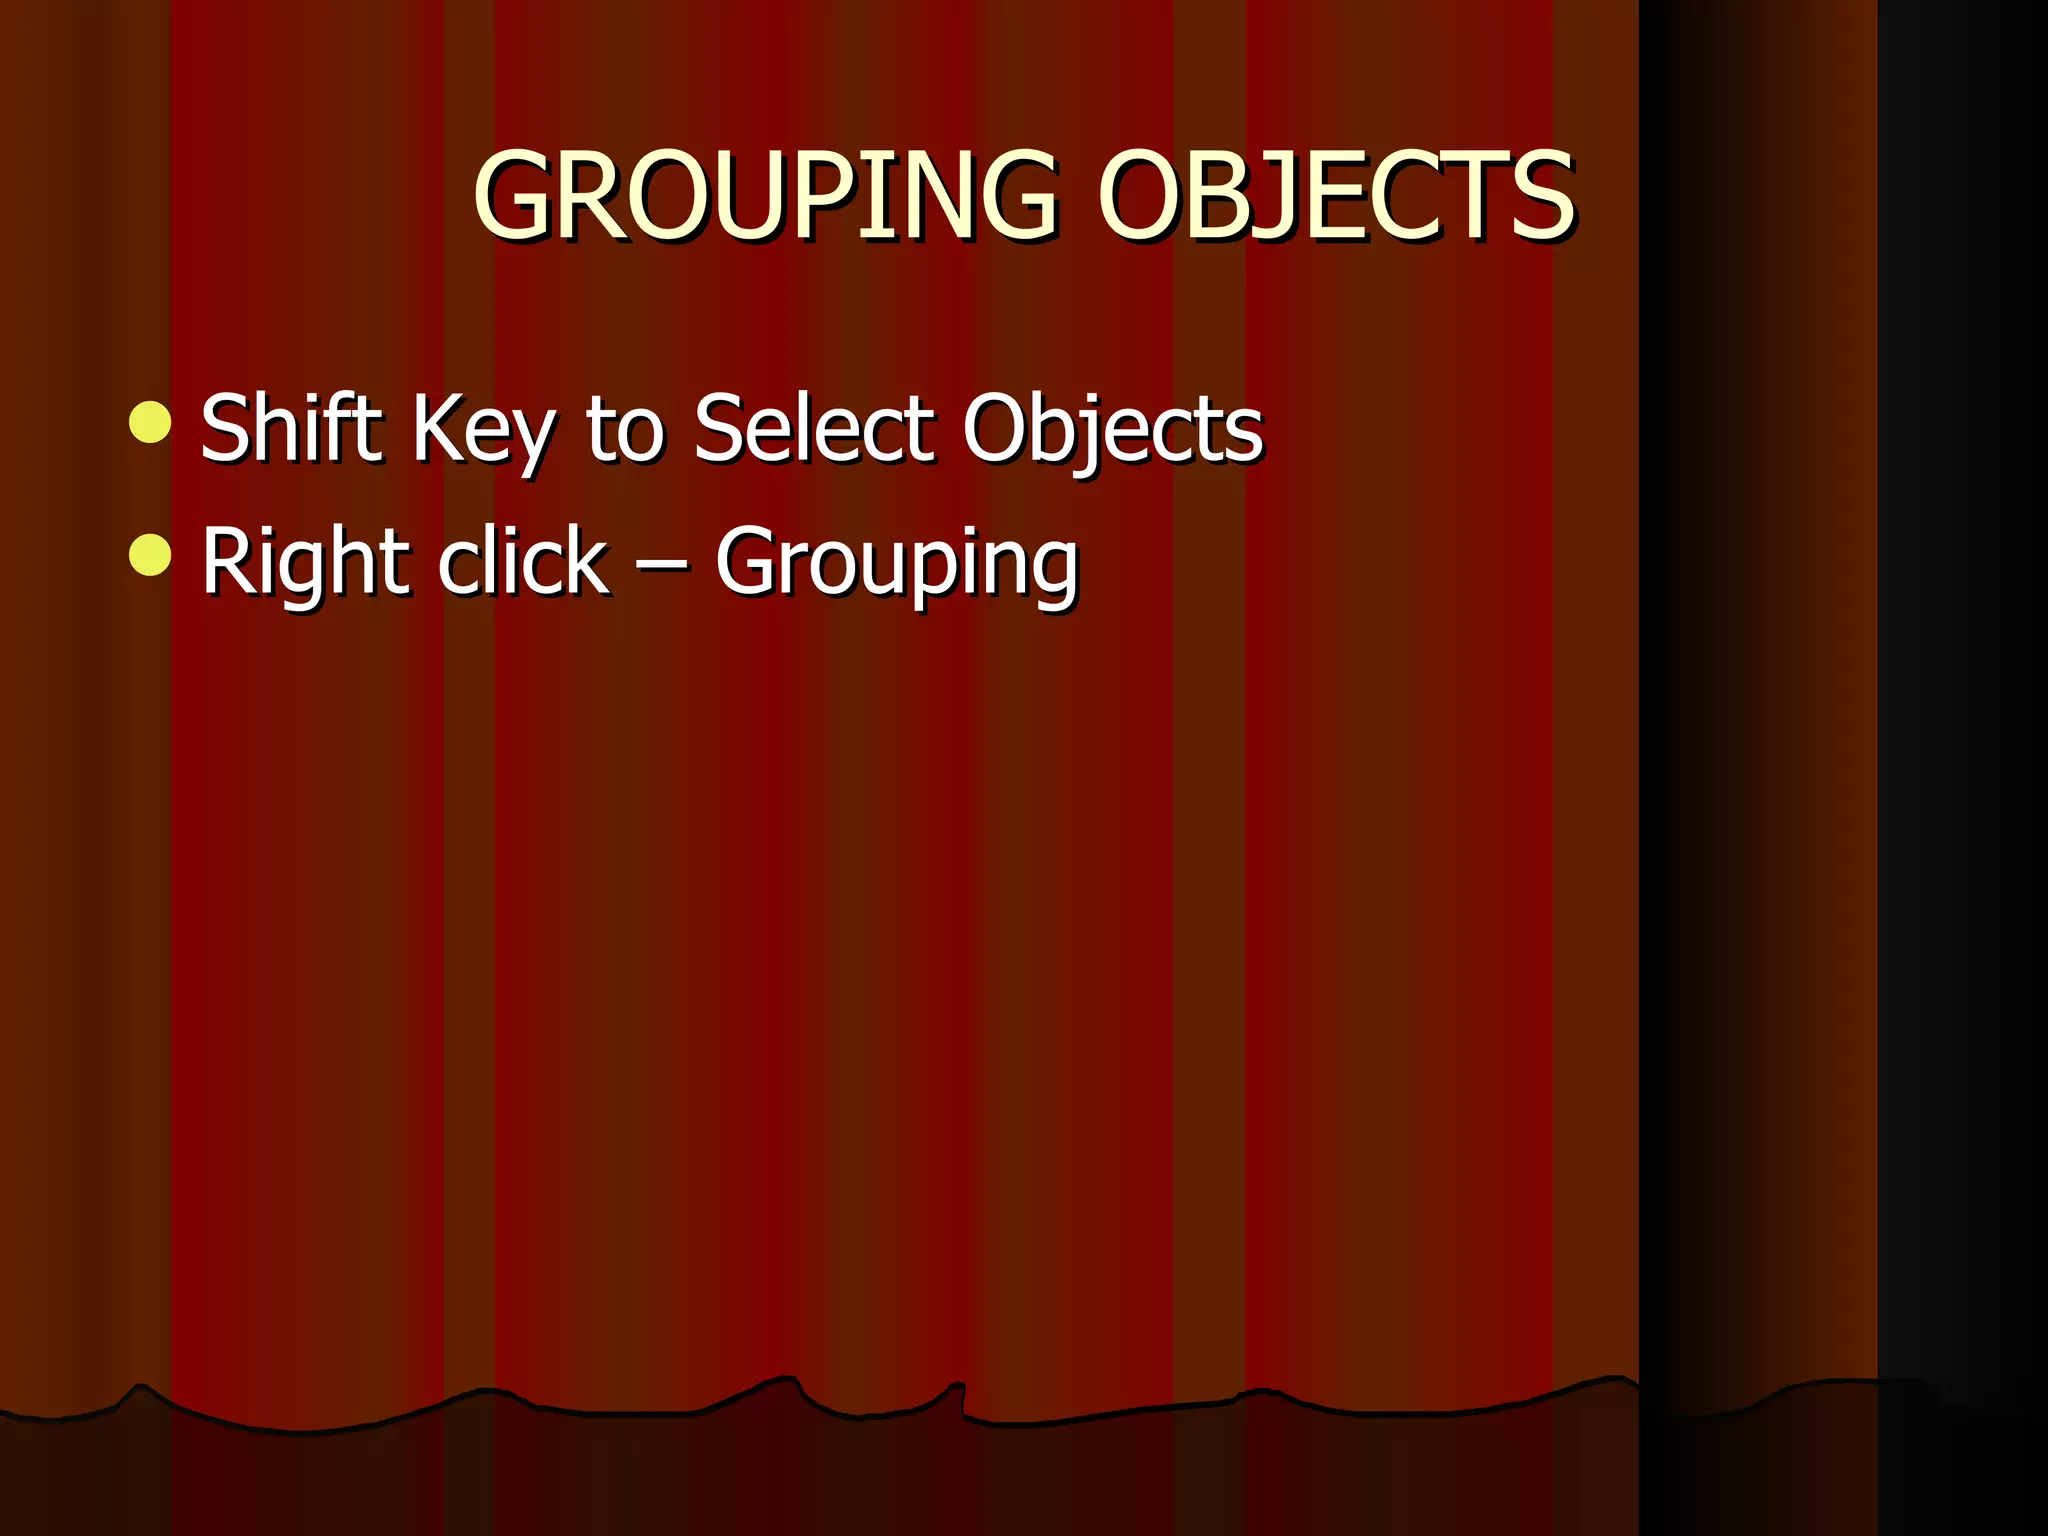
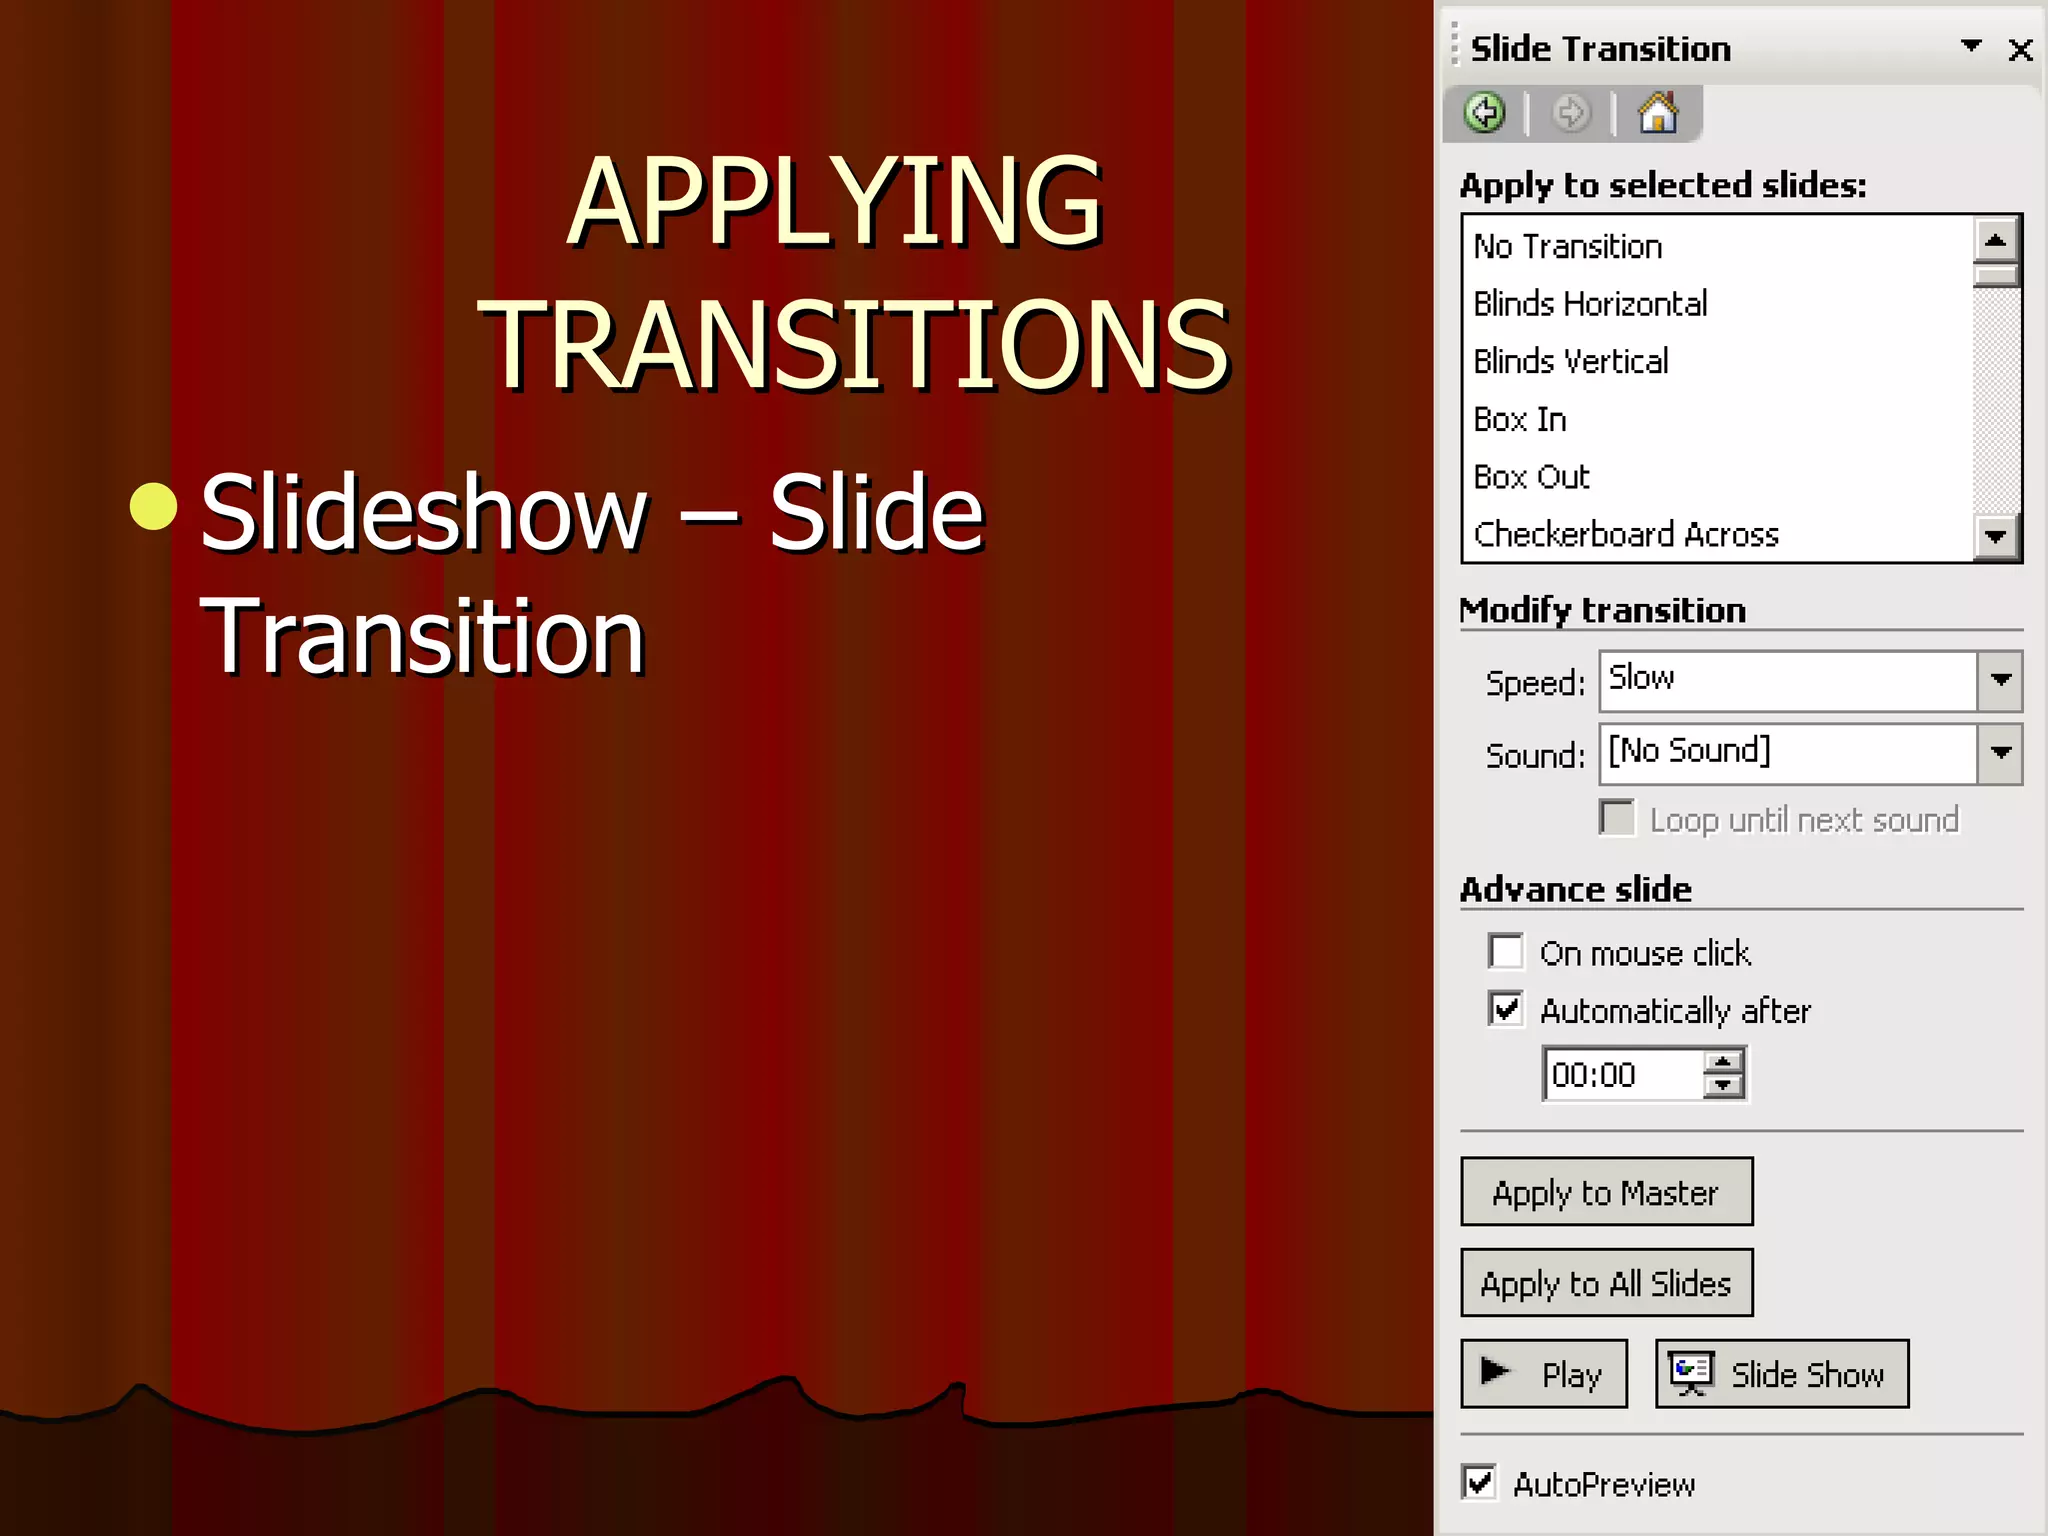
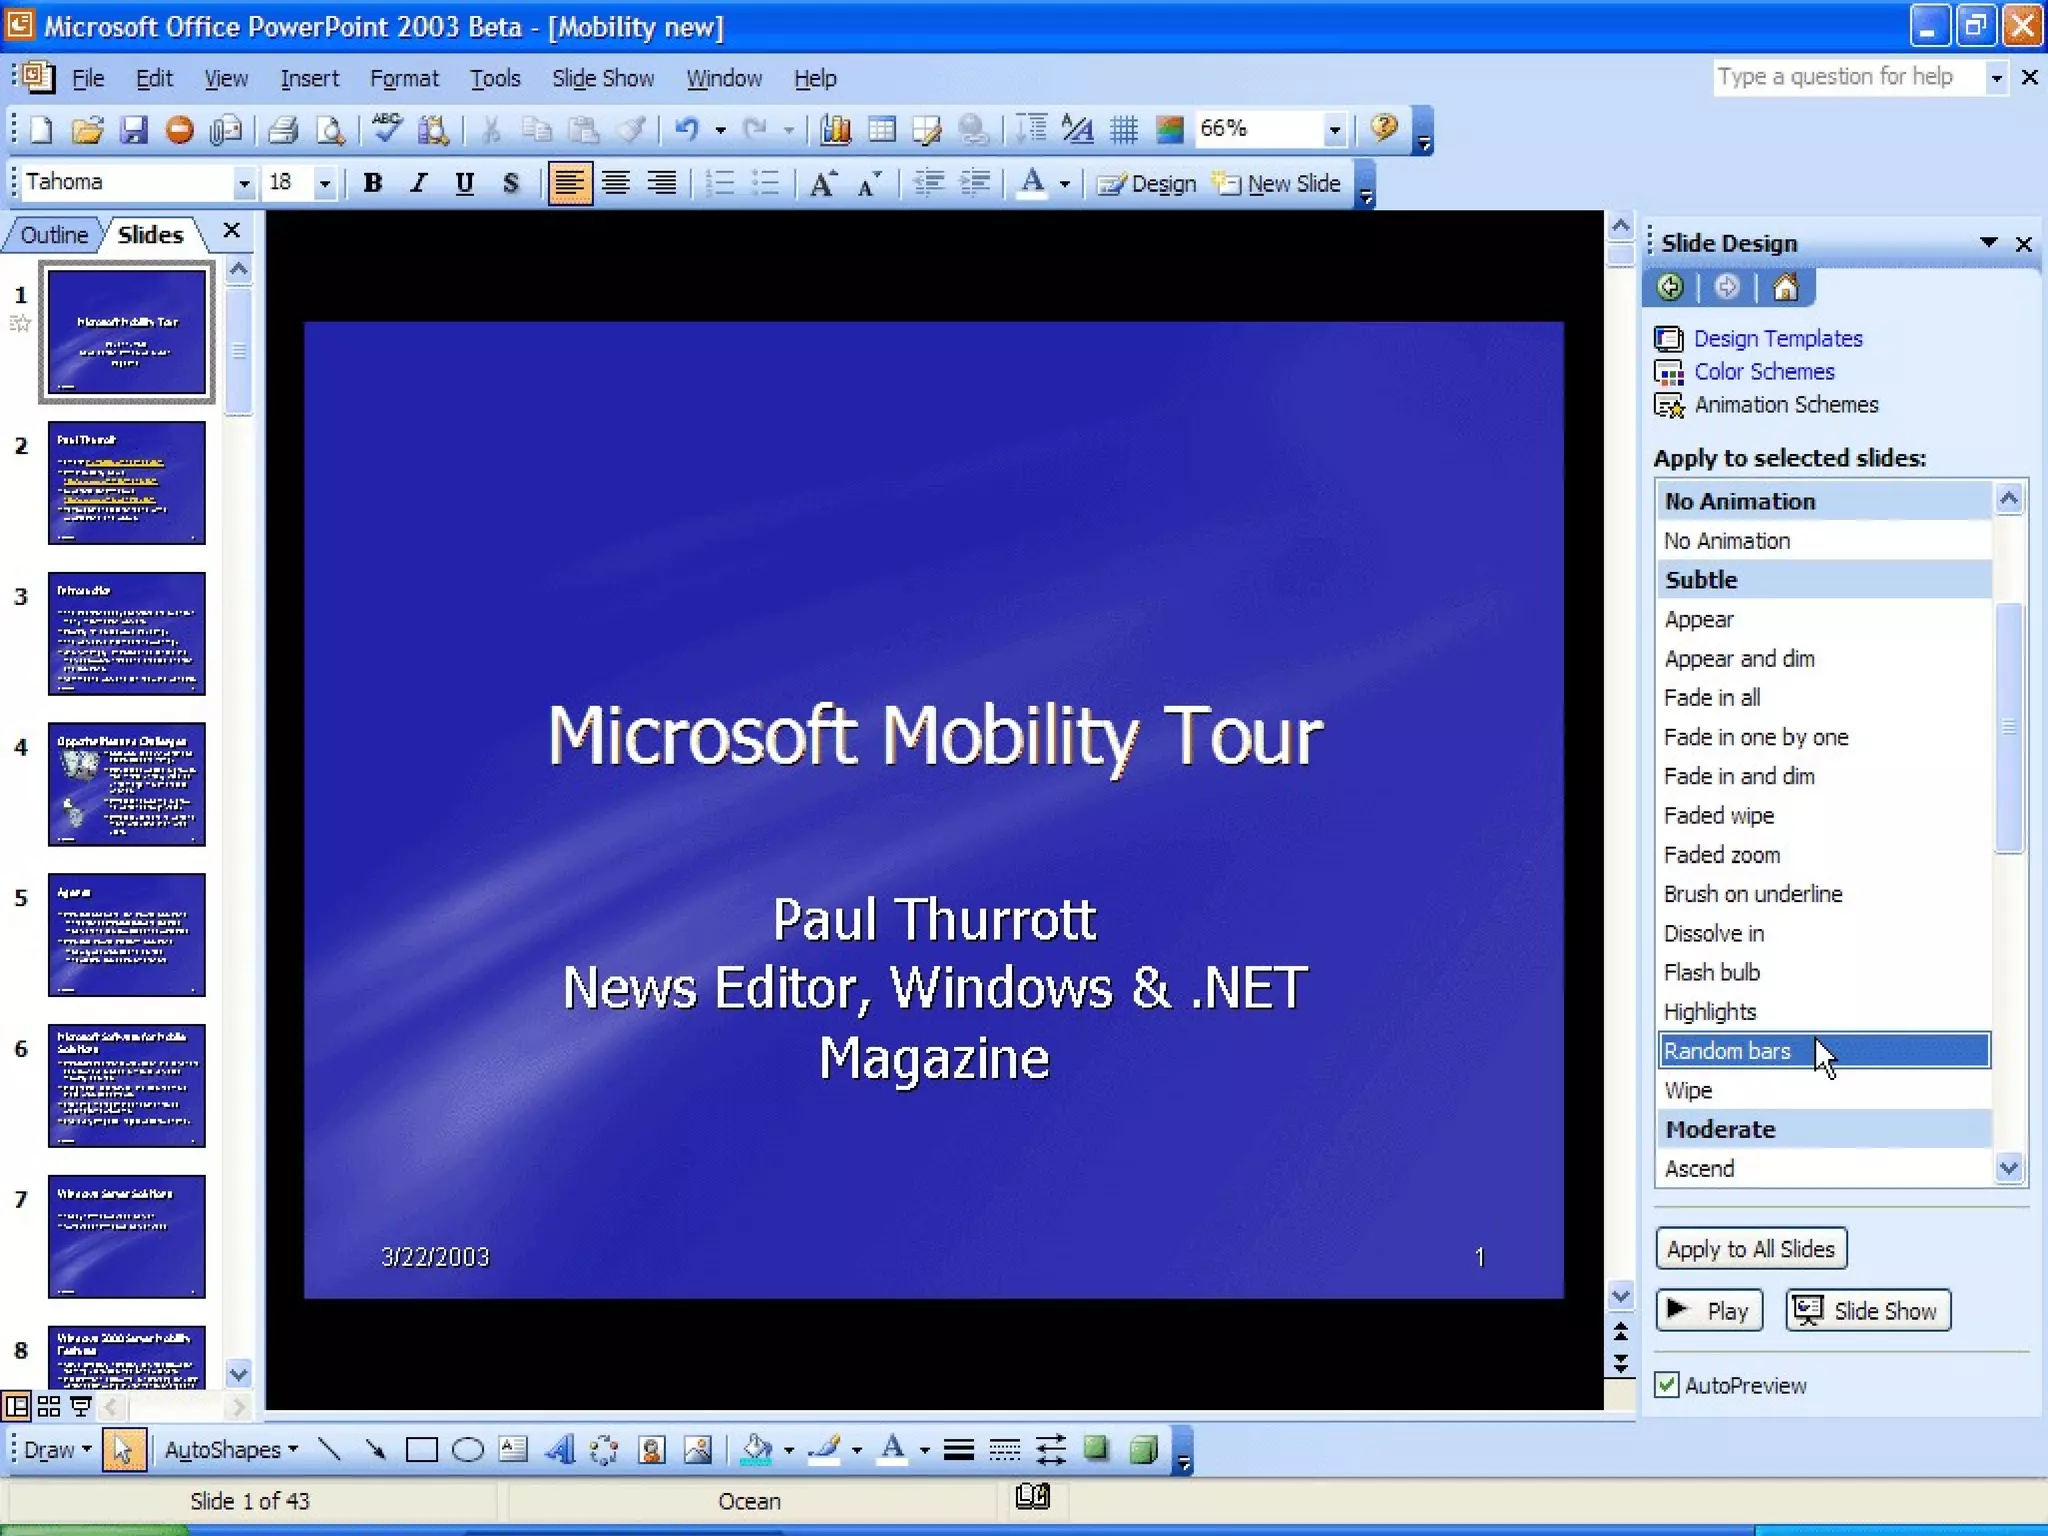
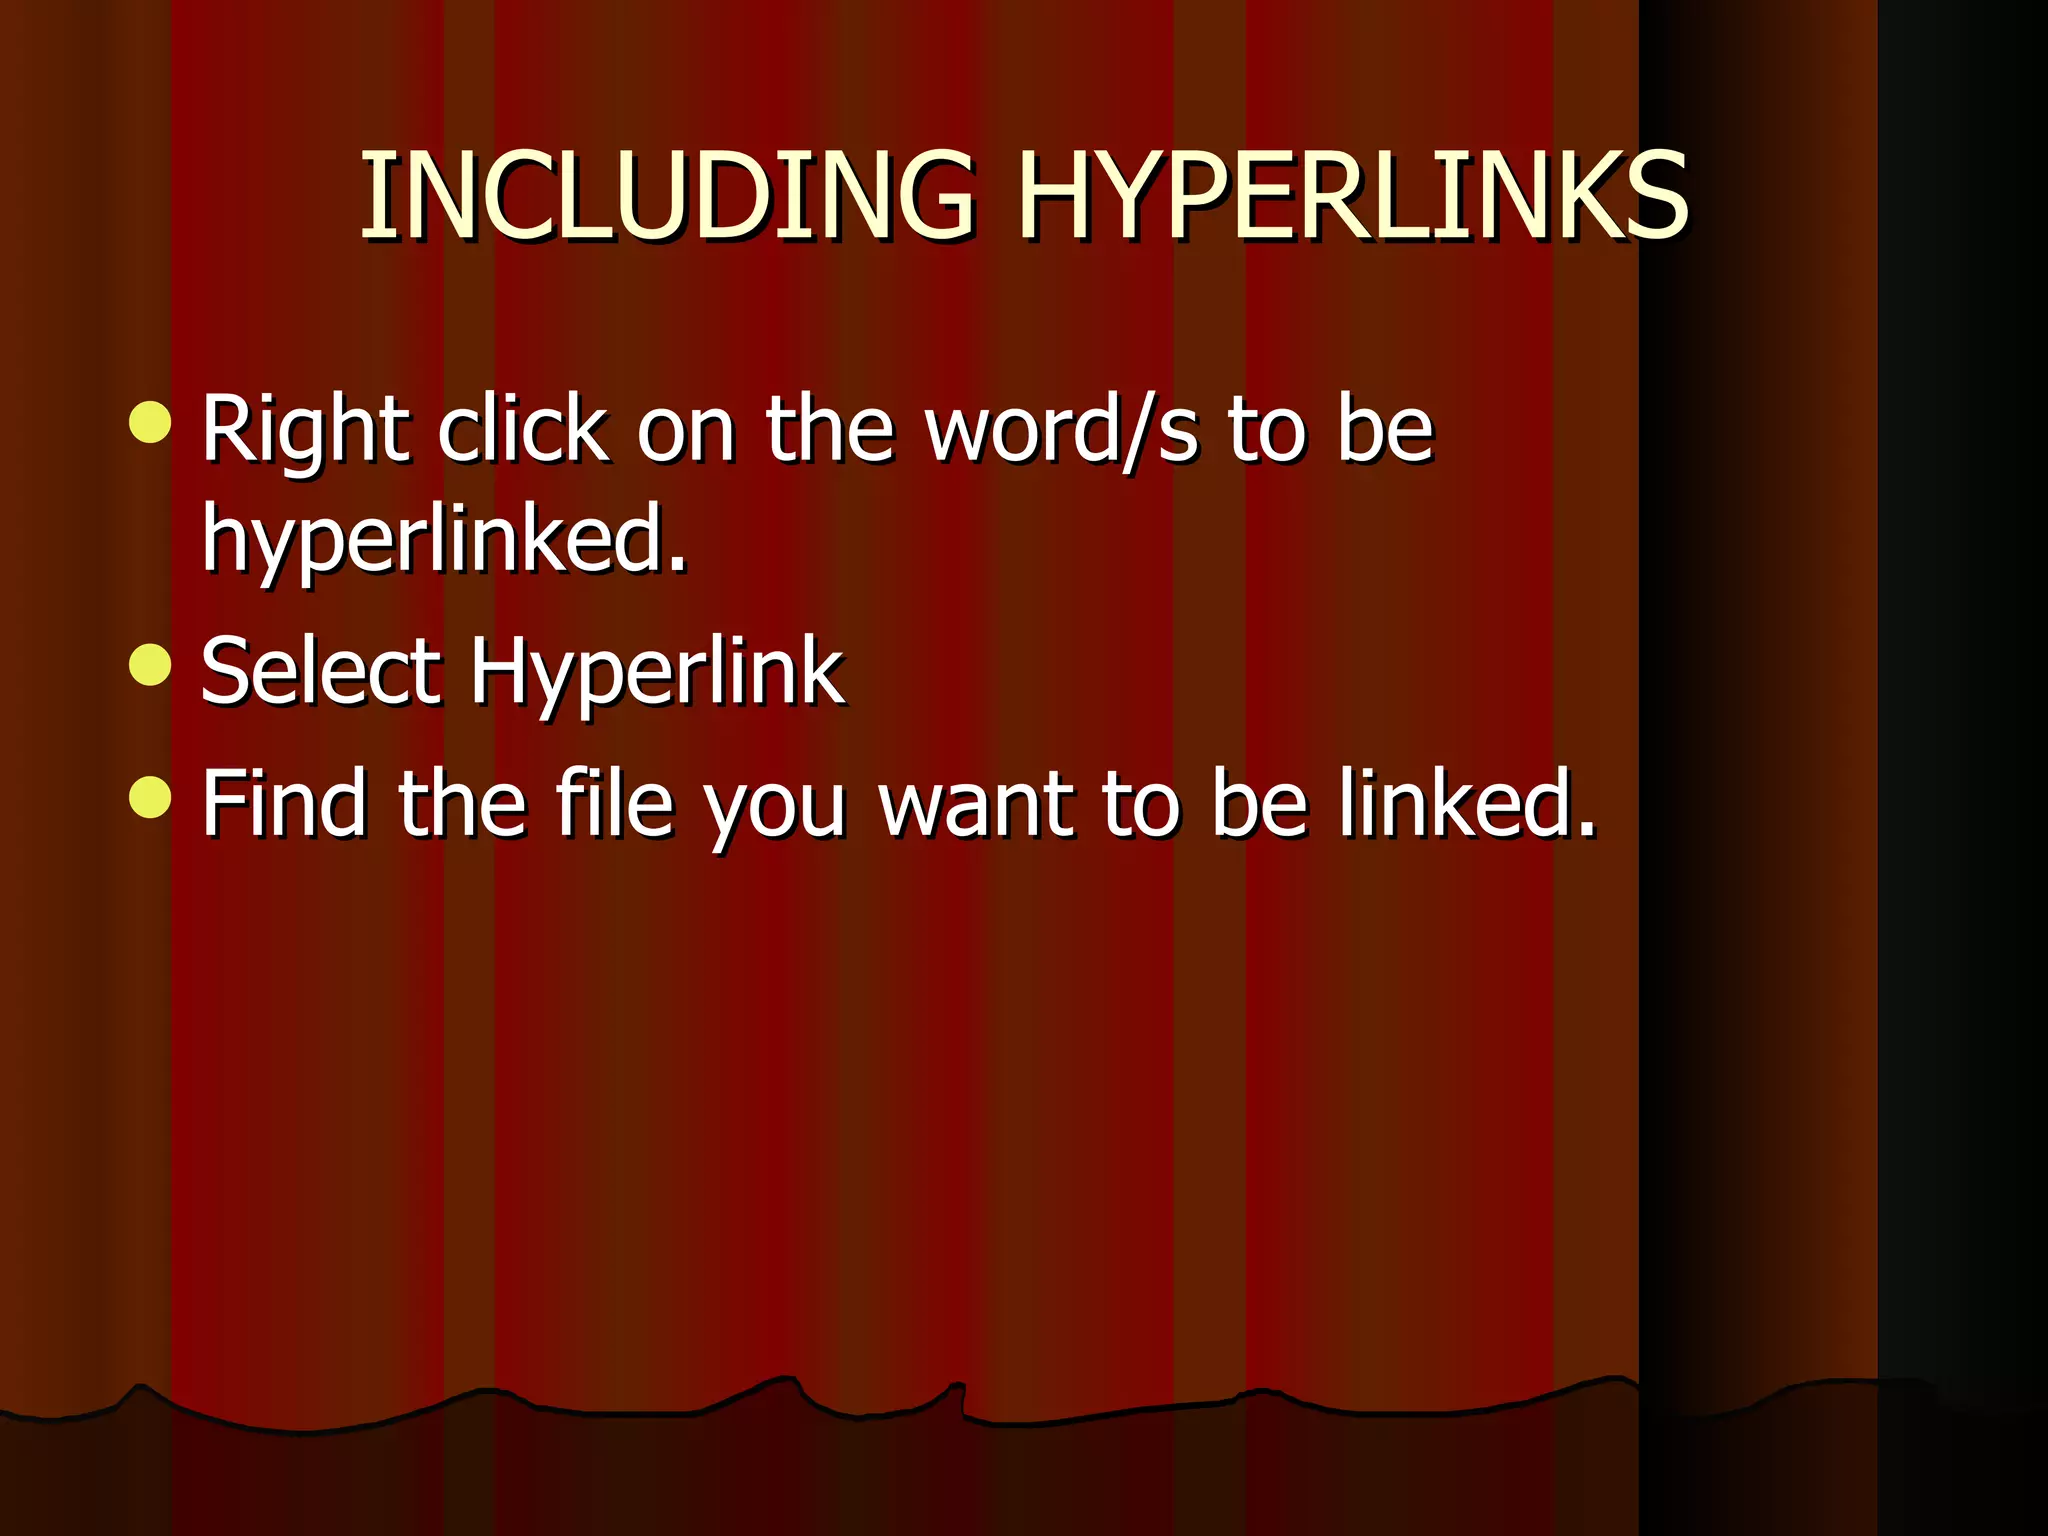
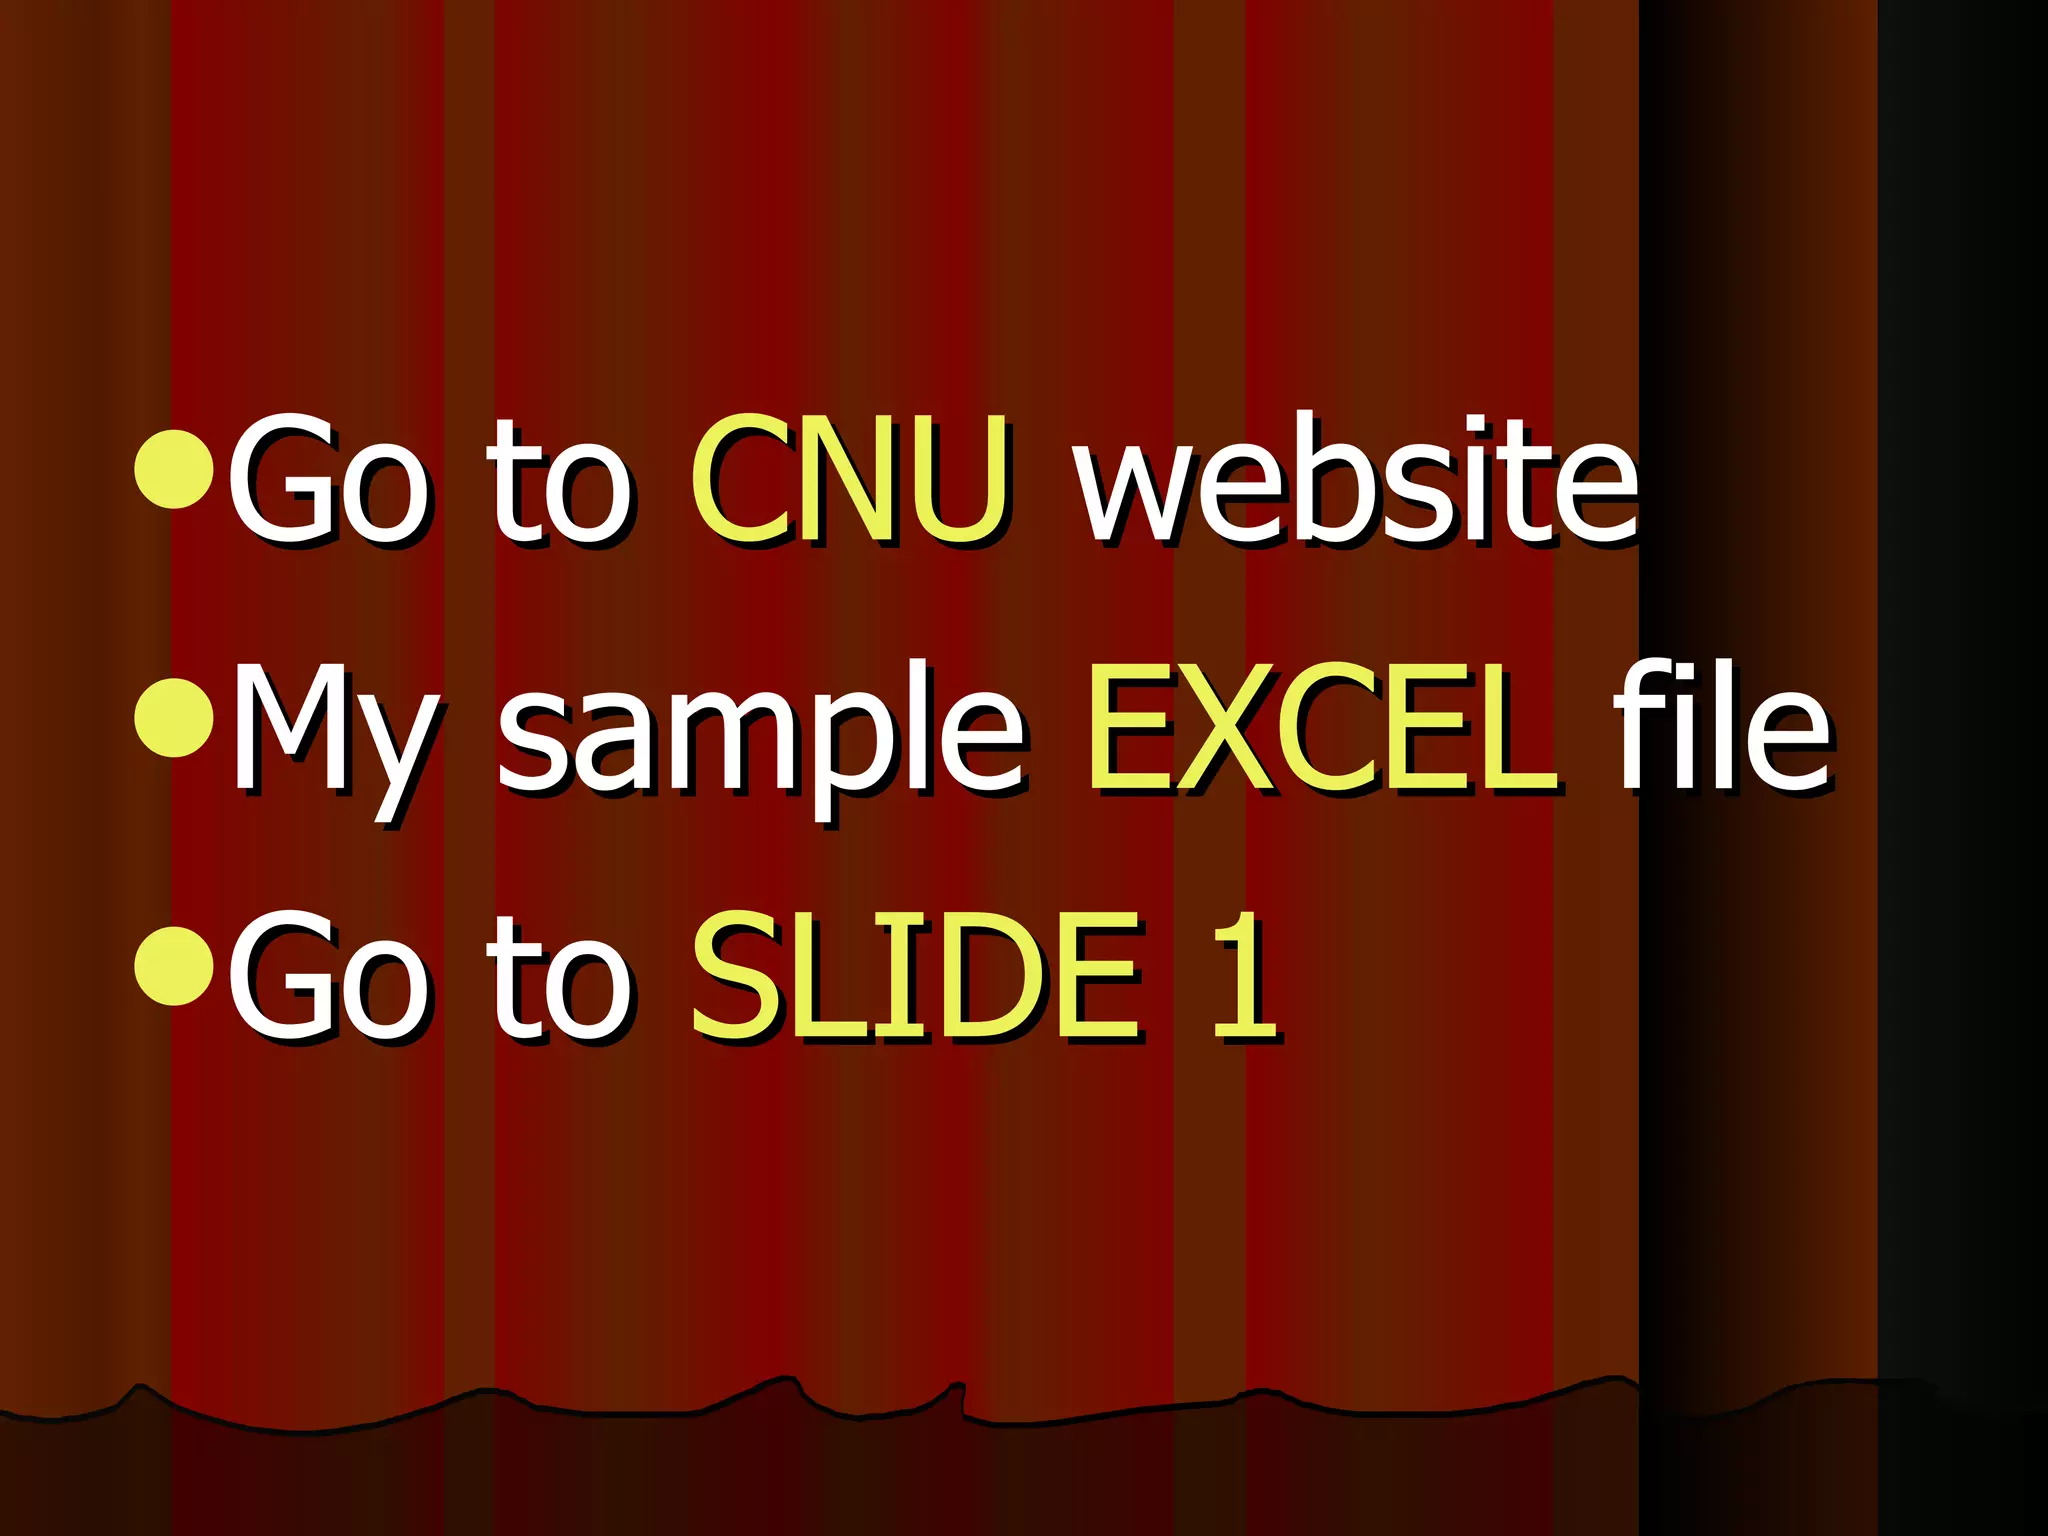


This document provides an overview of Microsoft PowerPoint, including its uses, interface, slide layouts, adding and modifying content like text, images, and multimedia. It describes how to change designs, duplicate/move/delete slides, and insert slide transitions and animations. Formatting tools are explained for pictures, grouping objects, and including hyperlinks in a presentation. The goal of PowerPoint is to create digital slide shows and presentations that can be published online or printed.