This document provides instructions for creating a basic PowerPoint presentation in 9 steps:
1) Open PowerPoint and save your project, saving often to prevent data loss.
2) Create a title slide with the presentation title and subtitle.
3) Choose a slide design template.
4) Add new slides and edit the slide layout.
5) Add text to slides by adjusting font settings.
6) Add pictures to slides by inserting images from your computer.
7) Create multiple slides by following steps 4-6.
8) Add slide transitions by selecting different transition styles and settings.
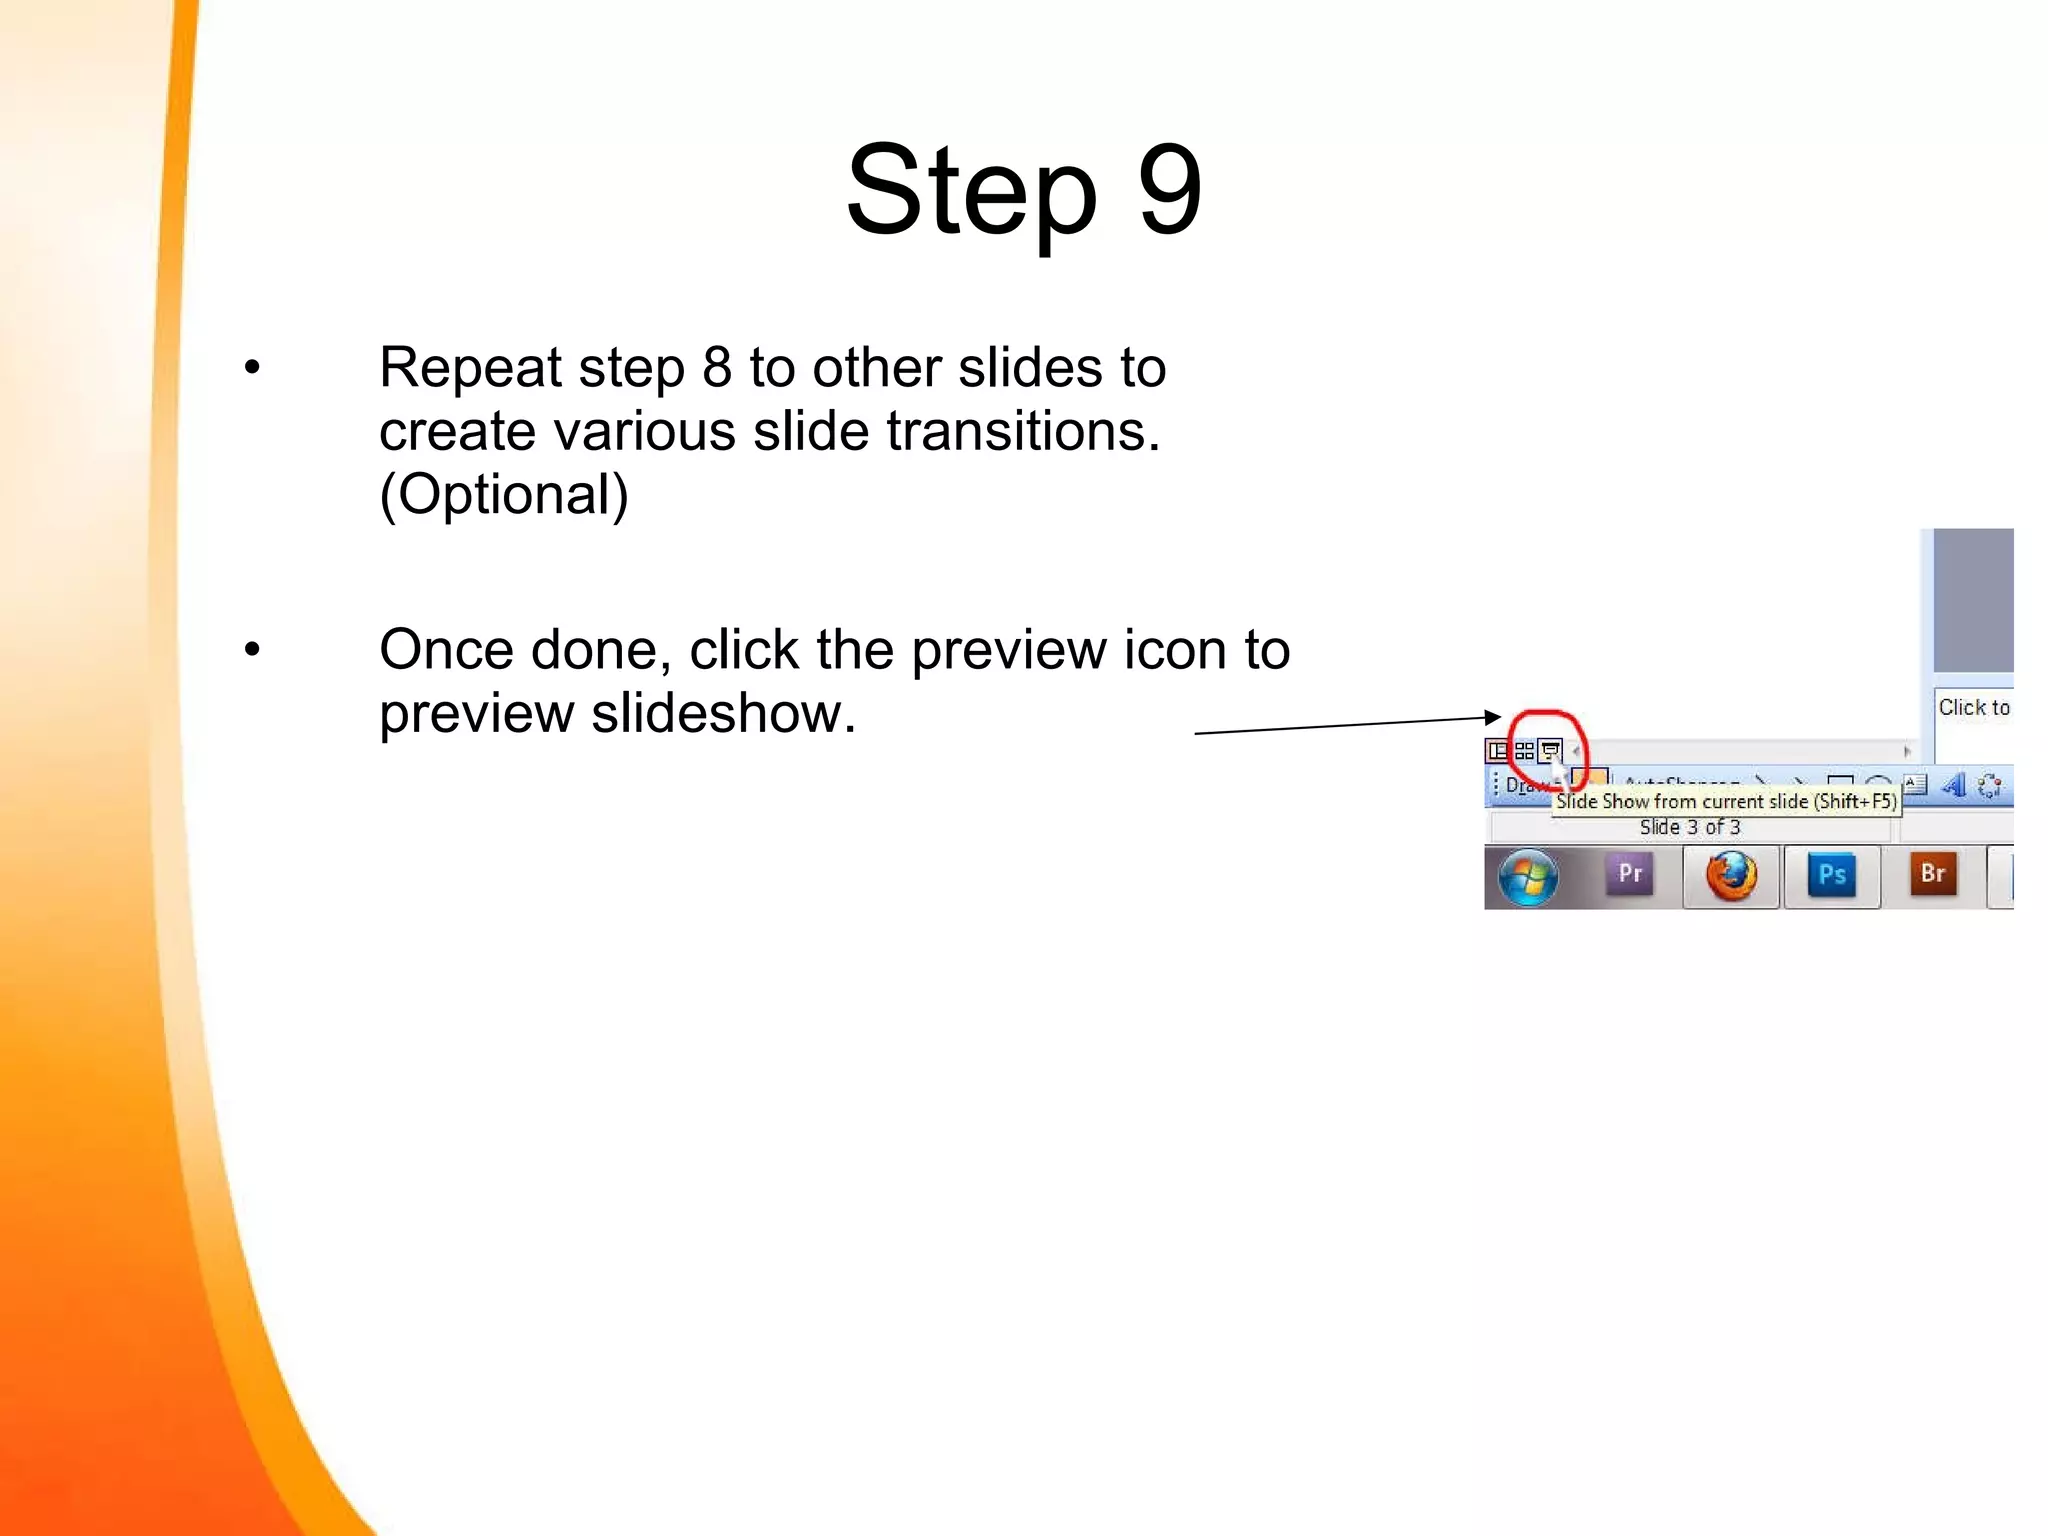
9) Repeat step 8 to add transitions to other slides and preview the completed presentation.
In this document
Powered by AI
This presentation introduces how to create a basic presentation using Microsoft PowerPoint.
Learn to create, design, and organize a presentation on George Washington utilizing Microsoft PowerPoint.
PowerPoint is a paid software recommended for creating professional presentations with a user-friendly interface.
A computer or laptop equipped with Microsoft Office/PowerPoint is required to follow along.
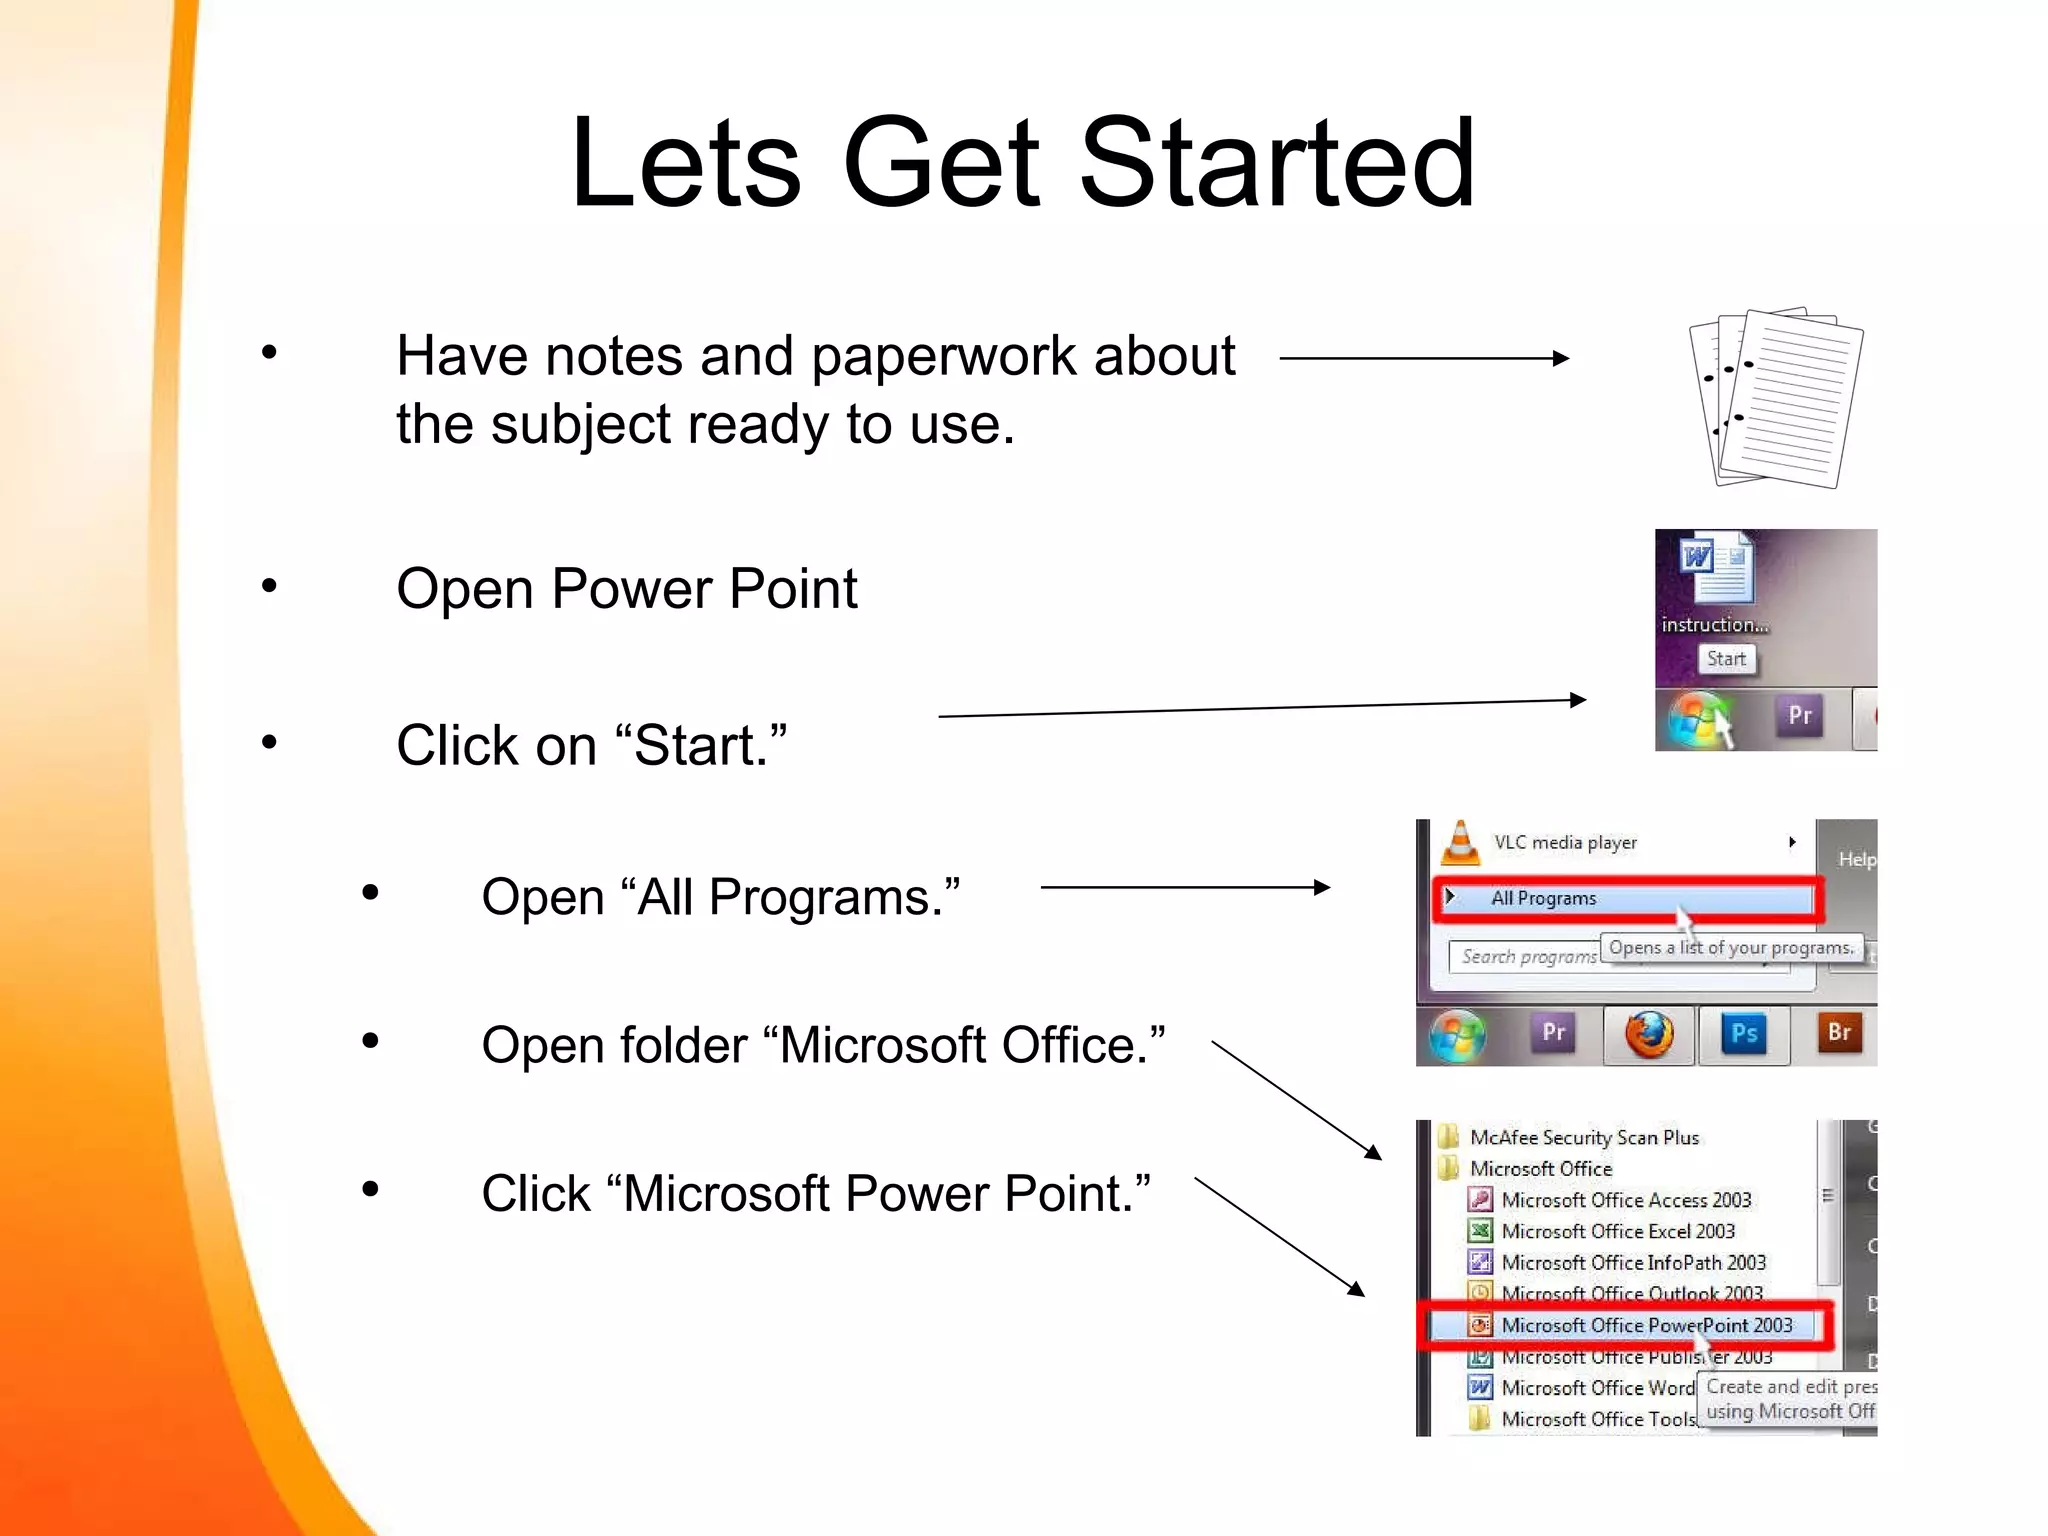
Gather notes, open PowerPoint through the Windows Start menu, and prepare to begin.
Instructions on saving the project frequently to prevent data loss during the presentation creation process.
Steps to create a title slide, including typing the title and subtitle for your presentation.
Guidance on choosing an appropriate slide design template for the presentation.
Instructions on adding a new slide and editing its layout to fit content needs.
Adjust text settings such as font type, size, alignment, and color in the text boxes.
Steps to insert images into slides, including selecting desired images from the computer.
Review the process of creating multiple slides and how to preview the slideshow.
Instructions on adding transitions between slides to enhance the flow of the presentation.
Tips on applying transitions to all slides and previewing the final slideshow.
Summary of skills learned in the tutorial, encouraging practice to enhance presentation skills.
How To CreateA Basic PowerPoint Presentation By: Jose Hernandez
2.
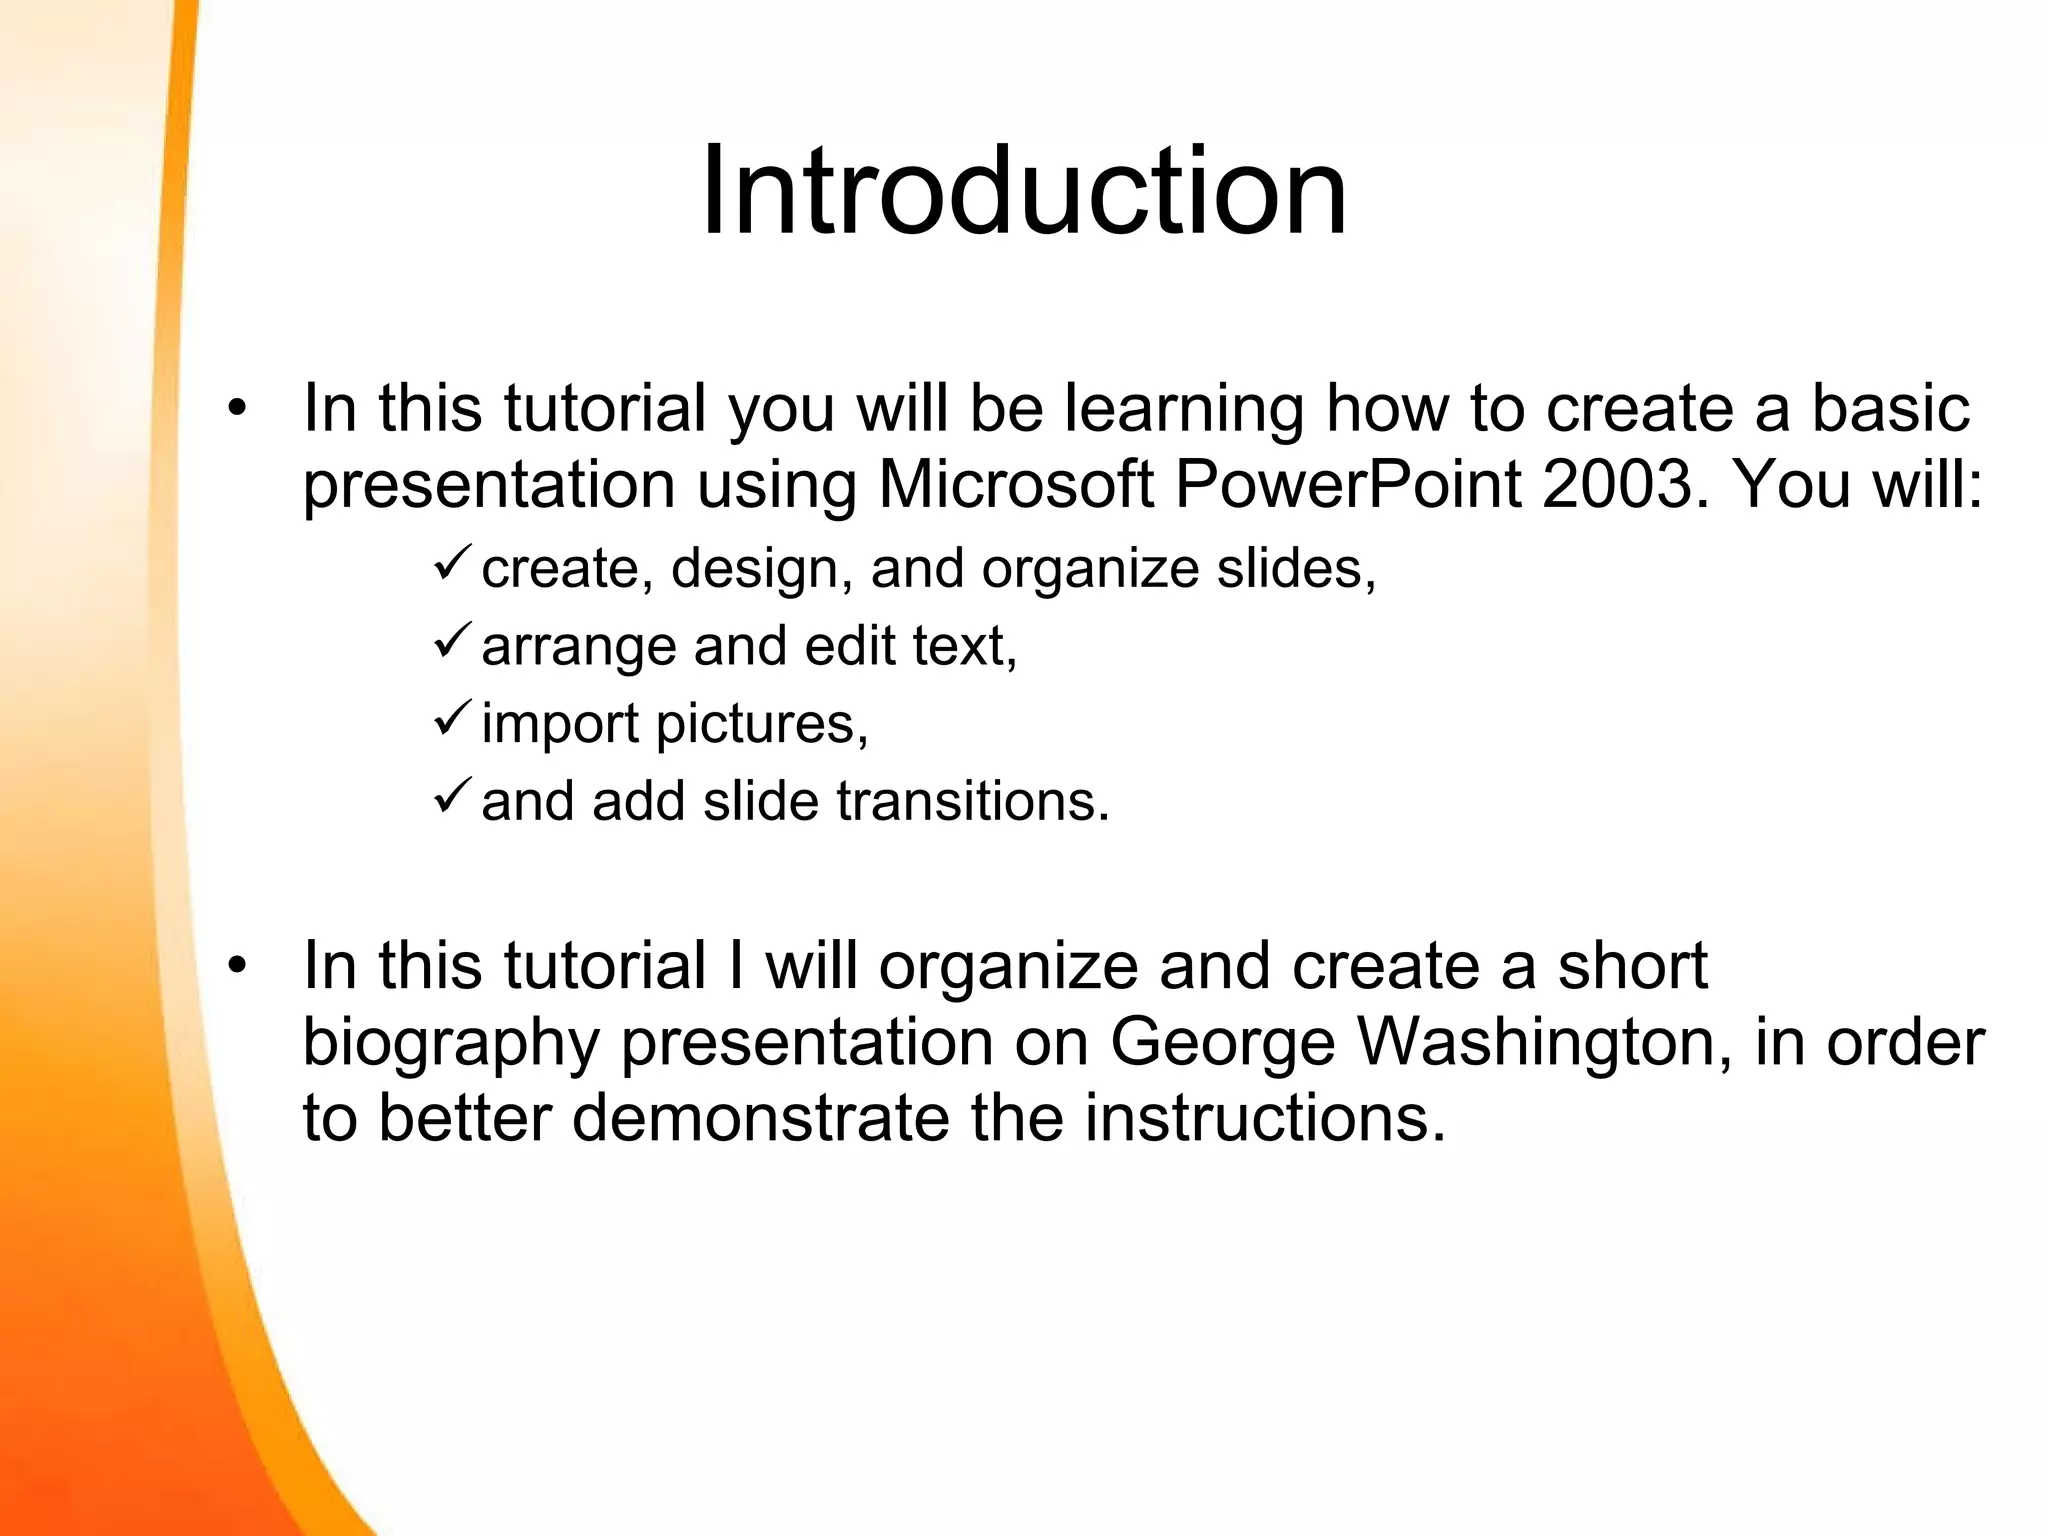
Introduction In thistutorial you will be learning how to create a basic presentation using Microsoft PowerPoint 2003. You will: create, design, and organize slides, arrange and edit text, import pictures, and add slide transitions. In this tutorial I will organize and create a short biography presentation on George Washington, in order to better demonstrate the instructions.
3.
WARNING! Microsoft PowerPoint IS NOT a free software, but, is recommended to be purchased. The program is easy to navigate and has a user friendly interface. The purpose of Microsoft PowerPoint is to create and present multiple slides of graphics and information to an audience. This tutorial is being created on Windows 7 Operating System and Microsoft PowerPoint 2003. Other versions may have some interface differences.
Lets Get StartedHave notes and paperwork about the subject ready to use. Open Power Point Click on “Start.” Open “All Programs.” Open folder “Microsoft Office.” Click “Microsoft Power Point.”
6.
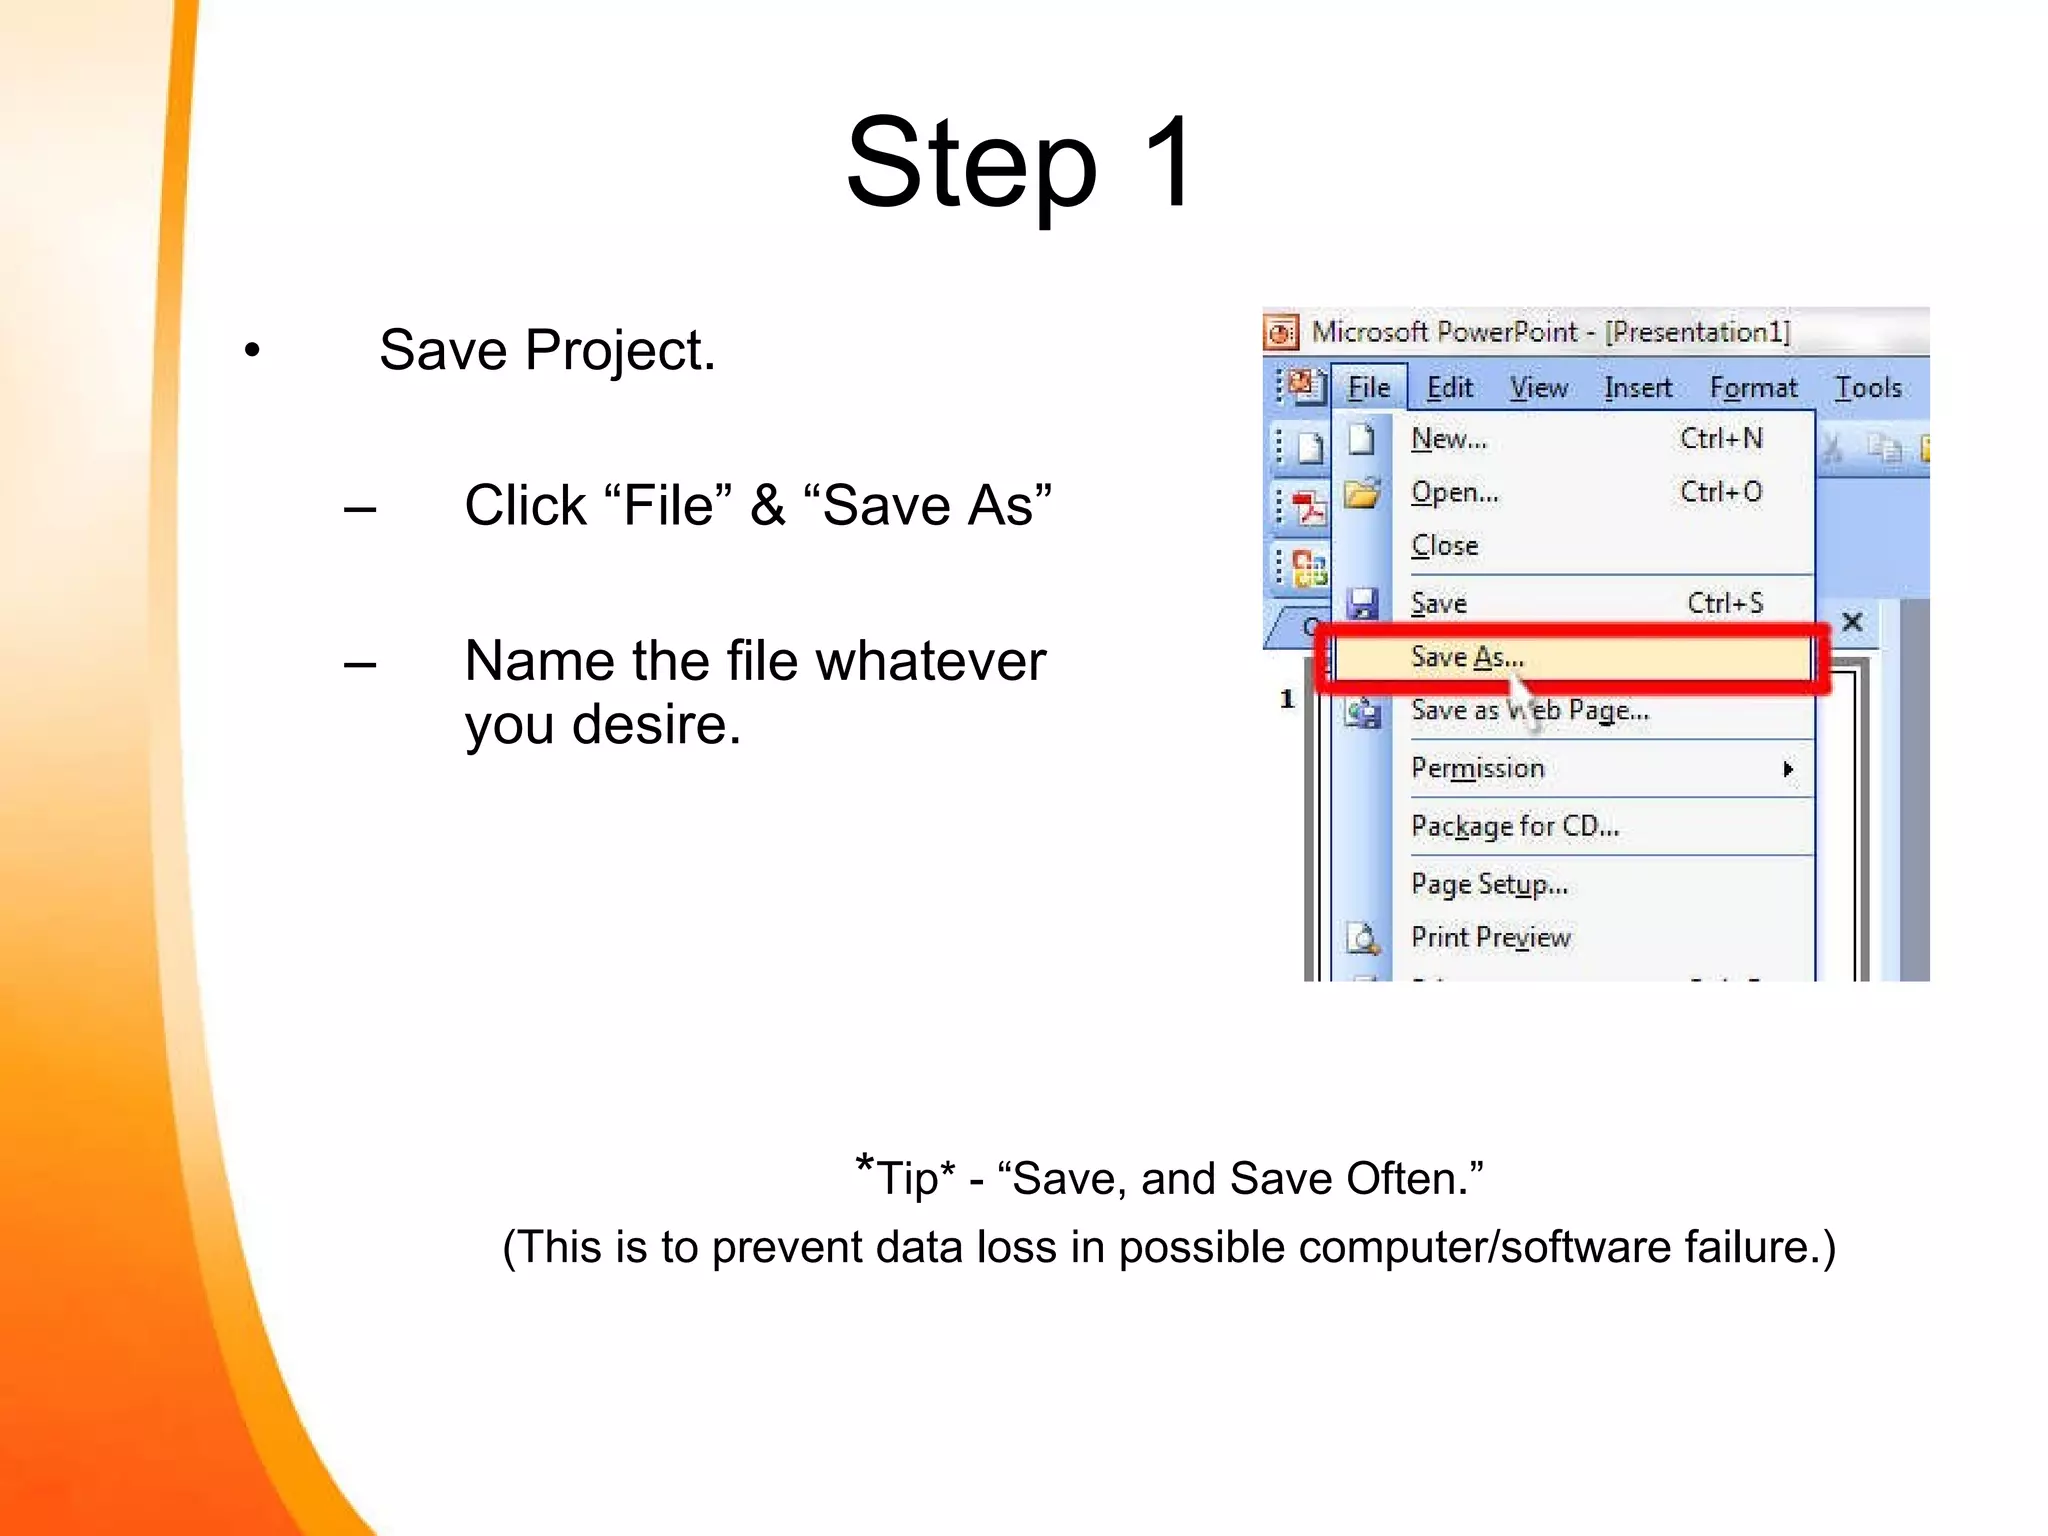
Save Project. Click“File” & “Save As” Name the file whatever you desire. Step 1 * Tip* - “Save, and Save Often.” (This is to prevent data loss in possible computer/software failure.)
7.
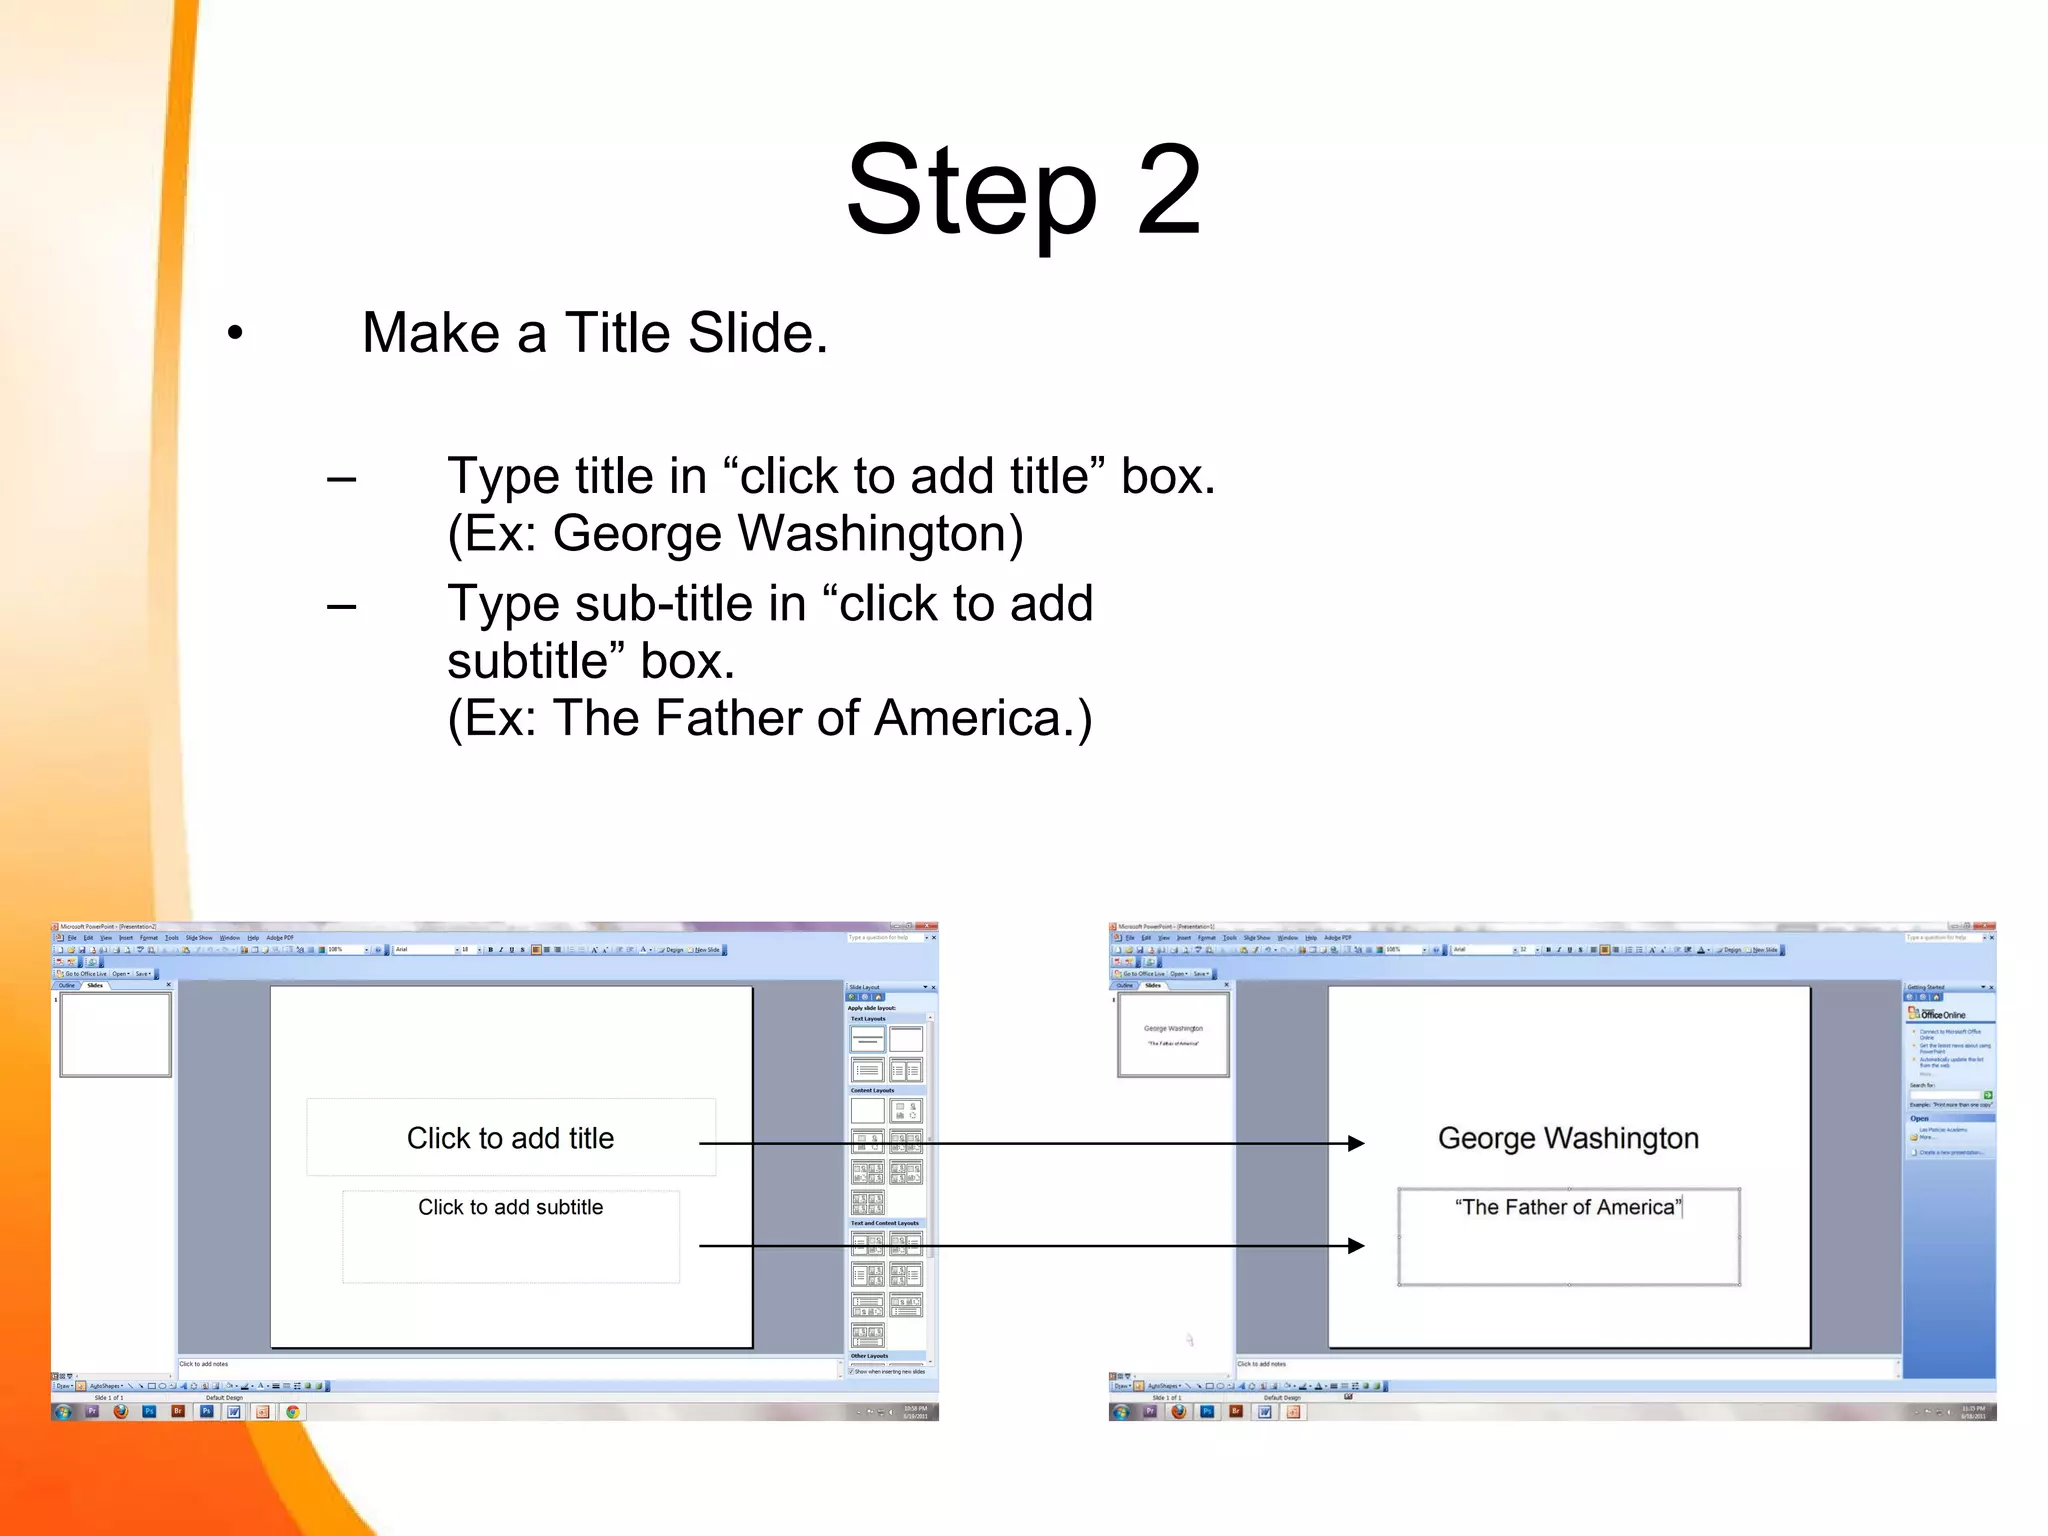
Step 2 Makea Title Slide. Type title in “click to add title” box. (Ex: George Washington) Type sub-title in “click to add subtitle” box. (Ex: The Father of America.)
8.
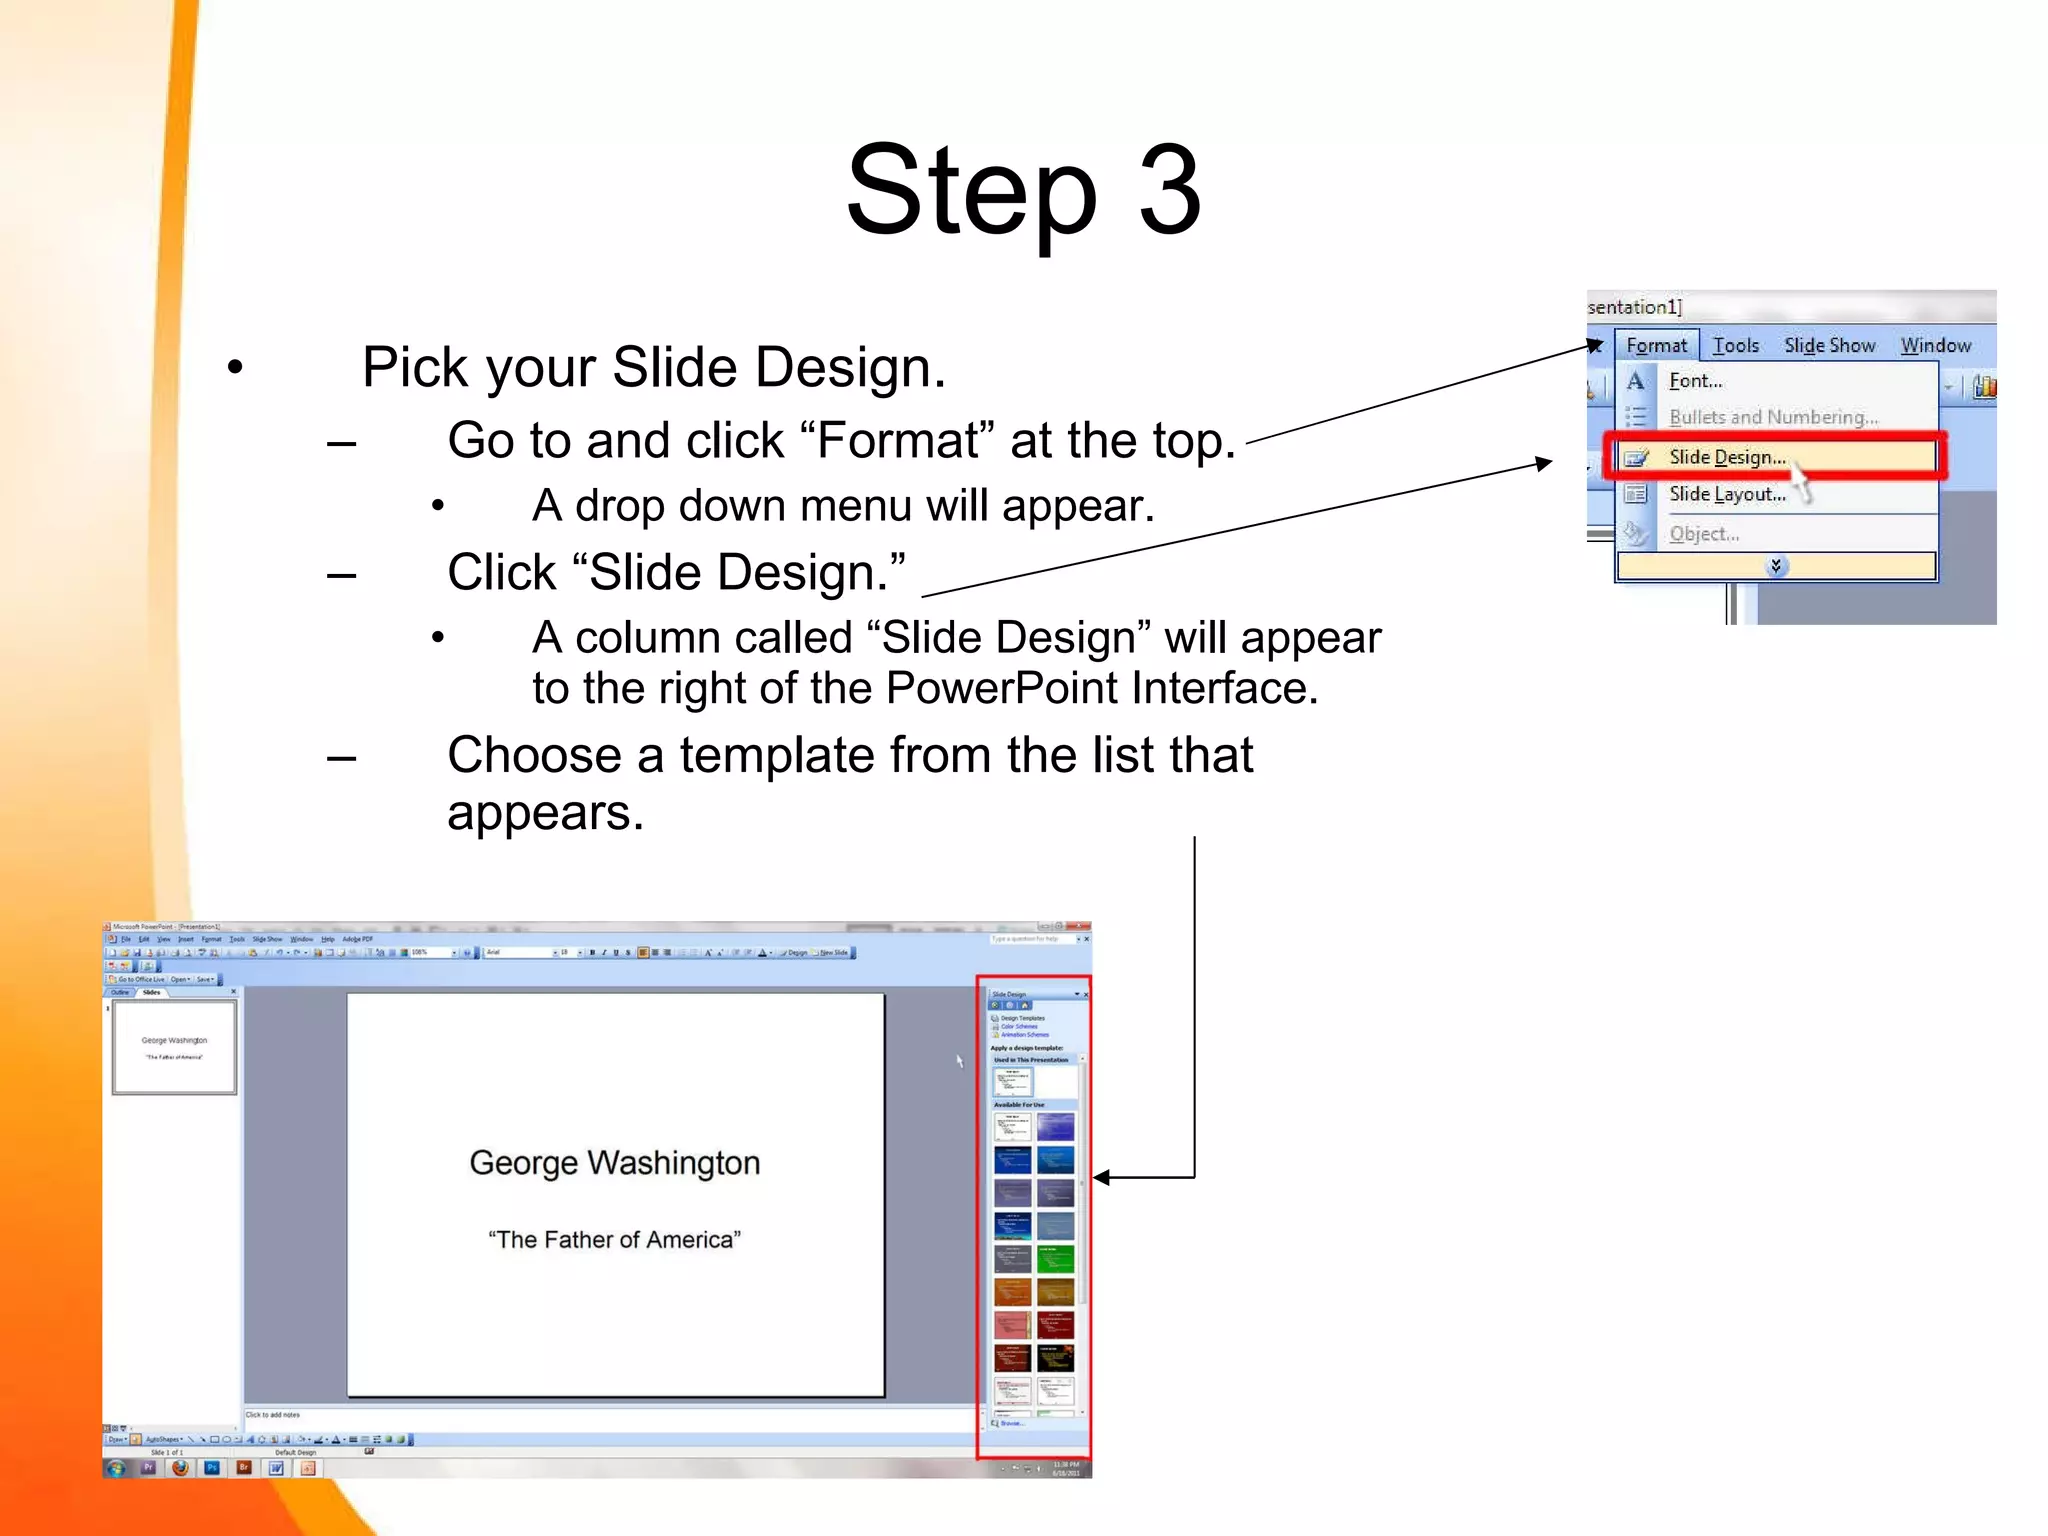
Step 3 Pickyour Slide Design. Go to and click “Format” at the top. A drop down menu will appear. Click “Slide Design.” A column called “Slide Design” will appear to the right of the PowerPoint Interface. Choose a template from the list that appears.
9.
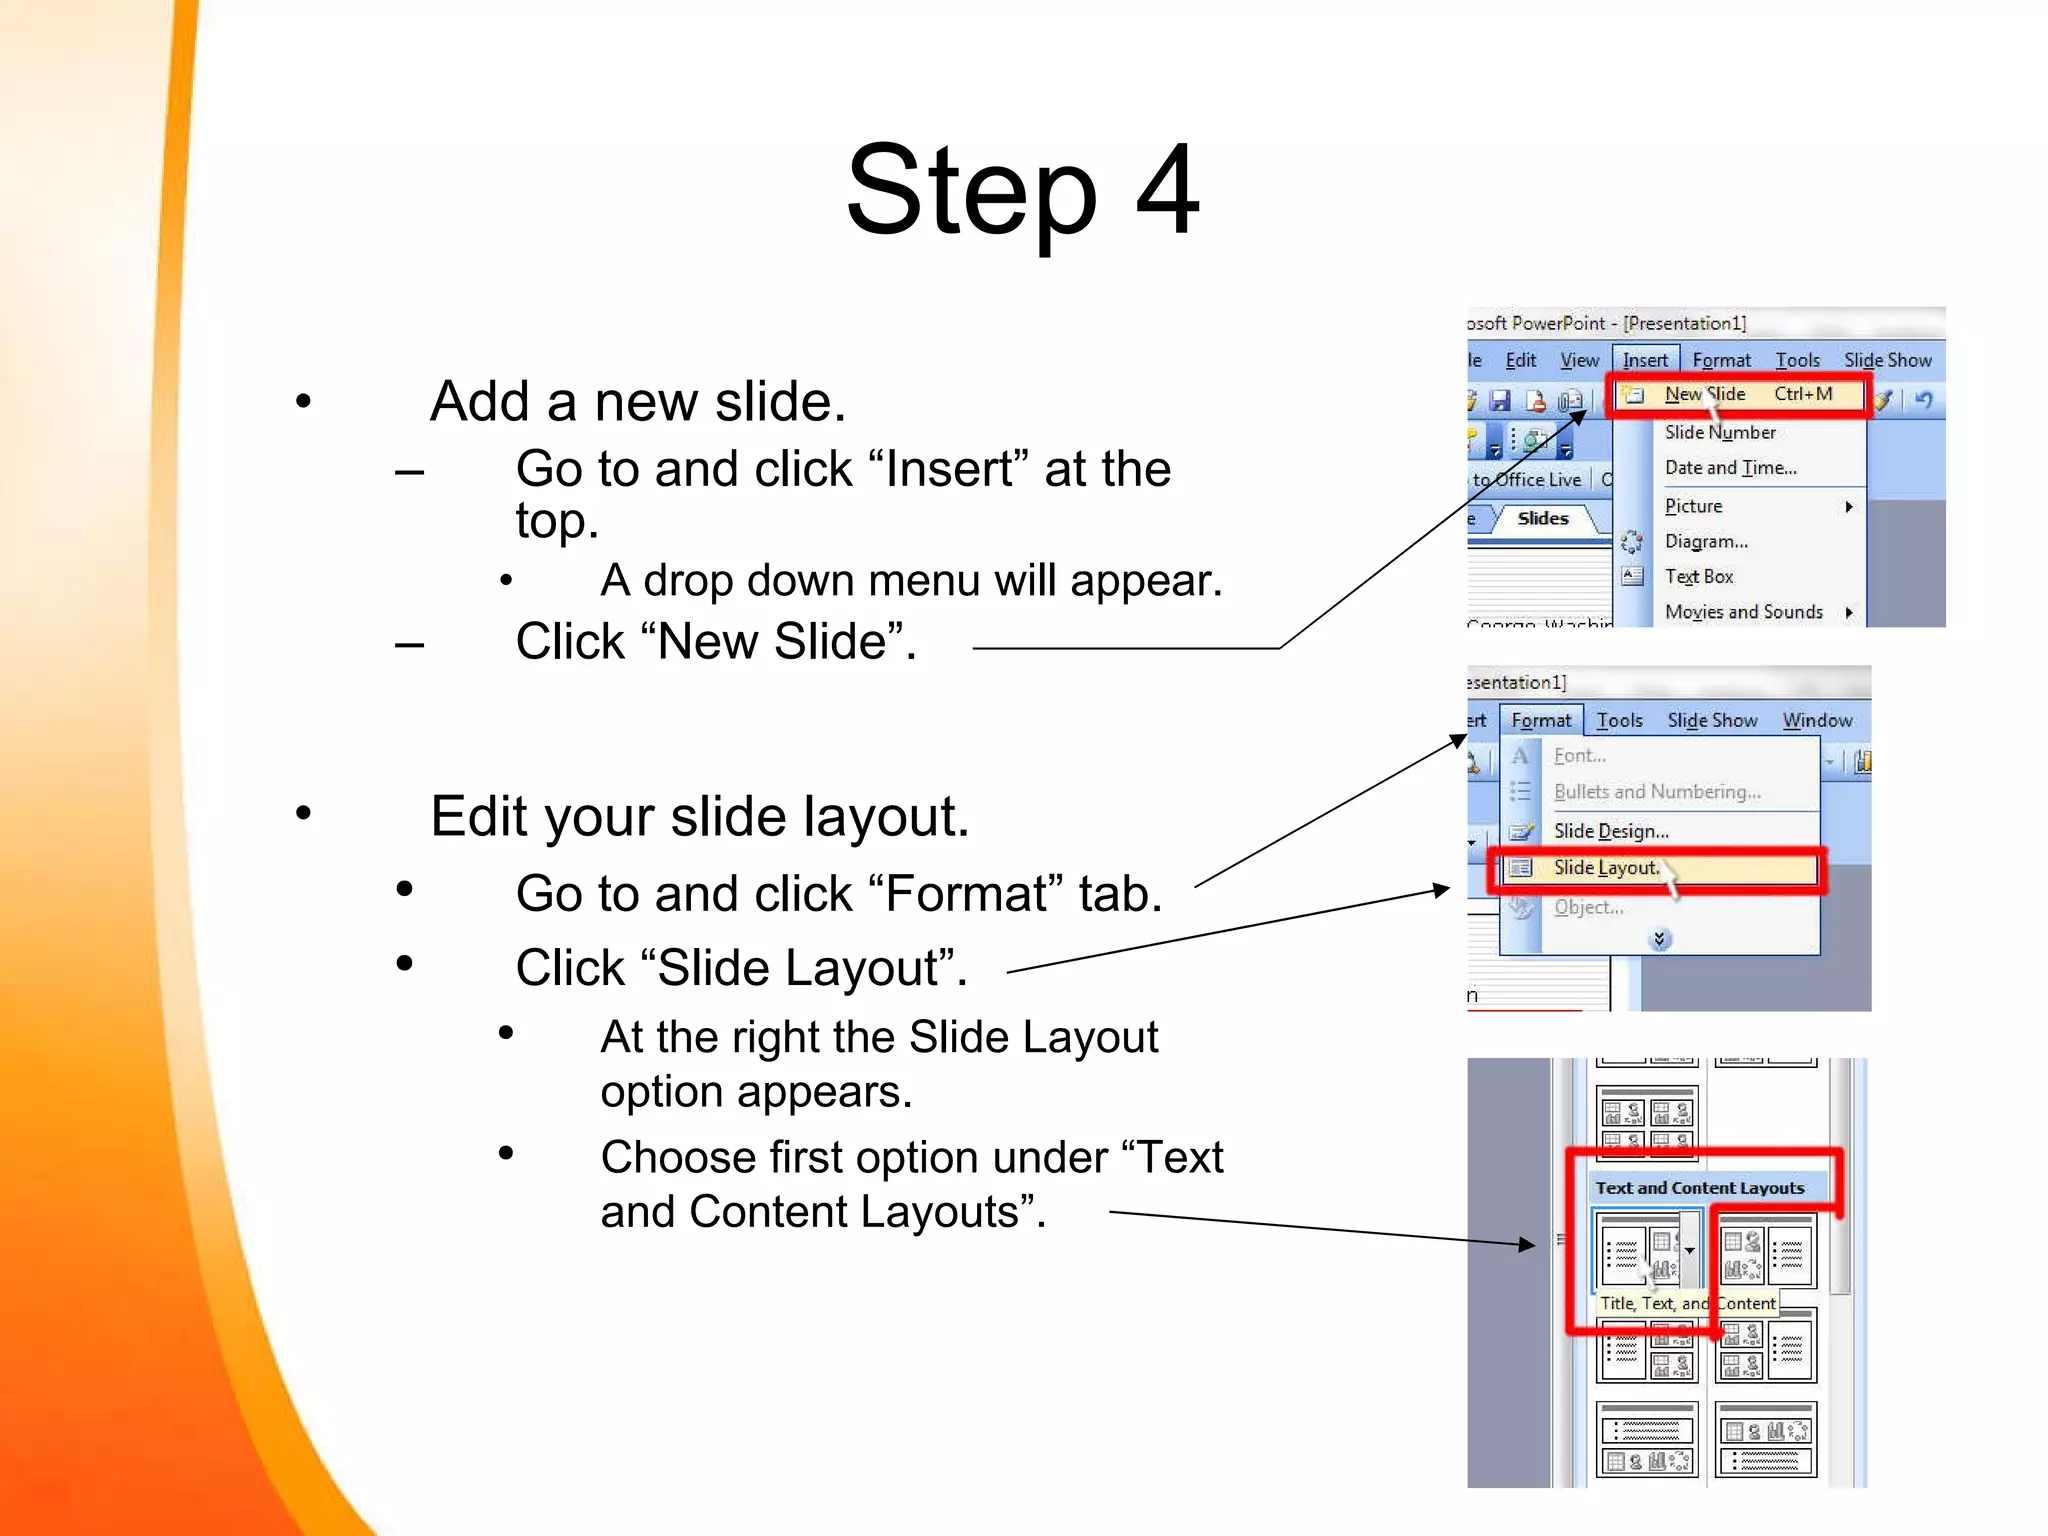
Step 4 Adda new slide. Go to and click “Insert” at the top. A drop down menu will appear. Click “New Slide”. Edit your slide layout. Go to and click “Format” tab. Click “Slide Layout”. At the right the Slide Layout option appears. Choose first option under “Text and Content Layouts”.
10.
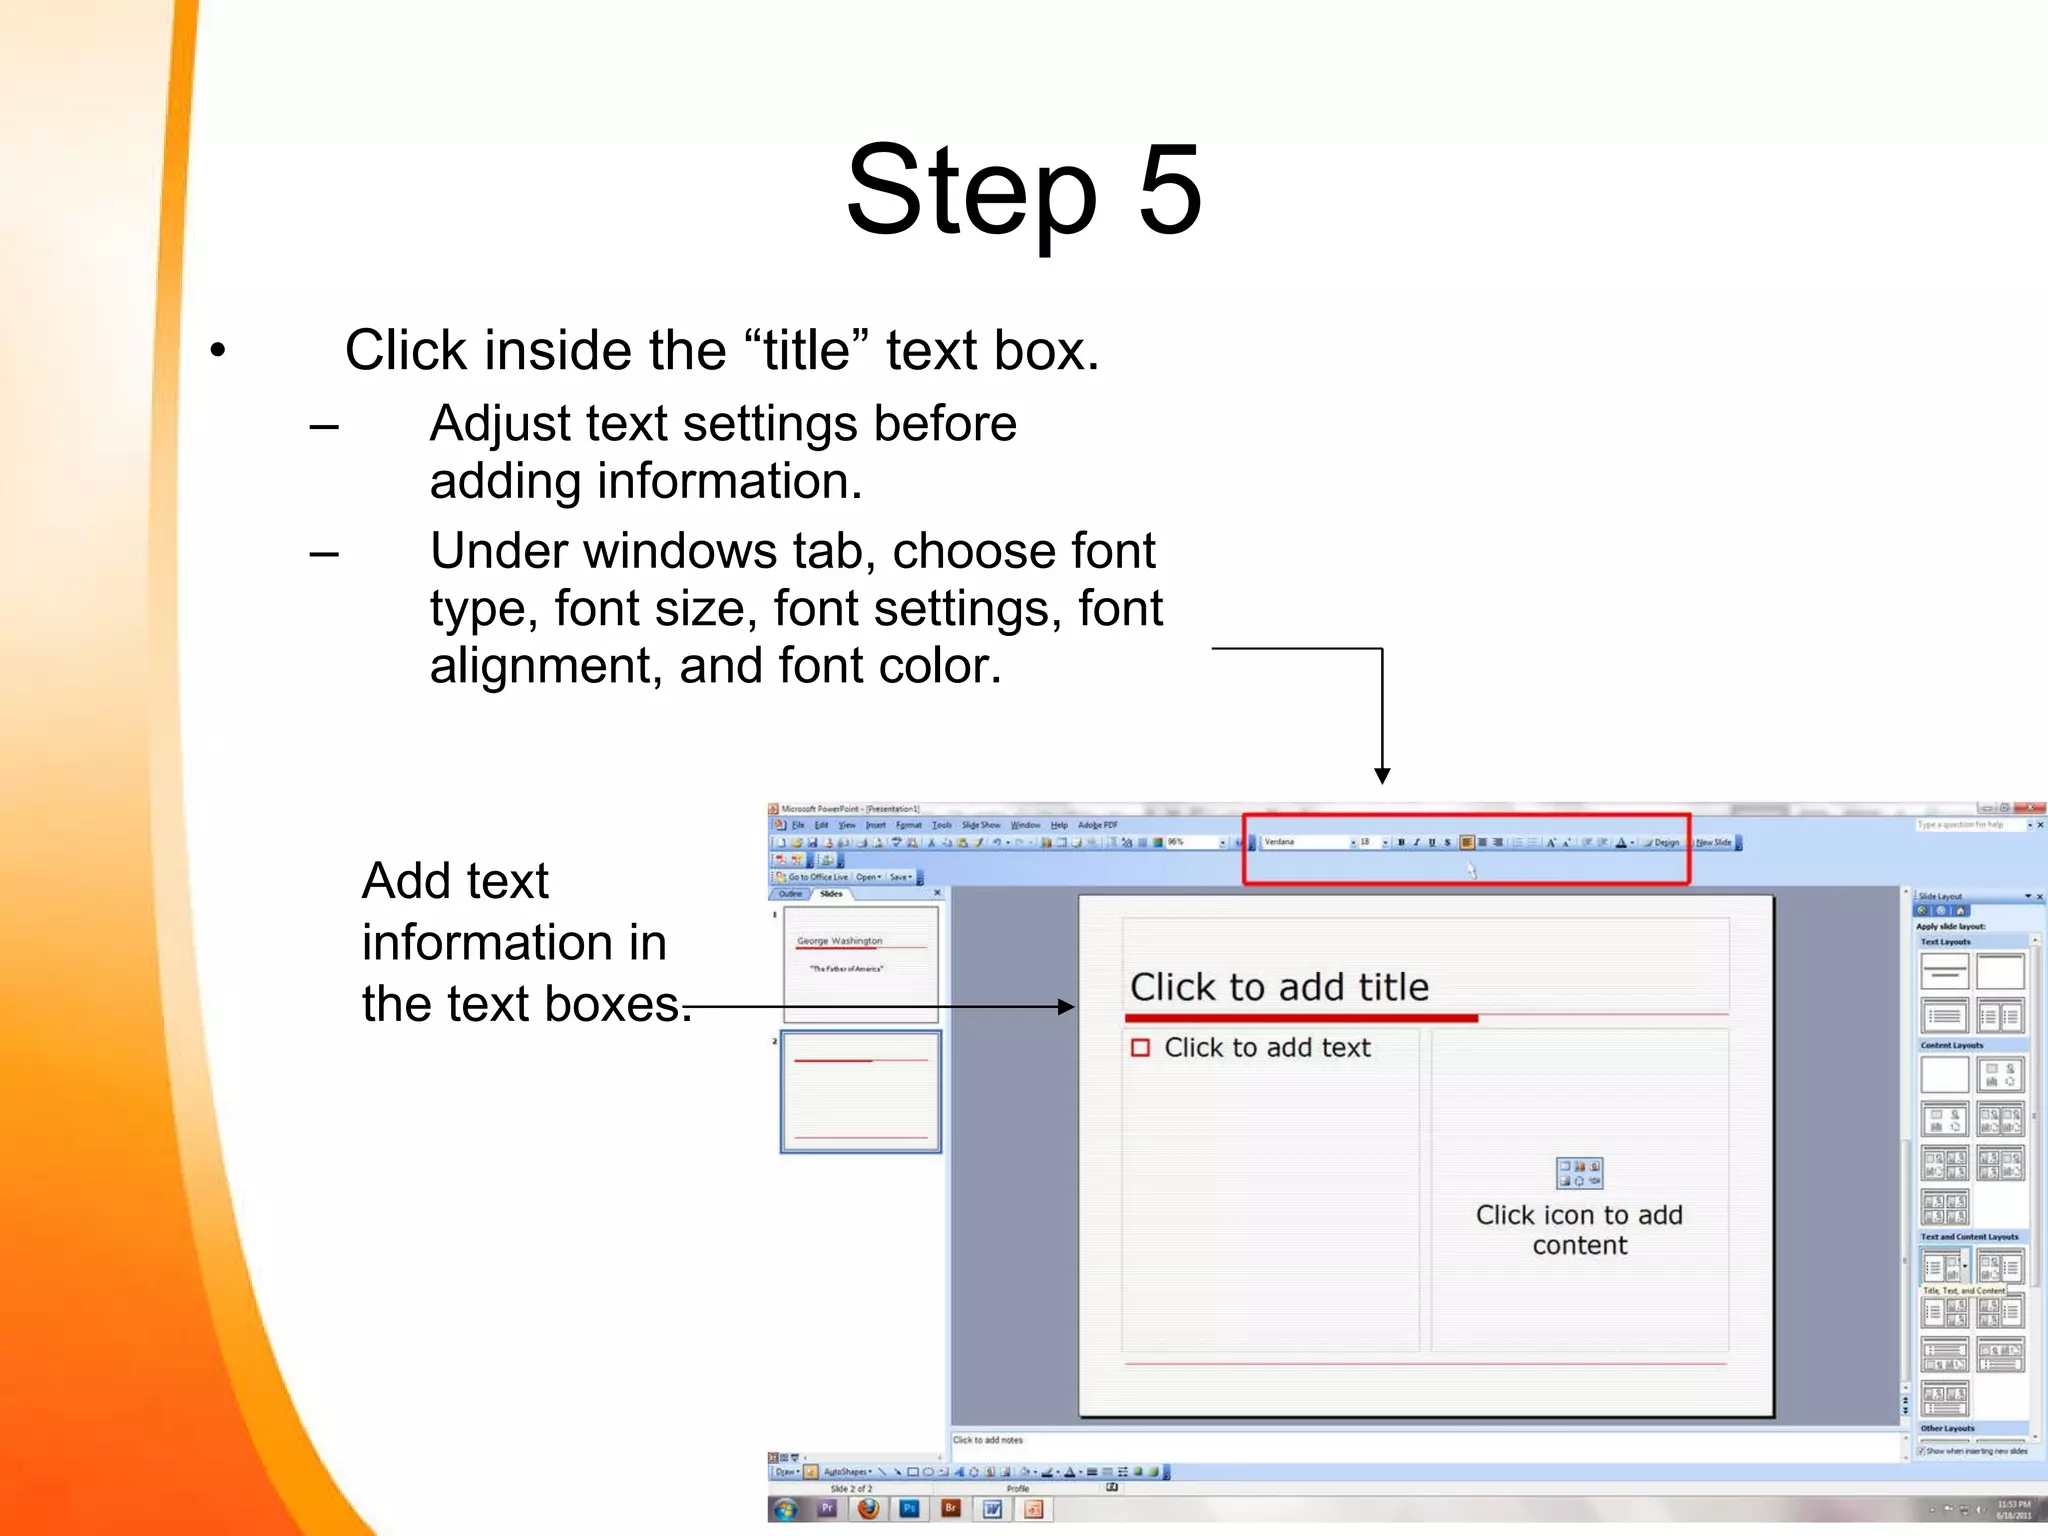
Step 5 Clickinside the “title” text box. Adjust text settings before adding information. Under windows tab, choose font type, font size, font settings, font alignment, and font color. Add text information in the text boxes.
11.
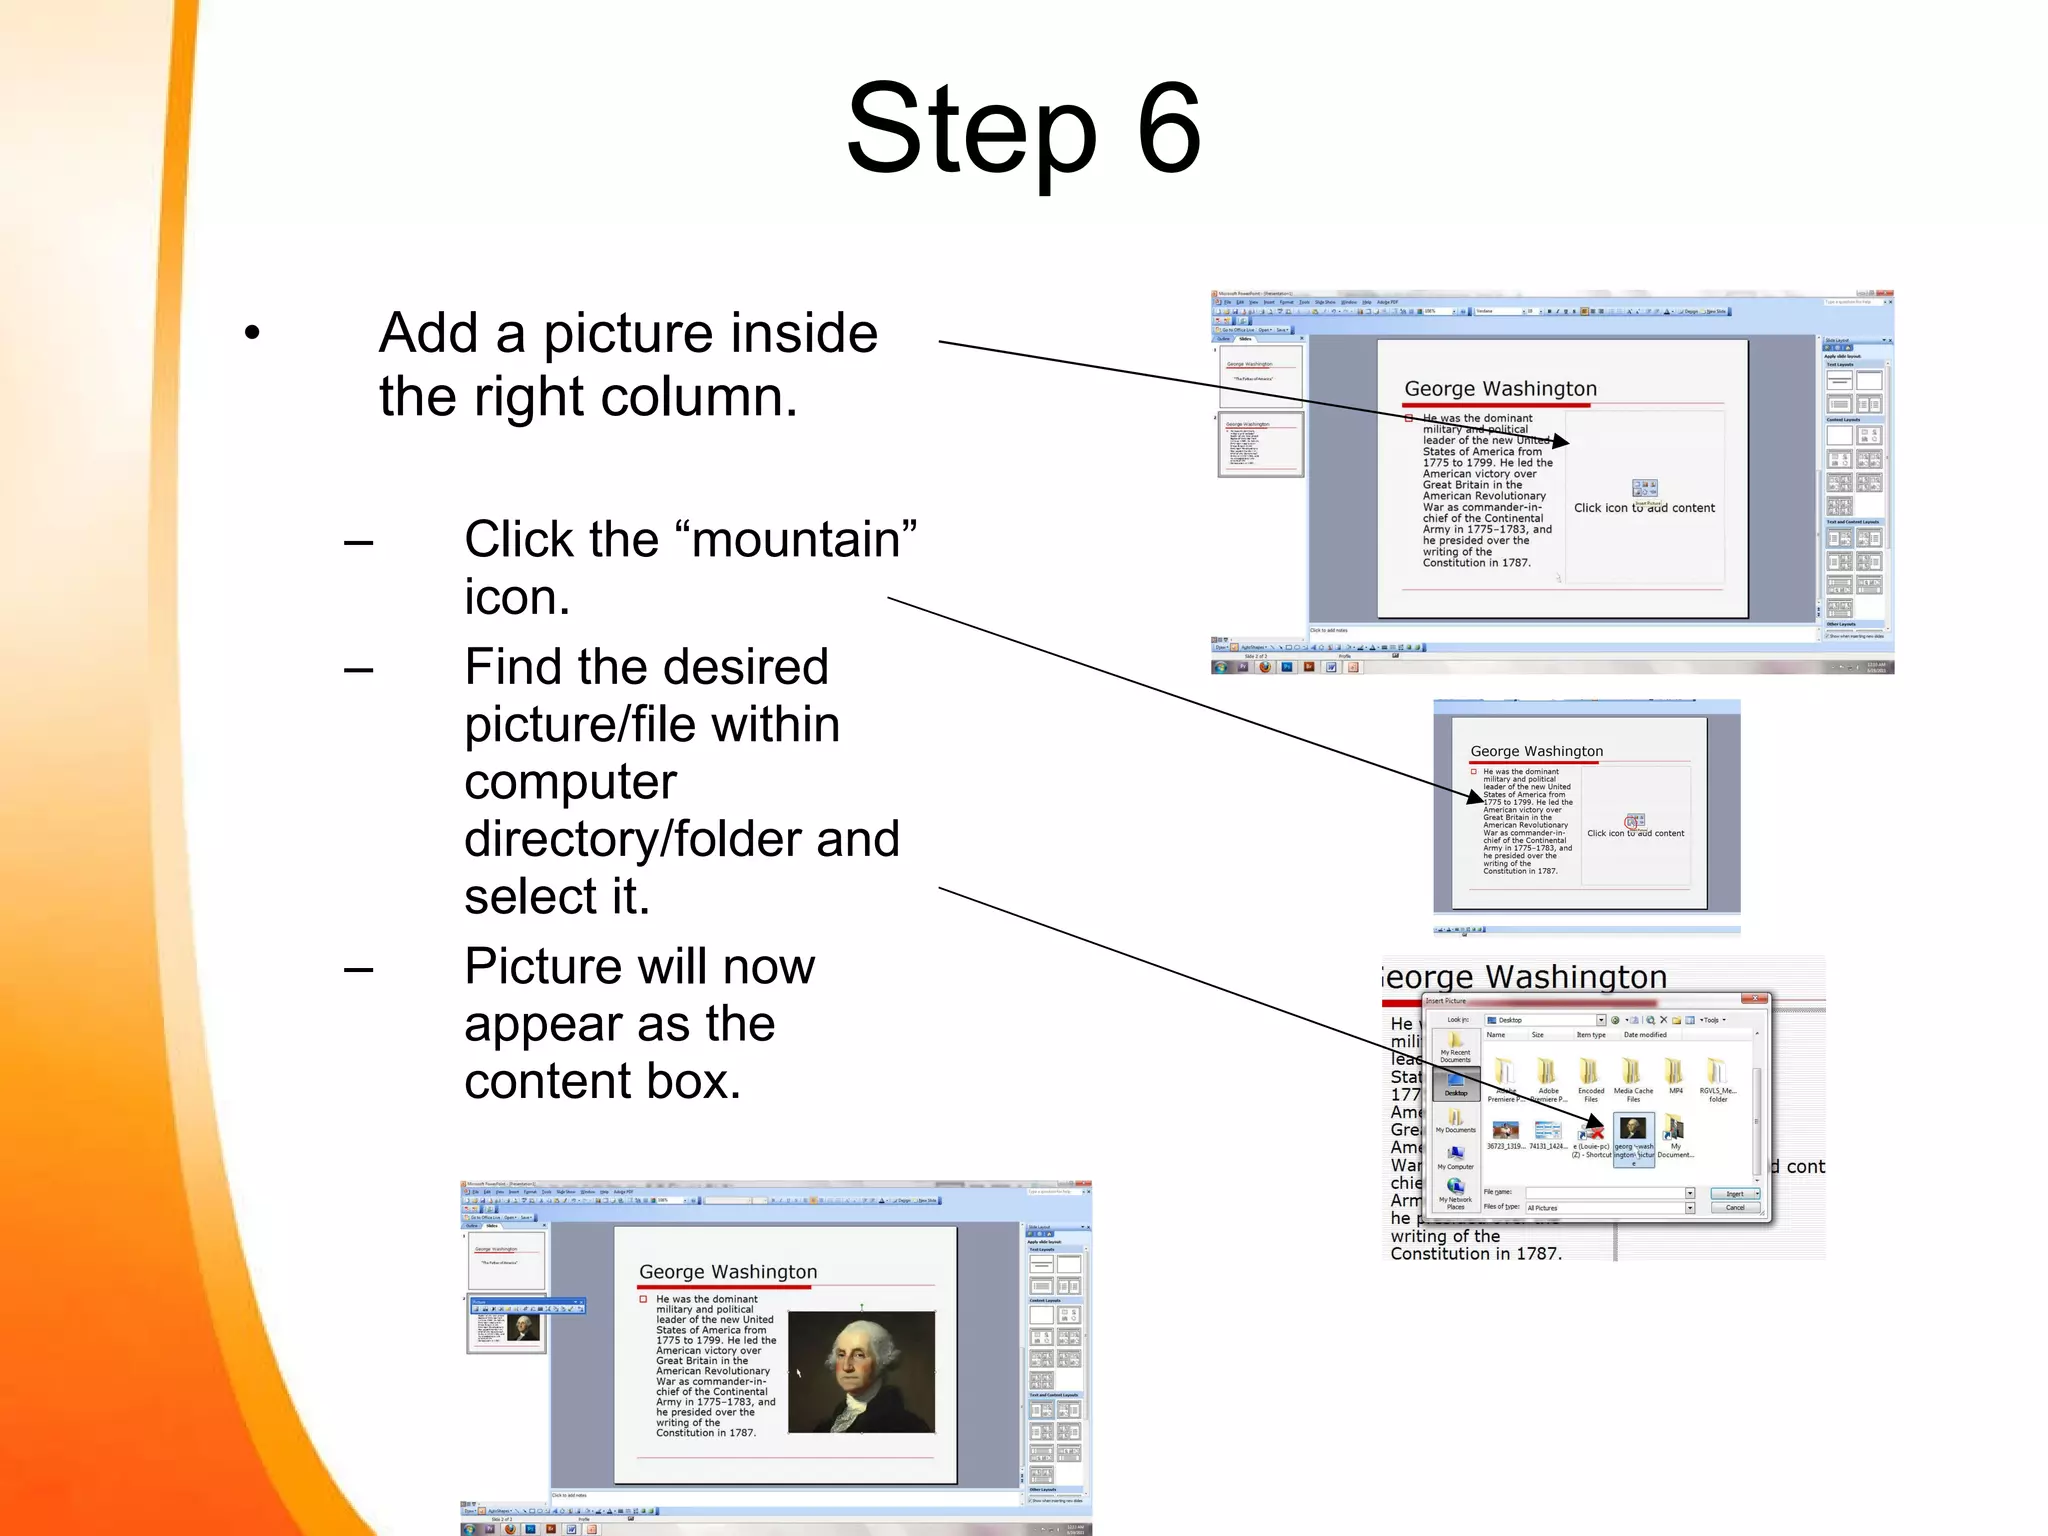
Step 6 Adda picture inside the right column. Click the “mountain” icon. Find the desired picture/file within computer directory/folder and select it. Picture will now appear as the content box.
12.
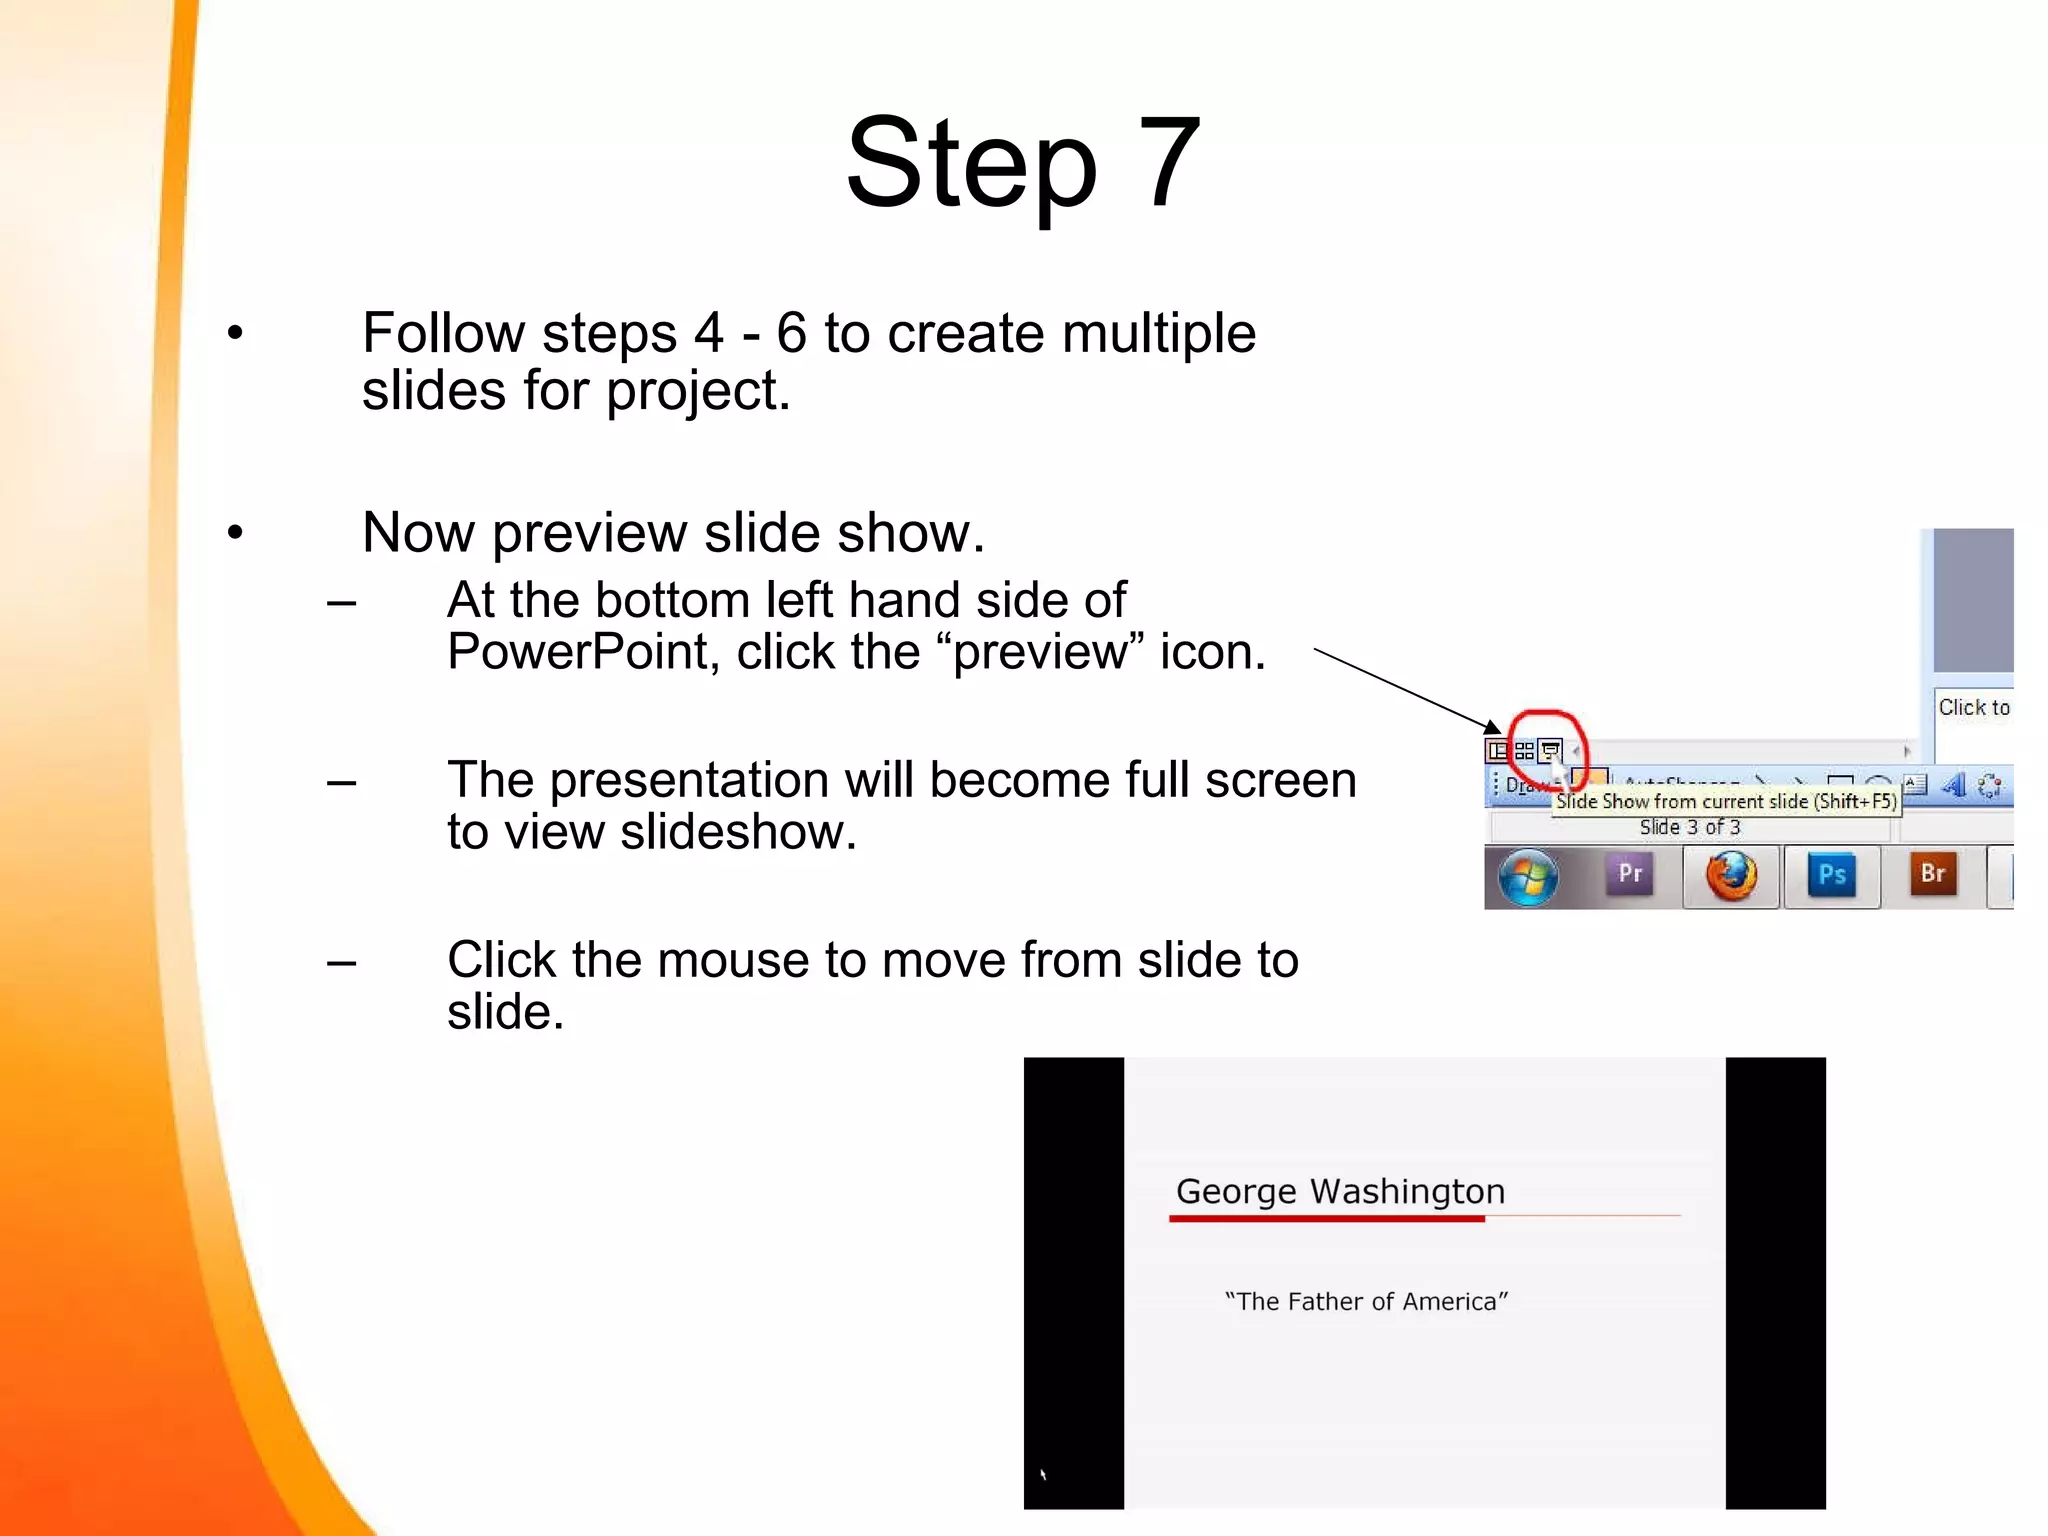
Step 7 Followsteps 4 - 6 to create multiple slides for project. Now preview slide show. At the bottom left hand side of PowerPoint, click the “preview” icon. The presentation will become full screen to view slideshow. Click the mouse to move from slide to slide.
13.
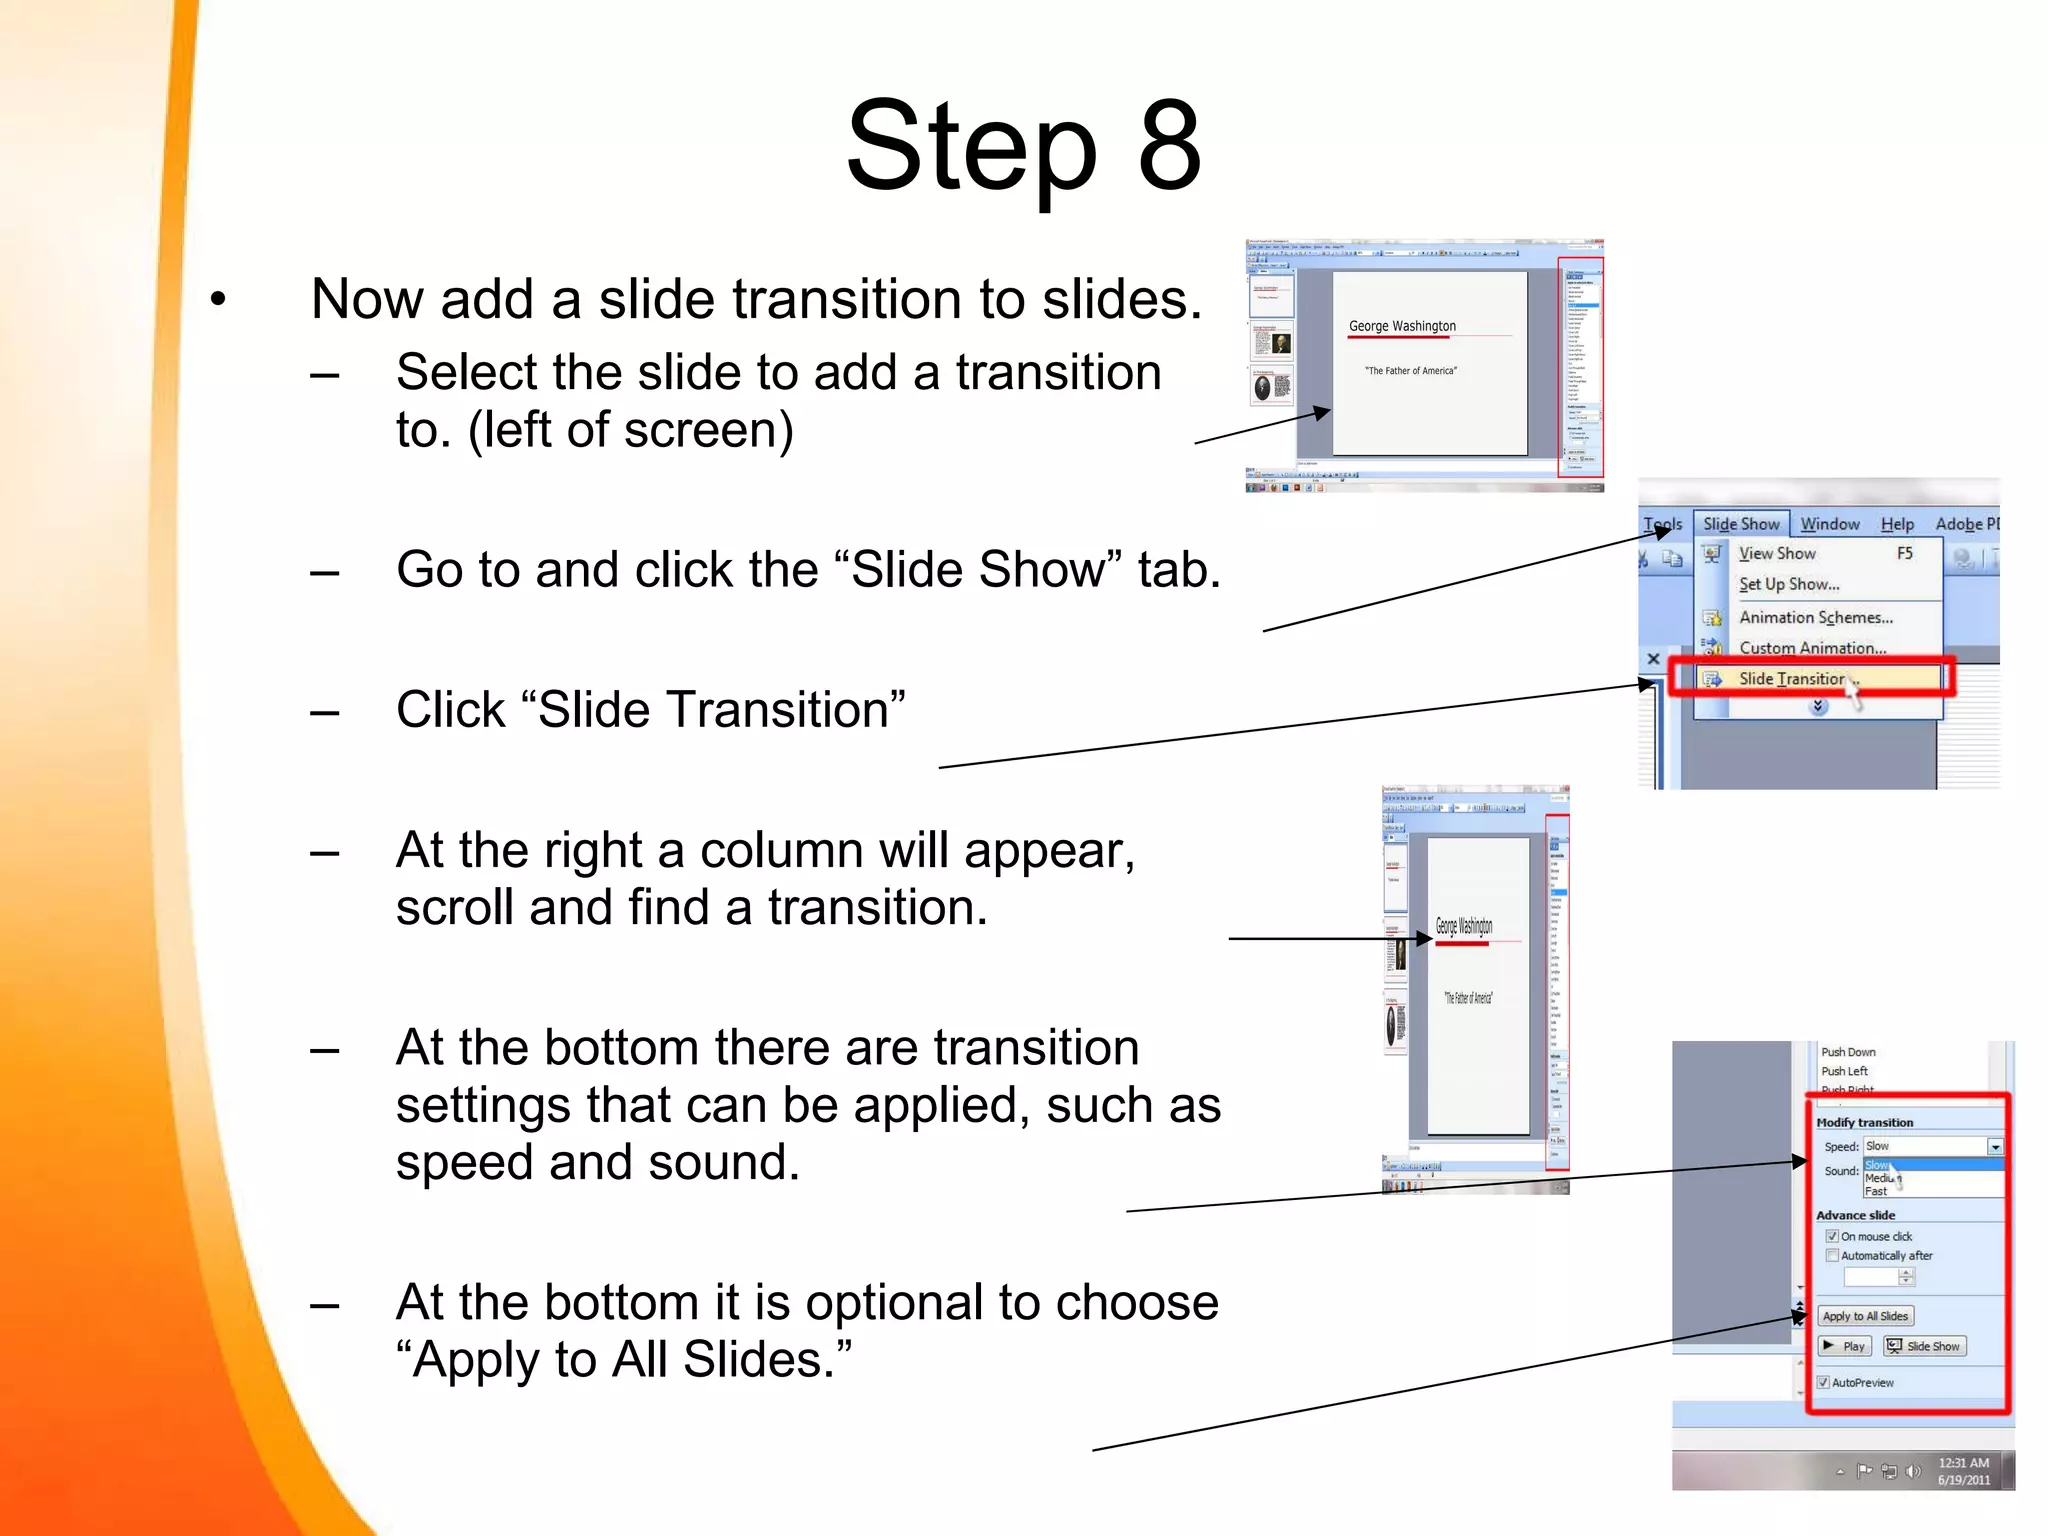
Step 8 Nowadd a slide transition to slides. Select the slide to add a transition to. (left of screen) Go to and click the “Slide Show” tab. Click “Slide Transition” At the right a column will appear, scroll and find a transition. At the bottom there are transition settings that can be applied, such as speed and sound. At the bottom it is optional to choose “Apply to All Slides.”
14.
Step 9 Repeatstep 8 to other slides to create various slide transitions. (Optional) Once done, click the preview icon to preview slideshow.
15.
Conclusion You nowknow the basics of creating a slideshow presentation using Microsoft PowerPoint. You know how to create, design, and organize slides, arrange and edit text, import pictures, and add slide transitions. Feel free to browse the PowerPoint software to further your presentation skills. You are equipped to create your own slideshow for your school projects, your business proposal, or for your family.